
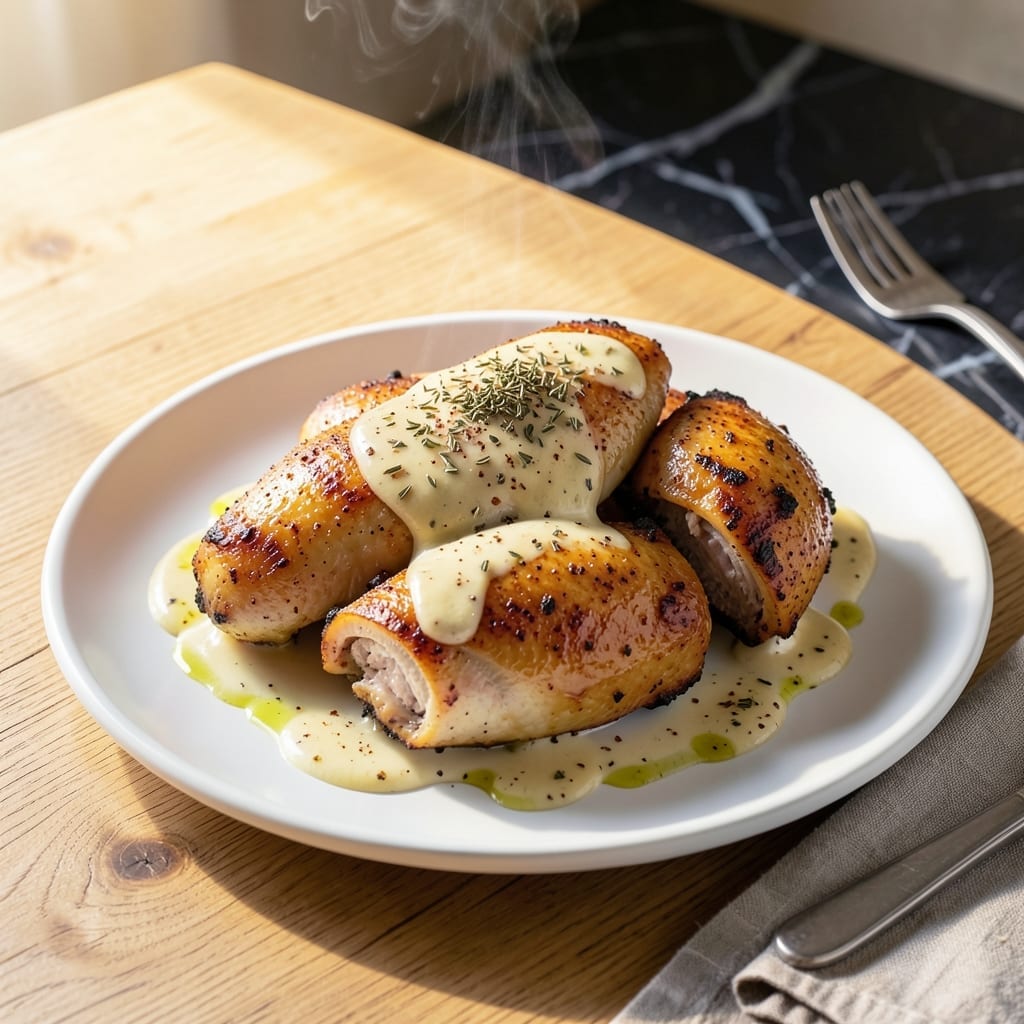
This baking method transforms ordinary chicken into something extraordinary with minimal effort. The mayo creates a golden crust that locks in moisture, ensuring the meat stays tender throughout.
I developed this technique after years of dry, overcooked chicken. The secret is coating the pieces completely before baking at high heat. This simple step makes all the difference.
What emerges from the oven is juicy chicken with a perfectly crisp exterior. The mayo doesn’t just protect the meat—it also adds a subtle richness that enhances the natural flavor.
Ready in under an hour, this dish proves that the best recipes often come from the simplest ideas.
Ingredients for Baked Chicken with Mayo
Transform ordinary chicken with this simple yet brilliant ingredient list. Golden, crisp, and impossibly juicy.
| Ingredient | Amount | Notes |
|---|---|---|
| Boneless, Skinless Chicken Thighs 🍗 | 2 lb | Patted dry for even coating |
| Mayonnaise 🥛 | ¾ cup | Full-fat for best crust |
| Garlic Powder 🧄 | 1 ½ tsp | Not garlic salt |
| Onion Powder 🧅 | 1 ½ tsp | Enhances savory depth |
| Paprika 🌶️ | 1 tbsp | Sweet or smoked variety |
| Dried Oregano 🍃 | 1 tsp | Mediterranean oregano preferred |
| Kosher Salt 🧂 | 1 tsp | Diamond Crystal brand recommended |
| Ground Black Pepper 🌶️ | ½ tsp | Freshly ground preferred |
| Dijon Mustard 🟡 | 1 tbsp | Adds subtle tang to crust |
| Lemon Juice 🍋 | 1 tbsp | Freshly squeezed for brightness |
| Olive Oil 🫒 | 1 tbsp | For greasing baking dish |
| Fresh Parsley 🌿 | ¼ cup | Chopped, for garnish |
The chicken quality is non-negotiable here. Boneless, skinless thighs yield the juiciest results—breasts dry out too easily. Look for air-chilled, free-range at Whole Foods or Costco. The mayo must be full-fat; light versions lack the fat content needed for that signature golden crust. I prefer Hellmann’s or Duke’s for consistent texture and flavor.
No Dijon? Yellow mustard at half the amount works in a pinch, though the flavor will be milder. Out of paprika? Cayenne or chipotle powder adds heat and color—use sparingly. The garlic and onion powders are essential for the dry rub; fresh minced garlic can be used but may burn at high heat. For a citrus variation, lime juice substitutes beautifully for the lemon.
The raw chicken should be used within 2 days of purchase or frozen for up to 9 months. Leftovers stay moist when refrigerated in a sealed container for 4-5 days. Reheat gently in the oven to preserve that coveted crisp texture.
Why You’ll Love This Recipe
- One Pan Wonder: I mix mayo with the spices, slather it on the chicken, and bake—no extra bowls, no fuss.
- That Mayo Magic: The paprika and garlic turn the mayo into this rich, golden crust that’s honestly addictive.
- Meal Prep Hero: I make a double batch on Sunday and it reheats beautifully for lunches all week.
- Budget Friendly: Chicken thighs stay juicy and cheap, and I already have the rest in my pantry.
Step-by-Step Instructions for Baked Chicken With Mayo
This method ensures a crisp golden crust while locking in moisture for tender meat every time.
Step 1: Prepare the Chicken and Seasoning Blend
Preheat your oven to 400°F. Pat the 2 lb boneless, skinless chicken thighs completely dry with paper towels—this is essential for the coating to adhere properly. Any moisture will create steam and prevent that coveted crispy exterior.
In a medium bowl, combine the 0.75 cup mayonnaise, 1.5 tsp garlic powder, 1.5 tsp onion powder, 1 tbsp paprika, 1 tsp dried oregano, 1 tsp kosher salt, and 0.5 tsp ground black pepper. Stir until the spices are evenly distributed throughout the mayonnaise. The mixture should be thick and vibrant in color.
Step 2: Coat the Chicken Thoroughly
Add the 1 tbsp Dijon mustard and 1 tbsp lemon juice to the mayonnaise blend, stirring to incorporate. The mustard adds a subtle tang that balances the richness, while the lemon juice brightens the overall flavor profile.
Dip each chicken thigh into the mayonnaise mixture, pressing gently to ensure full coverage on all sides. Place the coated thighs on a plate or wire rack. This step is crucial—don’t rush it. Each piece should be completely enrobed in the seasoned mayonnaise for maximum crust development during baking.
Step 3: Arrange and Bake to Golden Perfection
Lightly grease a baking dish with the 1 tbsp olive oil to prevent sticking. Arrange the coated chicken thighs in a single layer, leaving a little space between each piece to allow for even air circulation. This spacing helps the coating crisp up rather than steam.
Bake on the middle oven rack for 25 minutes. Then, increase the heat to 425°F and bake for an additional 10-15 minutes, or until the internal temperature reaches 165°F and the coating is deep golden brown and slightly crisp. The higher heat at the end ensures a well-browned crust.
Step 4: Rest and Garnish for Serving
Remove the chicken from the oven and let it rest in the baking dish for 5 minutes. This allows the juices to redistribute, ensuring each bite remains moist. Resting is non-negotiable—it’s the difference between juicy and dry chicken.
Sprinkle the 0.25 cup fresh parsley over the top just before serving. The parsley adds a fresh, herbal note that cuts through the richness of the mayonnaise crust. Serve immediately while the coating is still crisp and the meat is at its peak tenderness.
Pro Tips For Making Baked Chicken With Mayo
- Pat Dry First: I learned this the hard way—skip the paper towel and your mayo coating slides right off. Blot those thighs dry so the seasoning and mayo actually stick.
- High Heat Start: Crank the oven to 425°F for the first 10 minutes to set the mayo crust, then drop to 375°F to cook through without burning the spices.
- Skip Cold Mayo: Cold mayo straight from the fridge makes a thick, uneven coat. Let it sit out for 15 minutes first so it spreads smooth over the chicken.
- Double the Spices: Sounds like overkill, but garlic and onion powder lose punch in the oven. Use twice what you think you need—especially with paprika for that deep color.
Pro Cooking Tips for This Dish
Perfect Coating Technique
Pat the chicken completely dry first—any moisture prevents the mayo from adhering. I press each thigh into the mixture, ensuring every crevice is covered. This full coverage guarantees that golden crust we all love. 🔥
Oven Temperature Strategy
Start at 400°F for even cooking, then boost to 425°F for the final 10-15 minutes. This two-stage approach ensures the chicken cooks through while the crust gets that perfect crisp. Use an oven thermometer to verify accuracy.
Spacing Matters
Leave 1-2 inches between pieces on the baking dish. Crowding causes steaming instead of browning. I use a wire rack over a sheet pan for maximum airflow. The difference in texture is noticeable.
Internal Temp Check
Always use a meat thermometer—165°F is the magic number. I pull the chicken at 160°F since it rises 5°F during resting. This prevents overcooking while ensuring safety.
Resting Period
Let the chicken rest for 5 minutes before serving. This allows juices to redistribute, keeping the meat moist. Skipping this step means dry chicken, no matter how perfect the crust.
Garnish Timing
Add fresh parsley right before serving to preserve its color and aroma. The bright green contrast against the golden crust makes the dish visually stunning. It also adds a fresh herbal note. 💫
Nutrition Facts
Frequently Asked Questions
Can I use chicken breasts instead of thighs?
Yes, but they dry out faster. Reduce baking time to 20-25 minutes total and monitor internal temp closely. Thighs stay juicier due to higher fat content.
Why does the mayo create a crispy crust?
The fat in mayo browns beautifully at high heat, forming a golden seal that locks in moisture. It’s the same principle as butter-basted roasting.
Can I make this ahead of time?
Coat the chicken and refrigerate up to 24 hours before baking. Add 5 minutes to cook time if baking straight from the fridge.
What if my crust isn’t browning?
Switch to broil for the last 2-3 minutes, watching closely to avoid burning. Ensure oven is fully preheated before baking.

- Jollof Rice Sauce Recipe: West African Tomato and Spice Infusion - September 25, 2026
- Japanese Rice Soup Recipe: Umami-Rich Comfort in a Bowl - September 25, 2026
- Homemade Cream Of Rice Recipe: Silk-Smooth Breakfast in Minutes - September 25, 2026