
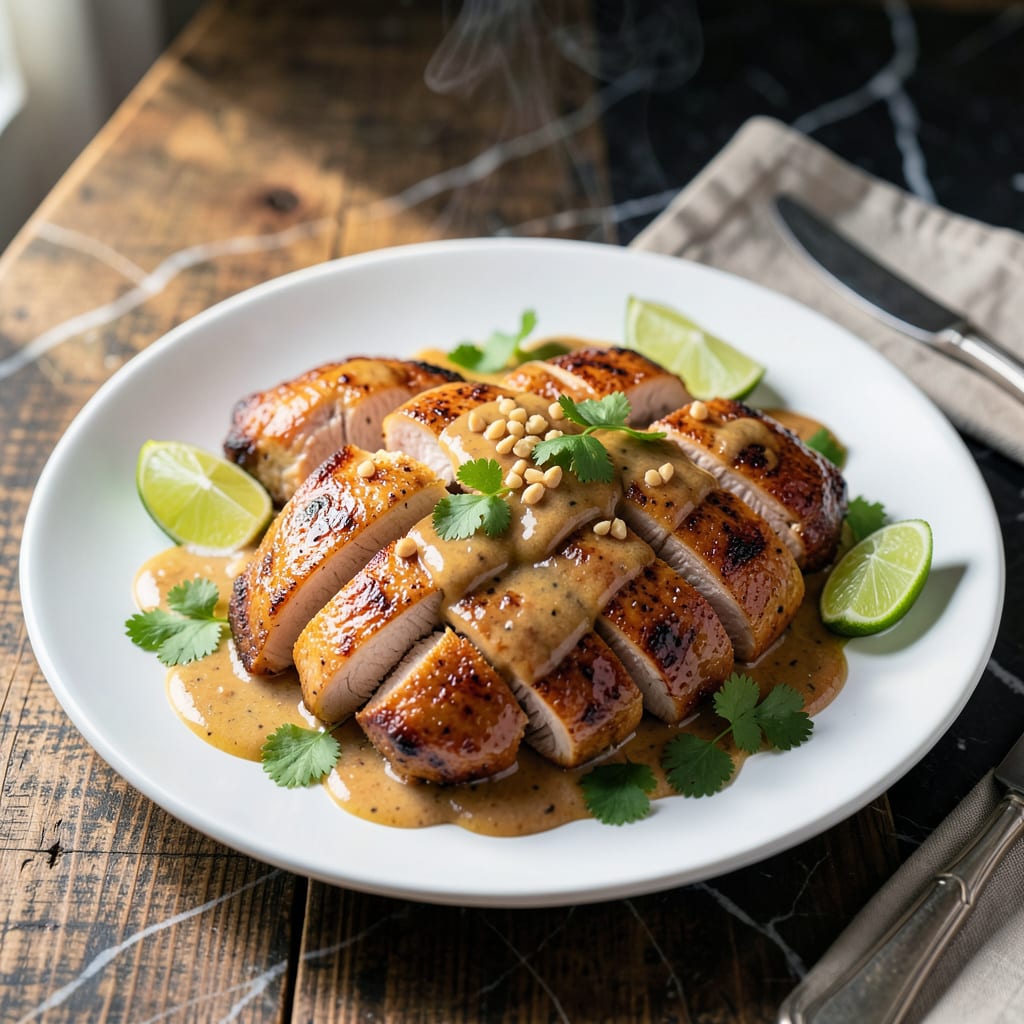
This recipe brings authentic Bangkok street food flavors to your kitchen with a creamy peanut sauce that’s both rich and balanced.
You’ll achieve tender chicken and a velvety sauce by using simple techniques and fresh ingredients like lime, ginger, and cilantro. The result is a dish that tastes like it came from a Thai satay stall.
Ingredients for Bangkok Peanut Sauce Chicken
Authentic Thai flavors start with fresh ingredients and a rich, balanced peanut sauce.
| Ingredient | Amount | Notes |
|---|---|---|
| Boneless, Skinless Chicken Thighs 🍗 | 1 ½ lb | Cut into thin strips |
| Creamy Peanut Butter 🥜 | ¾ cup | Unsweetened, natural style |
| Coconut Milk 🥥 | 1 cup | Full-fat for richness |
| Fresh Lime Juice 🍋 | 3 tbsp | About 2-3 limes |
| Soy Sauce 🫒 | 3 tbsp | Low-sodium preferred |
| Honey 🍯 | 2 tbsp | Or sub agave for vegan |
| Fresh Ginger Root 🌿 | 1 tbsp | Finely grated |
| Garlic Cloves 🧄 | 3 cloves | Minced finely |
| Red Curry Paste 🌶️ | 1 tbsp | Thai-style preferred |
| Fresh Cilantro 🌿 | ½ cup | Chopped, for garnish |
| Rice Vinegar 🍶 | 1 tbsp | Or apple cider vinegar |
| Sesame Oil 🫒 | 1 tsp | Toasted, for depth |
| Crushed Red Pepper Flakes 🌶️ | ½ tsp | Adjust to heat preference |
| Vegetable Oil 🫒 | 2 tbsp | For cooking chicken |
| Kosher Salt 🧂 | 1 tsp | Or to taste |
[recipeingredientscaler]
The peanut butter is non-negotiable here—natural, unsweetened styles like Smucker’s Natural or bulk bin options at Whole Foods deliver the cleanest flavor. Chicken thighs stay juicier than breasts through cooking; boneless, skinless from Costco or your local butcher work best. For coconut milk, Thai Kitchen or Native Forest brands offer consistent full-fat richness that thinner brands can’t match.
Need to swap an ingredient? Almond butter works as a peanut alternative (though flavor shifts slightly). No fresh ginger? Ground ginger at one-third the amount in a pinch. Tamari can replace soy sauce for gluten-free needs. For heat, sriracha or fresh Thai chilies add more authentic spice than standard red pepper flakes. Lime juice is key—bottled just doesn’t compare to fresh.
The sauce keeps beautifully for 5 days refrigerated in an airtight container. Chicken is best served fresh but reheats well for 2-3 days. For make-ahead, prep the sauce separately—it thickens as it cools. Freeze sauce portions for up to 3 months.
Why You’ll Love This Recipe
- One Pan Wonder: I toss everything in a skillet—chicken, peanut butter, coconut milk—and dinner’s ready before I can set the table.
- Crave-Worthy Balance: That tangy lime cuts through the rich peanut butter and soy sauce like a dream. Honestly, I could drink the sauce.
- Meal Prep Hero: It reheats beautifully, so I make a double batch for lunches all week. My coworkers always ask for the recipe.
- Budget Stretcher: Chicken thighs stay juicy and cost half what breasts do. Between us, I’ve saved a fortune making this monthly.
Step-by-Step Instructions for Bangkok Peanut Sauce Chicken
Master the technique for restaurant-quality Thai peanut chicken with these precise steps.
Step 1: Sear the Chicken to Golden Perfection
Heat 2 tbsp vegetable oil in a large skillet over medium-high heat until shimmering. Add the 1.5 lb boneless, skinless chicken thighs cut into thin strips, sprinkle with 1 tsp kosher salt, and cook undisturbed for 3-4 minutes per side.
You want a deep golden brown sear on each piece. Resist the urge to stir too soon—letting the chicken develop a crust prevents it from stewing in its own juices. The strips should release easily from the pan when properly browned.
Step 2: Create the Aromatic Base for the Sauce
Reduce heat to medium and add 3 cloves minced garlic, 1 tbsp grated fresh ginger root, and 1 tbsp red curry paste to the same skillet. Stir constantly for 1 minute until the mixture becomes fragrant and the curry paste deepens in color.
This step builds the flavor foundation. The garlic should turn slightly translucent but not brown, while the curry paste blooms in the residual chicken fat. Be vigilant—burnt garlic will impart bitterness to the final dish.
Step 3: Build the Peanut Sauce with Balanced Flavors
Add 0.75 cup creamy peanut butter, 1 cup coconut milk, 3 tbsp soy sauce, 3 tbsp fresh lime juice, 2 tbsp honey, 1 tbsp rice vinegar, 1 tsp sesame oil, and 0.5 tsp crushed red pepper flakes to the skillet.
Whisk vigorously until the peanut butter fully incorporates into a smooth, glossy sauce. Simmer for 2-3 minutes until slightly thickened, stirring frequently to prevent sticking. The sauce should coat the back of a spoon but still be pourable.
Step 4: Finish and Garnish for Maximum Impact
Return the seared chicken to the skillet and toss to coat completely in the peanut sauce. Cook for an additional 2-3 minutes until the chicken is heated through and the sauce clings beautifully to each piece.
Transfer to a serving platter and garnish with 0.5 cup chopped fresh cilantro. The cilantro adds a bright, fresh contrast to the rich peanut sauce. Serve immediately over steamed rice to soak up every last bit of the flavorful sauce.
Pro Tips For Making Bangkok Peanut Sauce Chicken
- Simmer the Sauce: Let the peanut sauce gently bubble for 3-4 minutes after adding coconut milk—I learned this the hard way when my first batch tasted raw and thin.
- Trim the Fat: Pat the chicken thighs dry and trim excess fat before cooking, or you’ll end up with a greasy sauce that separates.
- Use Fresh Limes: Bottled lime juice just doesn’t cut it; fresh lime juice adds the bright, zesty kick this dish needs.
- Thin the Peanut Butter: Mix the peanut butter with a splash of warm coconut milk before adding it to the sauce to prevent clumpy, uneven texture.
Essential Equipment for This Dish
Essential Cookware
I always reach for my 12-inch stainless steel skillet—like All-Clad D3—for even heat distribution and enough space to sear all the chicken in batches. A nonstick skillet works too, but stainless develops better fond for the sauce. 🔥
Mixing Tools
A sturdy whisk is non-negotiable for emulsifying the peanut butter into the coconut milk smoothly. I use a 2-cup glass measuring cup to mix the sauce ingredients before adding to the pan, preventing lumps.
Cutting Essentials
A sharp chef’s knife (I love Wüsthof 8-inch) makes quick work of slicing chicken into even ¼-inch strips. A microplane is perfect for grating the ginger finely without fibrous bits.
Serving Gear
Use a large serving platter to showcase the chicken with sauce pooled around it. I keep a silicone basting brush handy to coat every piece evenly before plating. The presentation matters as much as the taste.
Extras for Success
A fine-mesh strainer helps sift the red curry paste if it’s clumpy. I also keep kitchen tongs nearby for flipping chicken strips without piercing them, preserving those juices.
Cleanup Help
Line your counter with parchment paper for easy prep cleanup. The sauce can be sticky, so having a damp cloth ready to wipe the pan between batches prevents burning. Efficiency is key in the kitchen.
Nutrition Facts
Frequently Asked Questions
Can I use chicken breast instead of thighs?
Yes, but thighs stay juicier. If using breasts, reduce cooking time to 2-3 minutes per side to prevent dryness. Slice them thin for even cooking.
How do I make the sauce less thick?
Thin it with 1-2 tbsp warm water or coconut milk. Whisk well until smooth. The sauce will loosen as it heats.
What’s the best way to store leftovers?
Keep in an airtight container for up to 3 days. Reheat gently on low heat to avoid curdling the sauce.
Can I make this sauce ahead of time?
Prepare the sauce up to 2 days in advance. Store it refrigerated and reheat before adding cooked chicken.

- Jollof Rice Sauce Recipe: West African Tomato and Spice Infusion - September 25, 2026
- Japanese Rice Soup Recipe: Umami-Rich Comfort in a Bowl - September 25, 2026
- Homemade Cream Of Rice Recipe: Silk-Smooth Breakfast in Minutes - September 25, 2026