
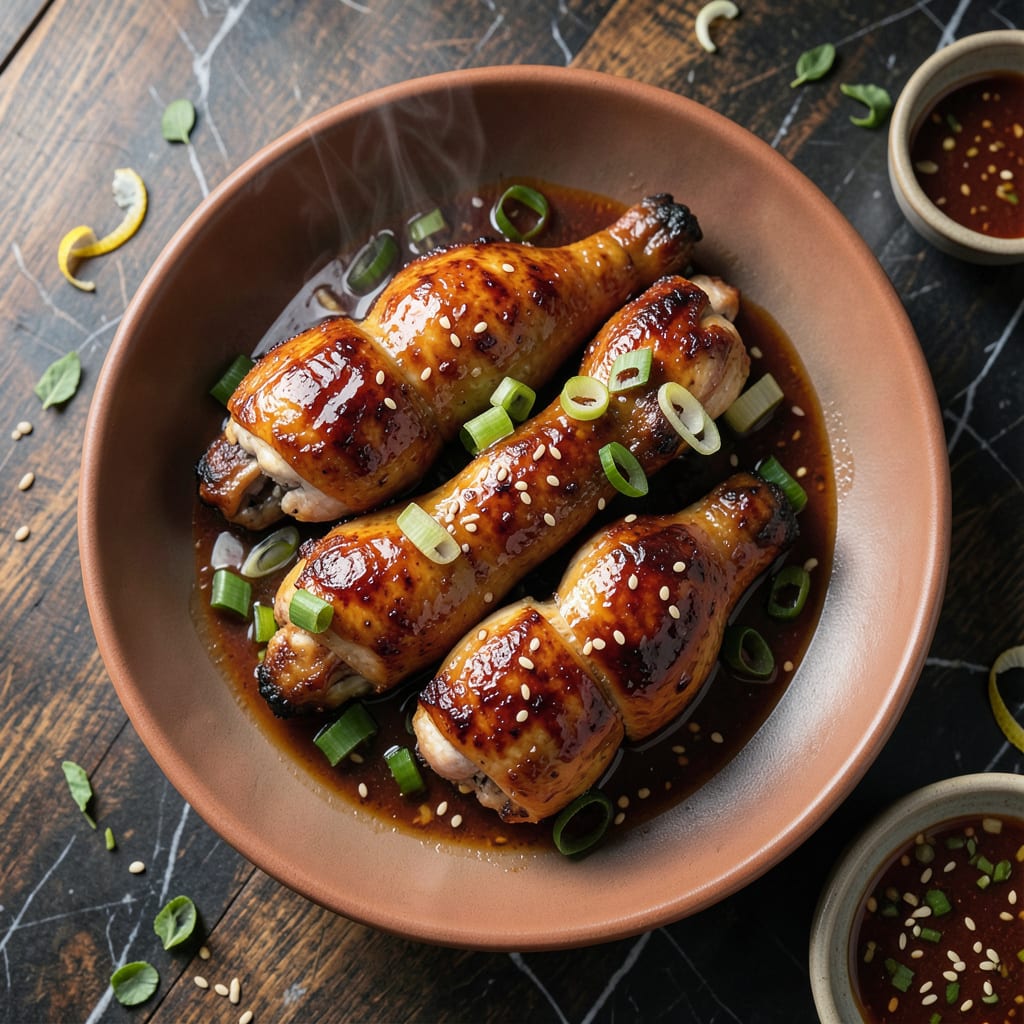
This baked chicken delivers a sticky-sweet glaze with minimal effort. The homemade teriyaki sauce caramelizes in the oven, creating a glossy finish that clings to every bite of tender chicken.
With just 10 minutes of prep and a 30-minute bake, you’ll have a restaurant-quality dish ready to serve over rice or with steamed vegetables.
Ingredients for Baked Teriyaki Chicken Recipe with Teriyaki Sauce
Sticky, sweet, and ready in 40 minutes with mostly pantry staples you already have.
| Ingredient | Amount | Notes |
|---|---|---|
| Chicken Thighs 🍗 | 2 lb | Boneless, skinless preferred |
| Soy Sauce 🫒 | ½ cup | Low-sodium for balance |
| Brown Sugar 🍚 | ½ cup | Packed for sweetness |
| Honey 🍯 | ¼ cup | Pure for best texture |
| Garlic Cloves 🧄 | 4 cloves | Minced for sauce |
| Fresh Ginger 🌿 | 1 tbsp | Grated for depth |
| Rice Vinegar 🍋 | 2 tbsp | For acidity balance |
| Olive Oil 🫒 | 2 tbsp | For browning chicken |
| Cornstarch 🌾 | 1 tbsp | For sauce thickening |
| Sesame Oil 🫒 | 1 tsp | Toasted for aroma |
| Green Onions 🧅 | 4 whole | Thinly sliced for garnish |
| Sesame Seeds 🌾 | 1 tbsp | Toasted for crunch |
| Red Pepper Flakes 🌶️ | ½ tsp | Optional for heat |
[recipeingredientscaler]
The chicken thighs are non-negotiable here—boneless, skinless stay juicy through baking. I grab mine from Costco for the best price, but any grocery store works. Look for even sizing so everything cooks at the same rate. The soy sauce matters too: Kikkoman low-sodium is my go-to (the regular can get too salty once the sauce reduces). Fresh ginger? Worth the effort—jarred stuff doesn’t have the same punch.
Out of honey? Maple syrup or agave swap in 1:1. No rice vinegar? Apple cider vinegar works in a pinch (just a touch more acidic). Don’t have cornstarch? Mix 1 tbsp flour with 2 tbsp water for a slurry instead. The sesame oil adds that restaurant-quality finish—skip it if you must, but it’s only 1 tsp and makes a difference. Frozen ginger (the grated kind) is a great backup.
Sauce keeps in the fridge for 5 days—perfect for doubling and using later. Baked chicken? Best eaten fresh but reheats okay for 3 days. Toast the sesame seeds just before serving (don’t skip this part—they go from bland to nutty in 30 seconds).
Why You’ll Love This Recipe
- One Pan Wonder: I toss everything on a single sheet pan—chicken thighs, garlic, and that sticky-sweet teriyaki glaze. Cleanup is a breeze, and honestly, that’s half the battle on busy nights.
- Sweet & Savory Fix: The honey and brown sugar caramelize in the oven while the soy sauce and garlic hit that umami depth. It’s the kind of flavor that makes you go back for “just one more bite.”
- Meal Prep MVP: I make a double batch on Sunday and it reheats beautifully for lunches. Between us, it tastes even better the next day when the flavors really sink in.
- Budget Friendly: Chicken thighs are cheap, and the sauce comes together with pantry staples. I’ll be real: it’s my go-to when I need to feed the family without breaking the bank.
Step-by-Step Instructions for Baked Teriyaki Chicken
Here’s my foolproof method for achieving that perfect sticky, glossy finish every time.
Step 1: Prepare the Teriyaki Marinade
In a medium bowl, whisk together the 0.5 cup soy sauce, 0.5 cup brown sugar, 0.25 cup honey, minced 4 cloves garlic cloves, 1 tbsp fresh ginger, and 2 tbsp rice vinegar until the sugar dissolves completely. I like to warm the mixture slightly to help the sugar incorporate faster.
This base delivers the perfect balance of sweet, salty, and umami. The ginger adds depth while the vinegar cuts through the richness. Don’t skip the whisking—you want everything fully combined before it meets the chicken.
Step 2: Sear and Coat the Chicken
Heat the 2 tbsp olive oil in a large oven-safe skillet over medium-high heat. Add the 2 lb chicken thighs and sear for 4-5 minutes per side until golden brown. This step builds flavor and prevents the chicken from sticking later.
Pour the marinade over the seared chicken, turning to coat each piece thoroughly. The sauce should sizzle and start to thicken slightly as it hits the hot pan. Real talk: this is where the magic starts happening.
Step 3: Bake to Glazed Perfection
Transfer the skillet to a preheated 400°F oven and bake for 20-25 minutes, basting the chicken with the sauce every 8-10 minutes. You’ll see the sauce transform from thin to a glossy, sticky glaze that clings to each piece.
The chicken is done when it reaches an internal temperature of 165°F and the sauce has reduced to a syrupy consistency. Here’s the thing—if the sauce is reducing too quickly, add a splash of water to prevent burning.
Step 4: Thicken and Finish the Sauce
Remove the chicken from the skillet and set aside. Place the skillet on the stovetop over medium heat. Mix the 1 tbsp cornstarch with 2 tbsp of the hot sauce from the pan, then stir this slurry back into the remaining sauce.
Cook for 2-3 minutes until the sauce thickens to a glaze-like consistency. Stir in the 1 tsp sesame oil and 0.5 tsp red pepper flakes (if using) for that final aromatic touch. The sauce should coat the back of a spoon with a beautiful sheen.
Step 5: Garnish and Serve
Return the chicken to the skillet, turning to coat in the thickened sauce. Transfer to a serving platter and sprinkle with the 4 whole green onions (thinly sliced) and 1 tbsp sesame seeds. The green onions add freshness while the sesame seeds provide a nutty crunch.
Let the chicken rest for 5 minutes before serving. This allows the juices to redistribute and the glaze to set slightly. Each piece should be lacquered with that signature sticky teriyaki coating, ready to impress.
Pro Tips For Making Baked Teriyaki Chicken Recipe With Teriyaki Sauce
- Bake at 400°F: I learned this the hard way—any lower and your teriyaki glaze won’t caramelize properly. Crank the oven to 400°F for that sticky, glossy finish on the chicken thighs.
- Score the Thighs: Cut 2-3 shallow slits into each thigh before baking. It lets the soy-honey-brown sugar sauce penetrate deeper and flavors every bite.
- Thicken the Sauce: After baking, simmer the leftover pan sauce for 3-4 minutes until it coats the back of a spoon. Skipping this leaves you with a watery, sad teriyaki.
- Use Fresh Garlic: Sounds obvious, but jarred garlic just doesn’t cut it here. Mince 3-4 fresh cloves—it’s the difference between flat and wow in your sauce.
Serving Suggestions for This Dish
Over Rice
Serve this dish over a bed of steamed jasmine rice to soak up every bit of that glossy teriyaki glaze. I use 1 cup uncooked rice for every 2 cups water, cooked in a rice cooker for perfect results every time. The fluffy texture contrasts beautifully with the sticky chicken. 💛
With Veggies
Pair with steamed broccoli or roasted asparagus for a balanced meal. Toss the veggies with a drizzle of the leftover sauce right before serving. For roasting, 400°F for 15-20 minutes with 1 tbsp olive oil brings out their natural sweetness.
Asian-Inspired Sides
A simple cucumber salad with rice vinegar and sesame seeds cuts through the richness. Thinly slice 1 large cucumber, toss with 1 tbsp rice vinegar, and sprinkle with ½ tsp sesame seeds. The cool crunch is a refreshing contrast.
For a Crowd
Turn this into a build-your-own bowl by offering steamed rice, sliced green onions, and extra sesame seeds. Guests can customize their plates. I like to add pickled ginger from the Asian aisle for a tangy kick.
Garnish Tips
Always toast your sesame seeds in a dry pan over medium heat for 30-60 seconds until golden. The nutty aroma elevates the dish. Sprinkle them just before serving so they stay crisp.
Finely slice green onions on a diagonal for a restaurant-worthy presentation. A sprinkle of red pepper flakes adds subtle heat and color. ✨
Nutrition Facts
Frequently Asked Questions
Can I use chicken breasts instead of thighs?
Yes, but they dry out faster. Reduce baking time to 15-20 minutes and check temperature at 165°F. Thighs stay juicier.
How do I make the sauce thicker?
Mix 1 tbsp cornstarch with 2 tbsp cold water, then stir into simmering sauce. Cook for 2-3 minutes until glossy.
Can I prep this ahead?
Marinate chicken overnight, but bake just before serving. Sauce keeps 5 days refrigerated. Reheat gently to maintain texture.
What if my sauce burns in the oven?
Add ¼ cup water to the pan and stir. Lower oven to 375°F and baste more frequently.

- Jollof Rice Sauce Recipe: West African Tomato and Spice Infusion - September 25, 2026
- Japanese Rice Soup Recipe: Umami-Rich Comfort in a Bowl - September 25, 2026
- Homemade Cream Of Rice Recipe: Silk-Smooth Breakfast in Minutes - September 25, 2026