
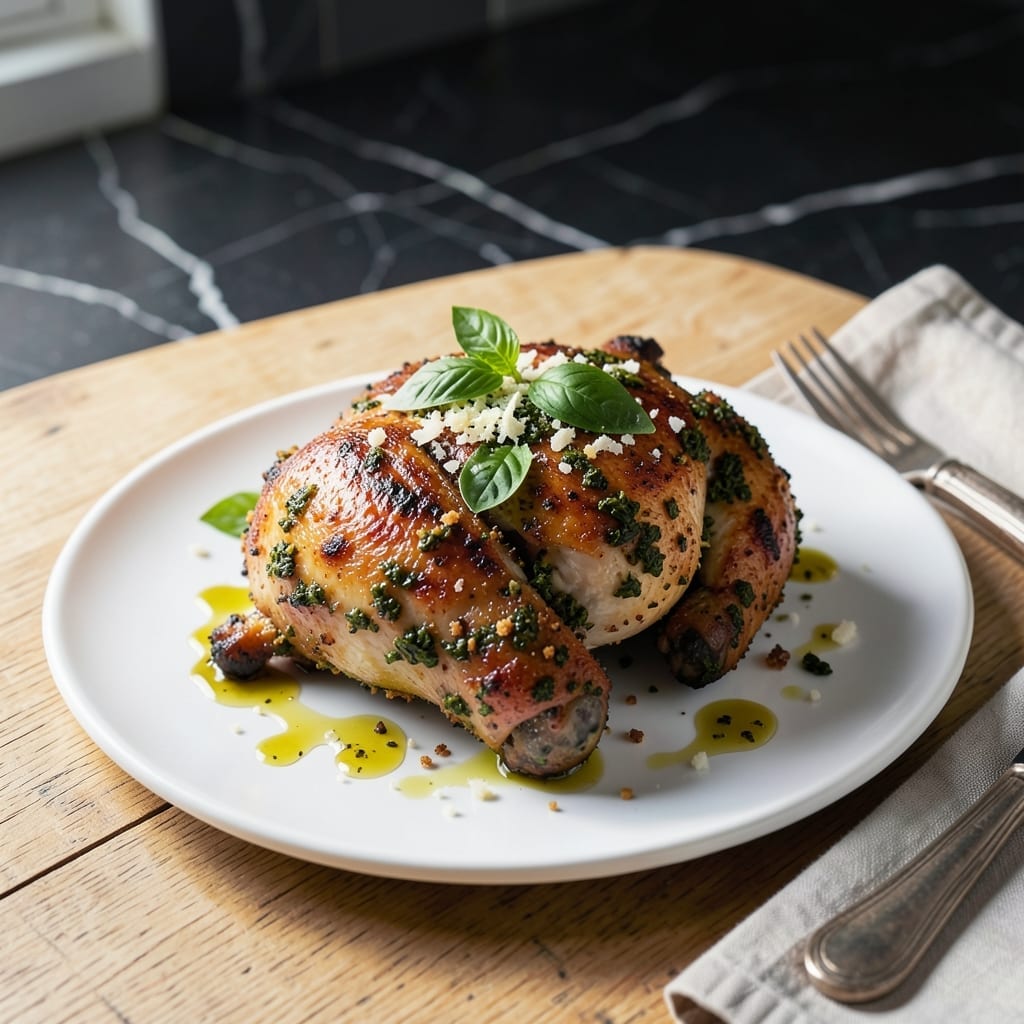
This herb-crusted chicken thigh recipe delivers restaurant-quality results with minimal effort. The secret lies in a simple yet effective technique: coating the thighs with a vibrant basil mixture before oven-baking.
I’ve perfected this method to ensure the chicken stays juicy while developing a golden, aromatic crust. The basil not only adds freshness but also creates a beautiful, fragrant layer that elevates every bite.
The oven does most of the work, baking the thighs to tender perfection with crisp edges. This dish proves that impressive flavors don’t require complicated steps—just quality ingredients and a foolproof approach.
Serve with roasted vegetables or a light salad for a complete meal that’s both satisfying and elegant. Here’s how to make it.
Ingredients for Basil Chicken Thigh
Quality ingredients create that restaurant-style crust and juiciness everyone loves.
| Ingredient | Amount | Notes |
|---|---|---|
| Bone-In Chicken Thighs 🍗 | 2 lb | Skin-on for crispiness |
| Fresh Basil Leaves 🌿 | 1 cup | Packed, roughly chopped |
| Garlic Cloves 🧄 | 4 cloves | Minced for maximum flavor |
| Extra-Virgin Olive Oil 🫒 | 3 tbsp | Divided for coating and baking |
| Dijon Mustard 🟡 | 1 tbsp | Smooth, not whole grain |
| Breadcrumbs 🍞 | ½ cup | Panko for extra crunch |
| Parmesan Cheese 🧀 | ½ cup | Freshly grated from block |
| Lemon Zest 🍋 | 1 tbsp | Finely grated for brightness |
| Lemon Juice 🍋 | 1 tbsp | Freshly squeezed |
| Kosher Salt 🧂 | 1 ½ tsp | Diamond Crystal preferred |
| Freshly Ground Black Pepper 🌶️ | 1 tsp | Coarse grind ideal |
| Dried Oregano 🍃 | 1 tsp | Mediterranean variety for depth |
| Red Pepper Flakes 🔥 | ½ tsp | Adjust for heat preference |
The chicken is everything here. Bone-in, skin-on thighs stay juiciest—look for plump pieces with smooth, moist skin at Whole Foods or your local butcher. The Parmesan needs to be freshly grated from a wedge; pre-shredded contains anti-caking agents that prevent proper melting. For basil, organic bunches from the produce section have superior aroma compared to pre-packaged options.
Out of Dijon? Whole grain mustard at half the amount works, though the texture differs slightly. No fresh basil? Dried basil at one-third the quantity, but the flavor profile won’t be as vibrant. Panko breadcrumbs are ideal for crunch, but regular breadcrumbs in a pinch. For a gluten-free version, crushed cornflakes substitute beautifully with a satisfying crisp.
Prep the basil mixture up to 1 day ahead—store covered in the fridge. The chicken bakes best immediately after coating. Leftovers keep 3-4 days refrigerated or freeze for 2 months. Always bring chicken to room temperature before reheating to maintain moisture.
Why You’ll Love This Recipe
- One Pan Wonder: I toss everything on a sheet pan and let the oven do the work—bone-in thighs, garlic, and basil roast together with almost no cleanup.
- Garlic-Kissed Basil: The combo of fresh basil and roasted garlic cloves with that Dijon tang makes the skin so crispy and the meat absurdly juicy.
- Weeknight MVP: I can prep it Sunday and reheat for lunches all week, or throw it together last-minute when plans change.
- Budget Keeper: Bone-in thighs are half the price of breasts, and a little basil goes a long way to make it feel fancy.
Step-by-Step Instructions for Herb-Crusted Basil Chicken Thighs
Master the technique for crispy, herb-infused chicken thighs with this professional approach.
Step 1: Prepare the Herb Crust Mixture
In a food processor, combine the 1 cup Fresh Basil Leaves, 4 cloves Garlic Cloves, 0.5 cup Parmesan Cheese, 0.5 cup Breadcrumbs, 1 tbsp Lemon Zest, 1 tsp Dried Oregano, 0.5 tsp Red Pepper Flakes, 1.5 tsp Kosher Salt, and 1 tsp Freshly Ground Black Pepper. Pulse until the mixture resembles coarse crumbs with visible flecks of green basil.
Transfer to a shallow dish and stir in 1 tbsp Lemon Juice and 1 tbsp Dijon Mustard. The mixture should hold together when pressed but remain crumbly. This combination of fresh herbs, citrus, and cheese creates a vibrant, flavorful crust that will adhere beautifully to the chicken.
Step 2: Coat and Sear the Chicken Thighs
Pat the 2 lb Bone-In Chicken Thighs completely dry with paper towels. This step is crucial for achieving crispy skin. Brush each piece lightly with 1 tbsp Extra-Virgin Olive Oil, then press firmly into the herb mixture, coating all sides completely. The crust should be thick and evenly distributed—don’t be shy with the pressing.
Heat the remaining 2 tbsp Extra-Virgin Olive Oil in a large oven-safe skillet over medium-high heat. When the oil shimmers, add the chicken skin-side down. Sear undisturbed for 5-6 minutes until the skin is deep golden brown and the crust begins to crisp. This initial sear locks in juices and sets the foundation for a perfect finish.
Step 3: Oven-Bake to Juicy Perfection
Preheat your oven to 400°F. Transfer the skillet with the seared chicken to the oven. Bake for 20-25 minutes until the internal temperature reaches 165°F and the juices run clear when pierced with a knife. The crust will darken slightly and become fragrant as it finishes cooking.
Basting the chicken with the pan juices halfway through baking enhances both moisture and flavor. Watch for the edges of the crust to turn a rich, caramelized brown—this visual cue signals the chicken is nearly done. The combination of oven heat and the initial sear guarantees crispy skin while keeping the meat tender.
Step 4: Rest and Serve
Transfer the chicken to a wire rack set over a baking sheet and let it rest for 5-10 minutes. This allows the juices to redistribute, ensuring every bite is moist and flavorful. The crust will firm up slightly during this time, making it easier to serve without losing any of the delicious topping.
Serve immediately while hot, with any accumulated pan juices drizzled over the top. The herb crust should be fragrant and golden, with a satisfying crunch that gives way to succulent, juicy meat beneath. This dish pairs beautifully with a simple arugula salad or roasted vegetables.
Pro Tips For Making Basil Chicken Thigh
- Sear Skin First: Start with the skin side down in a screaming hot pan with 2 tablespoons of olive oil—this renders the fat and creates that crispy layer that makes the dish. I learned this the hard way after serving soggy-skinned thighs too many times.
- Bruise the Basil: Tear or gently crush the basil leaves just before adding them to release their oils. Sounds weird, but it works: the flavor clings to the chicken instead of disappearing into the air.
- Skip the Overcrowding: Cook the thighs in batches if needed—packing the pan steams them instead of browning, and you’ll end up with pale, rubbery meat instead of golden, juicy pieces.
- Rest Before Serving: Let the chicken rest 5-10 minutes after cooking, tented with foil. My grandmother swore by this, and she was right: the juices redistribute, so every bite stays moist.
Wine and Beer Pairings for This Dish
White Wine Pairings
A crisp Sauvignon Blanc from New Zealand cuts through the richness with its bright acidity and citrus notes. I love how the grapefruit and lime flavors complement the basil and lemon in this dish. The Kim Crawford or Oyster Bay labels are reliable choices. 🍷
Red Wine Options
For red lovers, a light-bodied Pinot Noir from Oregon works beautifully. The Meiomi or Belle Glos options offer red fruit flavors that won’t overwhelm the herb crust. Serve slightly chilled at 55-60°F for the best experience.
Craft Beer Choices
A Belgian-style witbier like Blue Moon or Hoegaarden provides citrus and spice notes that echo the lemon and oregano. The wheat base adds a creamy texture that pairs well with the crispy chicken skin. 🍺
Light Beer Pairings
For something simpler, a crisp pilsner such as Samuel Adams Noble Pils cleanses the palate between bites. The light malt profile lets the basil and Parmesan flavors shine without competition.
Non-Alcoholic Option
Try a sparkling lemonade with fresh basil syrup for a non-alcoholic pairing that mirrors the dish’s flavors. I make mine with San Pellegrino and 2 tbsp muddled basil leaves per glass.
Nutrition Facts
Frequently Asked Questions
Can I use boneless thighs instead?
Yes, but reduce baking time to 15-18 minutes. Boneless cooks faster and may dry out if overcooked. For best results, check internal temp hits 165°F.
Why sear before baking?
Searing creates a crispy foundation and locks in juices. The medium-high heat caramelizes the crust for deeper flavor. Skipping this step risks soggy skin.
How do I prevent the crust from burning?
Tent with foil if browning too quickly. Bake at 375°F instead of 400°F for slower, even cooking. Watch closely after 15 minutes.
Can I make this ahead?
Coat thighs up to 4 hours ahead, refrigerated. Bake just before serving for optimal crispiness. Avoid freezing coated pieces.

- Jollof Rice Sauce Recipe: West African Tomato and Spice Infusion - September 25, 2026
- Japanese Rice Soup Recipe: Umami-Rich Comfort in a Bowl - September 25, 2026
- Homemade Cream Of Rice Recipe: Silk-Smooth Breakfast in Minutes - September 25, 2026