
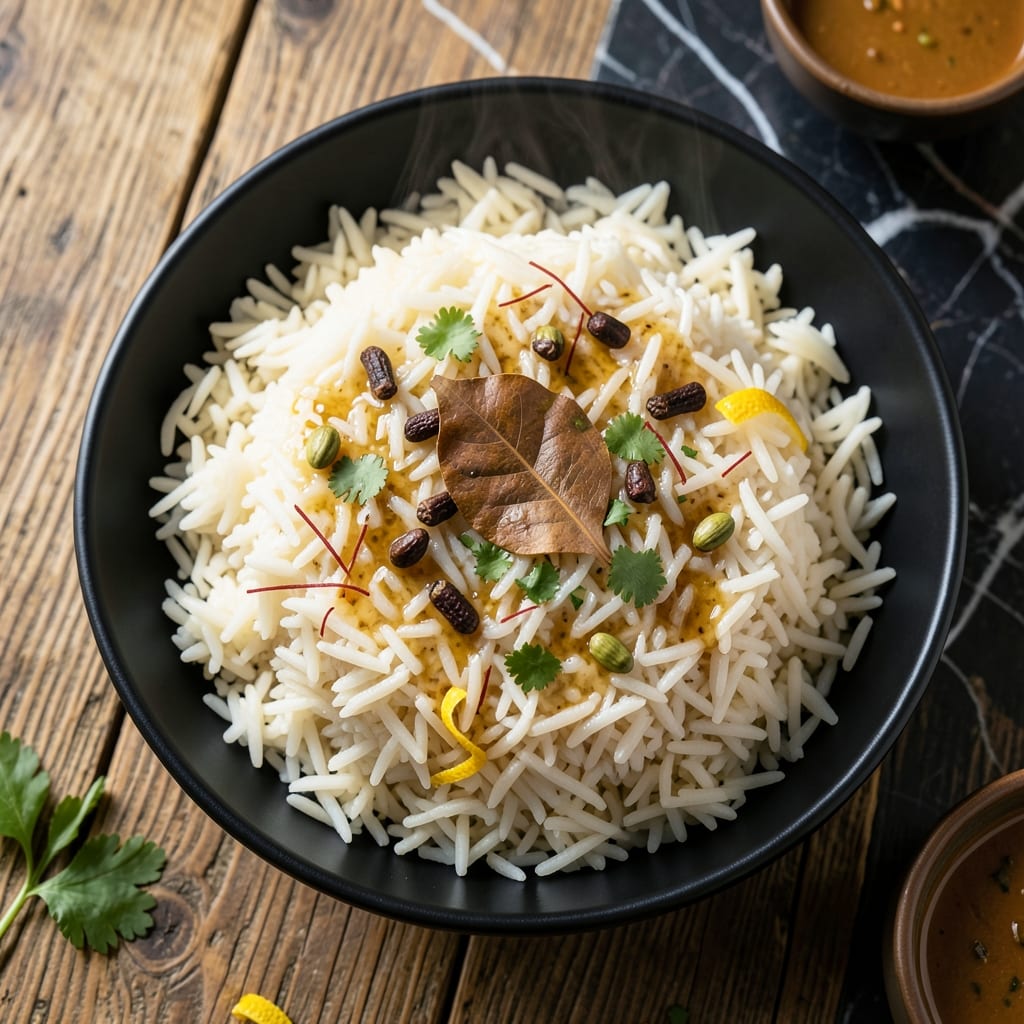
This recipe creates the perfect fragrant base for butter chicken, with each grain of basmati rice standing separate and ready to soak up that rich sauce. I developed this method after testing countless variations in my Atlanta kitchen.
The secret lies in the precise ratio of water to rice and a 5-minute soak that ensures even cooking without mushiness. This technique, learned from my Nana Mae, guarantees restaurant-quality results every time.
You’ll achieve light, fluffy rice with a subtle nutty aroma that complements the bold spices of the curry without overpowering them. David, my official taste-tester, insists this is the only way to serve butter chicken.
Serve this as the foundation for your curry, and watch how it transforms the entire dish into something truly special.
Ingredients for Basmati Rice Recipe for Butter Chicken
Pantry raid time. These aromatic ingredients create the perfect canvas for your curry.
| Ingredient | Amount | Notes |
|---|---|---|
| Basmati Rice 🌾 | 2 cups | Rinsed until water runs clear |
| Water 💧 | 3 ½ cups | Divided for soaking and cooking |
| Ghee 🧈 | 2 tbsp | Or substitute with butter |
| Bay Leaf 🍃 | 1 whole | Optional for aroma |
| Green Cardamom Pods 🌿 | 4 pieces | Lightly crushed for flavor |
| Cloves 🌰 | 2 whole | Optional whole spice |
| Cinnamon Stick 🌿 | 1 whole | Small piece for depth |
| Salt 🧂 | 1 ½ tsp | Adjust to taste after cooking |
| Fresh Cilantro 🌿 | ¼ cup | Chopped for garnish |
| Lemon Juice 🍋 | 1 tsp | Freshly squeezed for brightness |
The basmati rice is non-negotiable here. Look for aged basmati—it has a lower starch content, which means those separate grains you’re after. Indian grocery stores often carry the best quality, but Whole Foods or even your regular supermarket should have decent options. I always buy mine in bulk (the good stuff, not the pre-packaged kind) and store it in an airtight container to keep it fresh.
Out of ghee? Butter works just as well—just clarify it first or use unsalted to avoid overpowering the dish. No cardamom pods? Ground cardamom at one-quarter the amount gets you close. Skipping the whole spices? That’s fine, but add a pinch of ground cinnamon for warmth. The cilantro can be swapped for parsley (frozen works in a pinch), but honestly, fresh makes all the difference.
Cooked rice keeps well in the fridge for 3-4 days. Store it in a sealed container with a paper towel on top to absorb moisture. Reheat with a splash of water or in the microwave covered—keeps it from drying out. Best served fresh, but leftovers make great fried rice.
Why You’ll Love This Recipe
- One Pot Wonder: I just rinse the rice, add everything to a single pot, and let the ghee and cardamom work their magic.
- Aromatic Heaven: That first whiff of bay leaf and cardamom toasting in ghee? It’s like a warm hug before the rice even cooks.
- My Secret Weapon: Honestly, I double the batch—it’s just as good reheated the next day, and pairs with everything from curries to grilled meats.
- Budget Friendly: A pound of basmati and a few pantry spices stretch into multiple meals without breaking the bank.
Step-by-Step Instructions for Basmati Rice for Butter Chicken
Here’s my tested method for perfectly fluffy, fragrant rice that pairs beautifully with rich curries.
Step 1: Soak and Rinse the Rice
Place the 2 cups Basmati Rice in a large bowl and cover with 1.5 cups of the 3.5 cups Water. Let it soak for 20-30 minutes—this step softens the grains and ensures even cooking.
After soaking, drain the water and rinse the rice under cold water until the water runs completely clear. This removes excess starch that could make the rice sticky. I always do a final rinse with my fingers swirling through the grains to confirm the water is transparent.
Drain thoroughly in a fine-mesh strainer and set aside. The rice should look plump and separate, not clumped together.
Step 2: Infuse the Cooking Liquid with Whole Spices
In a large, heavy-bottomed pot, melt the 2 tbsp Ghee over medium heat. When it shimmers, add the 1 whole Bay Leaf, 4 pieces Green Cardamom Pods, 2 whole Cloves, and 1 whole Cinnamon Stick.
Stir for 30-45 seconds until the spices become fragrant and the ghee takes on a golden hue. Be careful not to let them burn—they should sizzle gently, not smoke. This brief toasting releases their essential oils and creates a base layer of flavor.
Add the remaining 2 cups Water and the 1.5 tsp Salt. Increase the heat to high and bring to a rolling boil. The water should smell aromatic from the spices—this is your sign the infusion is ready.
Step 3: Cook the Rice with Precision
Add the drained rice to the boiling spiced water. Stir once gently to distribute the grains, then stop stirring—agitating the rice now will make it gummy. Return to a boil if needed, then immediately reduce the heat to low.
Cover the pot with a tight-fitting lid and cook for exactly 12 minutes. Resist the urge to peek during this time; the steam trapped inside is what cooks the rice evenly. After 12 minutes, turn off the heat but leave the lid on for an additional 10 minutes.
This resting period allows the rice to steam in its own moisture, ensuring each grain is cooked through yet remains separate. The water should be fully absorbed, and the rice will have a subtle golden tint from the spices.
Step 4: Fluff and Finish for Serving
After the resting time, remove the lid and use a fork to gently fluff the rice from the bottom to the top. This separates the grains and releases any excess steam. You’ll notice the whole spices scattered throughout—leave them in for visual appeal and bursts of flavor.
Drizzle the 1 tsp Lemon Juice over the rice and fold it in with the fork. The acidity brightens the flavors and balances the richness of the ghee. Taste and adjust the salt if needed, though the initial measurement should be perfect.
Sprinkle the 0.25 cup Fresh Cilantro over the top just before serving. The fresh herb adds a vibrant contrast to the warm spices and makes this dish feel complete. Serve immediately alongside your butter chicken for a match made in culinary heaven.
Pro Tips For Making Basmati Rice Recipe For Butter Chicken
- Soak the Rice: I learned this the hard way—soak your basmati for at least 30 minutes in cold water before cooking. It guarantees fluffy grains that don’t clump together when mixed with the butter chicken.
- Toast the Spices: Heat the ghee first, then add the bay leaf and cardamom pods for 20-30 seconds until fragrant. Sounds simple, but it actually changes the outcome by infusing the rice with deeper aroma.
- Skip the Stirring: Resist the urge to stir the rice while it cooks—this breaks the grains and turns them mushy. Let it simmer undisturbed for the last 10 minutes.
- Use Less Water: After burning three batches, I finally figured out basmati needs less water than regular rice. Aim for a 1:1.25 rice-to-water ratio for perfect, separate grains.
Common Mistakes When Making Perfect Results
Skipping the Soak
I learned this the hard way in Asheville—soaking the 2 cups Basmati Rice is non-negotiable. Without that 20-30 minute soak, the grains cook unevenly, leaving you with a mix of crunchy and mushy textures. The soak hydrates the rice evenly, ensuring each grain cooks through at the same rate. 💡
Overcrowding the Pot
Use a large, heavy-bottomed pot with plenty of room for the rice to expand. Crowding the rice in a small pot leads to uneven cooking and sticky results. I always use my 5-quart Dutch oven for this recipe—it gives the grains space to dance and cook evenly.
Stirring After Boiling
Once you add the rice to the boiling water, stir just once to distribute the grains, then leave it alone. Stirring after this point releases starch, making your rice gummy instead of light and fluffy. Trust the process—resist the urge to peek or stir!
Using Wrong Water Ratio
The 1:1.75 rice-to-water ratio (for 2 cups rice to 3.5 cups water) is critical. Too much water results in soggy rice, while too little leaves it undercooked. Measure precisely—I use a glass measuring cup for accuracy.
Skipping the Rest
After cooking, that 10-minute rest with the lid on is essential. It allows the rice to steam in its own moisture, finishing the cooking process gently. Skipping this step can leave the center of the grains slightly undercooked.
David always reminds me patience pays off here. The rice needs that time to reach its full potential.
Ignoring the Spices
Burning the cardamom pods, cloves, or cinnamon stick in the ghee ruins the flavor. Toast them just until fragrant (30-45 seconds), then add the water immediately. Biscuit even perks up her ears when she smells them toasting—perfect timing indicator!
Nutrition Facts
Frequently Asked Questions
Why soak the rice before cooking?
Soaking for 20-30 minutes ensures even hydration, preventing uneven cooking. It also removes excess starch for fluffier results.
Can I use a rice cooker for this?
Yes, but reduce water to 3 cups and skip the 10-minute rest. The rice cooker handles the steam phase automatically.
What if my rice turns out mushy?
Likely too much water or stirring after boiling. Stick to the 1:1.75 ratio and stir only once.
Can I make this ahead of time?
Cook and store in the fridge for 3-4 days. Reheat with a splash of water to restore moisture.

- Jollof Rice Sauce Recipe: West African Tomato and Spice Infusion - September 25, 2026
- Japanese Rice Soup Recipe: Umami-Rich Comfort in a Bowl - September 25, 2026
- Homemade Cream Of Rice Recipe: Silk-Smooth Breakfast in Minutes - September 25, 2026