
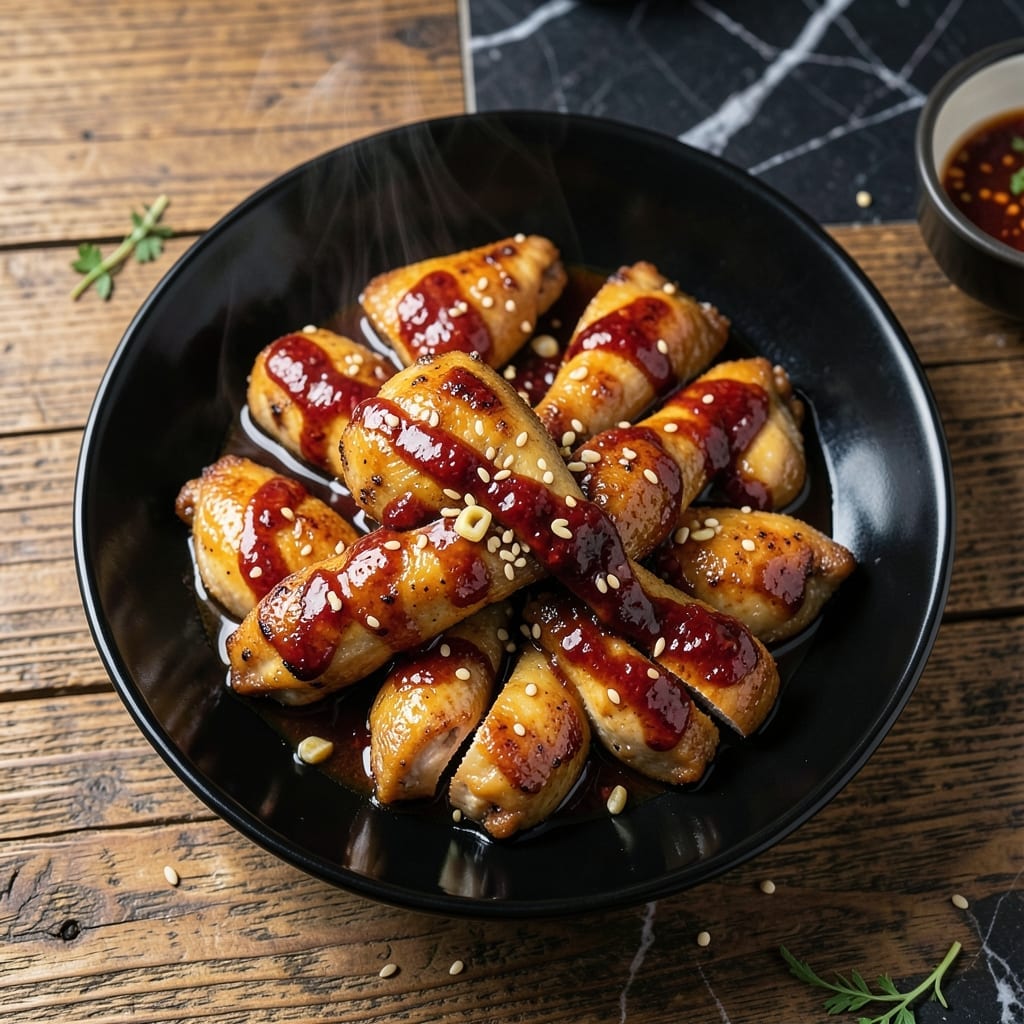
This Beijing-style chicken delivers a balance of sweet, spicy, and tangy flavors that’s hard to resist. The dish combines crispy chicken pieces with a glossy, wok-tossed sauce that clings to every bite.
I’ve refined this recipe to capture the traditional taste without complicated steps. A quick marinade and high-heat cooking ensure the chicken stays tender inside while achieving a perfect crispy exterior.
The sauce is the star—sweet, slightly spicy, and rich with depth. It’s a harmony of soy, vinegar, and chili that transforms simple ingredients into something extraordinary.
Serve it with steamed rice to soak up every drop of the flavorful sauce. This dish brings restaurant-quality results to your home kitchen.
Ingredients for Beijing Chicken
Crispy chicken meets glossy sauce in this irresistible Beijing-style dish with bold flavors.
| Ingredient | Amount | Notes |
|---|---|---|
| Boneless Chicken Thighs 🍗 | 1 ½ lb | Cut into bite-sized pieces |
| Soy Sauce 🫙 | 3 tbsp | Low-sodium preferred |
| Rice Vinegar 🍚 | 2 tbsp | Or apple cider vinegar |
| Honey 🍯 | 2 tbsp | For sweetness balance |
| Chili Paste 🌶️ | 1 tbsp | Sambal oelek or sriracha |
| Minced Garlic 🧄 | 3 cloves | Freshly minced preferred |
| Ginger 🌿 | 1 tbsp | Freshly grated |
| Cornstarch 🌾 | ½ cup | For coating chicken |
| Sesame Oil 🫒 | 1 tsp | For aromatics |
| Dry Sherry 🍷 | 1 tbsp | Or Shaoxing wine |
| Green Onions 🧅 | 3 whole | Sliced for garnish |
| Vegetable Oil 🫒 | ¾ cup | For frying, high smoke point |
| Red Bell Pepper 🌶️ | 1 whole | Thinly sliced |
| Sesame Seeds 🌾 | 1 tsp | Toasted, for garnish |
For authentic flavor, dark soy sauce adds depth, but regular works fine. Chicken thighs stay juicier than breasts—look for skinless, boneless at Whole Foods or Asian markets. The chili paste is non-negotiable: Sambal oelek (in the international aisle) or Lee Kum Kee brand for the right heat level. Fresh ginger and garlic make a difference, so avoid the jarred stuff.
No rice vinegar? Apple cider vinegar at half the amount works. Swap honey for maple syrup if needed. The cornstarch coating is key—don’t use flour (it won’t crisp the same). For extra crunch, double-fry the chicken (first at 325°F, then 375°F). If you skip the sherry, add extra soy sauce to compensate for the missing depth.
Fry the chicken in batches to avoid crowding—keeps it crispy. Store leftovers in an airtight container for up to 3 days (the sauce may thicken, so thin with a splash of water when reheating). The dish is best served immediately, but the sauce can be made 1 day ahead and refrigerated.
Why You’ll Love This Recipe
- One Pan Wonder: I toss the chicken thighs in the soy-honey glaze and let the oven do the work—minimal mess, maximum flavor.
- Sweet & Spicy Balance: The honey and chili paste create this addictive contrast that makes me sneak bites straight from the pan.
- Meal Prep Hero: It reheats beautifully, so I make a big batch for lunches all week. Honestly, it tastes even better the next day.
- Budget Friendly: Boneless thighs are cheap, and the sauce uses pantry staples I always have on hand—no extra grocery runs needed.
Step-by-Step Instructions for Beijing Chicken
Master the wok-tossing technique for restaurant-quality results at home with these precise steps.
Step 1: Marinate and Coat the Chicken
Cut the 1.5 lb boneless chicken thighs into 1-inch pieces and place them in a bowl. Whisk together the 3 tbsp soy sauce, 2 tbsp rice vinegar, 2 tbsp honey, 1 tbsp chili paste, 3 cloves minced garlic, 1 tbsp ginger, 1 tsp sesame oil, and 1 tbsp dry sherry in a separate bowl.
Pour the marinade over the chicken and mix thoroughly to ensure every piece is well coated. Let it sit for 15 minutes. Meanwhile, spread the 0.5 cup cornstarch on a plate. After marinating, dredge each piece of chicken in the cornstarch, pressing gently to adhere. This creates that signature crispy coating.
Step 2: Fry the Chicken to Golden Perfection
Heat the 0.75 cup vegetable oil in a wok or deep skillet over medium-high heat until it reaches 350°F. Test by dropping in a small piece of coated chicken—if it sizzles immediately, the oil is ready.
Working in batches to avoid crowding, carefully add the chicken pieces to the hot oil. Fry for 4-5 minutes, turning occasionally, until they are golden brown and crispy on all sides. Use a slotted spoon to transfer the fried chicken to a paper towel-lined plate to drain excess oil.
Step 3: Stir-Fry the Vegetables
Carefully pour out all but 2 tbsp of the oil from the wok. Return it to medium-high heat and add the thinly sliced 1 whole red bell pepper. Stir-fry for 2-3 minutes until the pepper softens slightly but retains its vibrant color and a hint of crispness.
Add the chicken back to the wok and toss everything together for 1-2 minutes to combine the flavors. The residual heat will help the sauce cling perfectly to the crispy chicken pieces.
Step 4: Garnish and Serve Immediately
Transfer the Beijing chicken to a serving platter. Sprinkle with the sliced 3 whole green onions and toasted 1 tsp sesame seeds for a fresh, aromatic finish. The green onions add a pop of color and a mild onion bite that complements the sweet and spicy flavors.
Serve hot with steamed rice to soak up the delicious sauce. The contrast of crispy chicken, tender bell peppers, and the glossy, slightly sticky coating makes this dish irresistible. For best results, consume immediately while the chicken is at its crispest.
Pro Tips For Making Beijing Chicken
- Velve the Thighs: Cut the boneless chicken thighs into 1-inch pieces—small enough to cook through quickly but big enough to stay juicy. I learned this the hard way after ending up with dry, chewy bits from uneven sizes.
- Bloom the Chili: Heat the chili paste in the oil for 30 seconds before adding anything else. Sounds weird, but it works: this deepens the flavor and mellows the raw heat.
- Skip the Boil: Simmer the sauce gently instead of boiling it down hard, or the honey will turn bitter. Keep it at a lazy bubble—just enough to thicken without scorching.
- Rest Before Serving: Let the chicken sit in the sauce off the heat for 5 minutes after cooking. My grandmother swore by this, and she was right: it lets the flavors sink in and the thighs soak up every last bit of that glossy glaze.
Make-Ahead Tips for This Recipe
Prep the Sauce
Mix the 3 tbsp soy sauce, 2 tbsp rice vinegar, 2 tbsp honey, and 1 tbsp chili paste the night before. This lets flavors meld deeply. Store in a sealed jar in the fridge for up to 24 hours. 💡
Marinate the Chicken
Cut and marinate the 1.5 lb boneless chicken thighs in the sauce for up to 12 hours in the fridge. Don’t exceed this or the vinegar will start breaking down the meat. Use a zip-top bag for easy mixing.
Pre-Coat with Cornstarch
Before cooking, toss the marinated chicken with 0.5 cup cornstarch in a bowl. Let it sit at room temperature for 10 minutes while you prep other ingredients. This ensures the coating sticks perfectly during frying.
Prep Garnishes
Slice the 3 whole green onions and toast the 1 tsp sesame seeds in a dry pan over medium heat for 1-2 minutes. Store separately in small containers until serving. This keeps them fresh and crisp.
Fry in Batches
If frying ahead, cook the chicken fully, then cool completely on a wire rack. Store in a single layer in the fridge for up to 2 hours before reheating. Avoid stacking to prevent sogginess.
Reheat Properly
Reheat the chicken in a 350°F oven on a wire rack for 8-10 minutes to restore crispiness. Toss with the sauce and veggies just before serving. The oven method works better than a microwave for texture. 🔥
Nutrition Facts
Frequently Asked Questions
Can I use chicken breast instead of thighs?
You can, but thighs stay juicier. If using breast, reduce frying time to 3-4 minutes to prevent dryness.
Why does the recipe call for cornstarch instead of flour?
Cornstarch creates a lighter, crispier coating. Flour can make the chicken dense and gummy when fried.
How do I make it less spicy?
Reduce chili paste to 1/2 tbsp or omit it entirely. Balance flavors with an extra 1 tbsp honey.
Can I bake the chicken instead of frying?
Yes, bake at 400°F for 18-20 minutes, flipping halfway. It won’t be as crispy but still tasty.

- Jollof Rice Sauce Recipe: West African Tomato and Spice Infusion - September 25, 2026
- Japanese Rice Soup Recipe: Umami-Rich Comfort in a Bowl - September 25, 2026
- Homemade Cream Of Rice Recipe: Silk-Smooth Breakfast in Minutes - September 25, 2026