
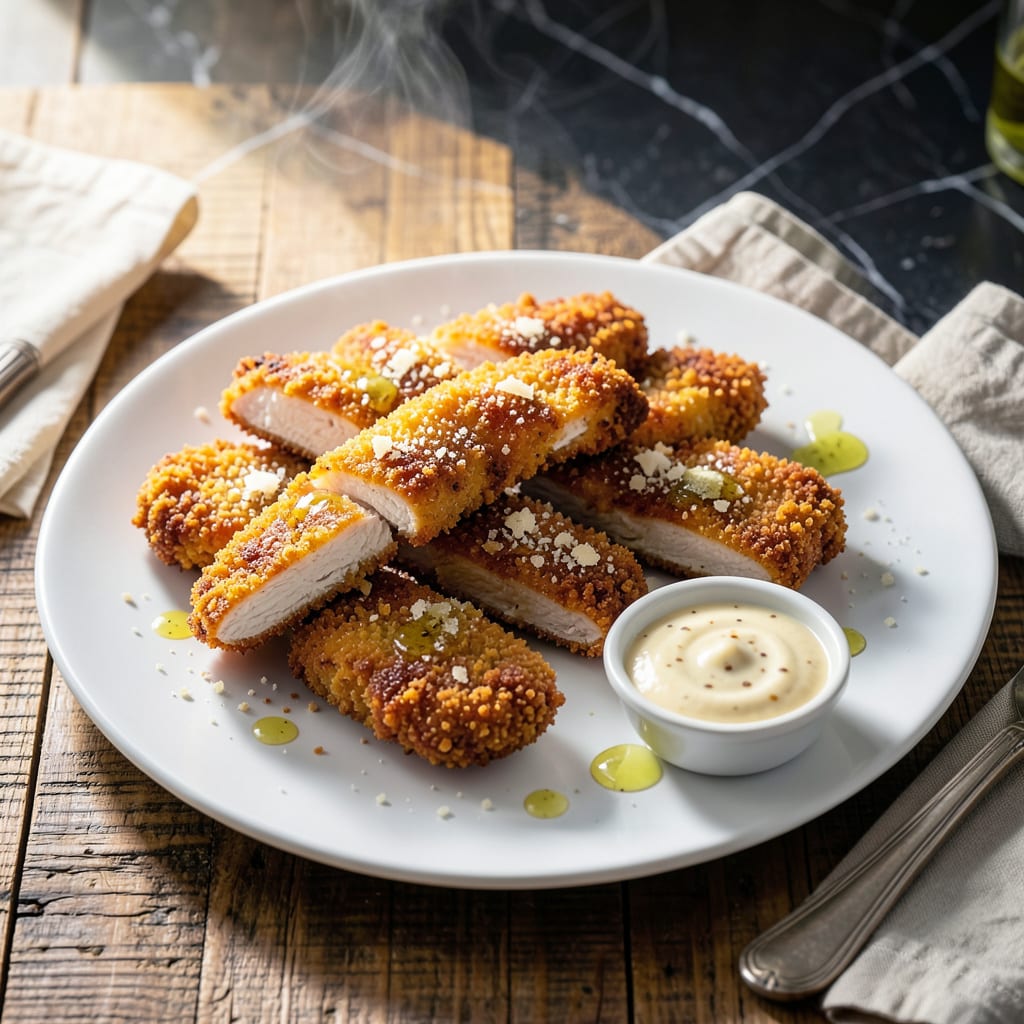
This method delivers perfectly crispy chicken tenders without the fryer. A triple-coating technique and high-heat baking create that coveted crunch while keeping the meat tender inside.
With just a few pantry staples and 30 minutes in the oven, you’ll have golden, bite-sized pieces that rival any restaurant version. The secret lies in the oven temperature and proper spacing for even browning.
Ingredients for Best Baked Chicken Tenders Recipe Ever
A handful of pantry staples creates that restaurant-quality crunch at home.
| Ingredient | Amount | Notes |
|---|---|---|
| Chicken Breast 🍗 | 1 ½ lb | Boneless, skinless, cut into strips |
| All-Purpose Flour 🌾 | 1 cup | For initial dredging layer |
| Large Eggs 🥚 | 2 whole | Beaten for binding agent |
| Panko Breadcrumbs 🍞 | 2 cups | Japanese-style for extra crunch |
| Grated Parmesan Cheese 🧀 | ½ cup | Freshly grated from block |
| Garlic Powder 🧄 | 1 tsp | For seasoning the coating |
| Onion Powder 🧅 | 1 tsp | Adds depth to breading |
| Paprika 🌶️ | 1 tsp | Sweet or smoked variety |
| Salt 🧂 | 1 tsp | Diamond Crystal kosher preferred |
| Black Pepper 🌶️ | ½ tsp | Freshly ground for best flavor |
| Buttermilk 🥛 | ½ cup | For tenderizing the chicken |
| Olive Oil 🫒 | 2 tbsp | For light brushing before baking |
| Cornstarch 🌾 | 2 tbsp | Mixed with flour for crispier coating |
[recipeingredientscaler]
The chicken breast quality is paramount here. Air-chilled, organic chicken from Whole Foods or a trusted local butcher yields the most tender results. For the breading, Kikkoman Panko provides superior crunch compared to standard breadcrumbs. The Parmesan should be Parmigiano-Reggiano—pre-grated versions often contain anti-caking agents that compromise texture. Freshly grate from a wedge for optimal melt and flavor integration.
No buttermilk? Whole milk with 1 tbsp lemon juice works in a pinch. For gluten-free, swap the flour for rice flour and use gluten-free panko. The paprika can be omitted if preferred, though it adds a subtle depth. Smoked paprika introduces a nice barbecue-like note. If using chicken tenders instead of breasts, reduce baking time by 5-7 minutes to prevent drying.
The breaded tenders can be refrigerated for up to 24 hours before baking. Leftovers keep in the fridge for 3-4 days and reheat best in the oven at 375°F for 10-12 minutes. For freezing, arrange uncooked tenders on a tray to freeze solid, then transfer to a bag for up to 3 months.
Why You’ll Love This Recipe
- One Bowl Wonder: I mix the flour, eggs, and panko right in the same dish—no mountain of bowls to wash.
- Crispy Magic: That parmesan in the breading gives it this salty, crunchy edge that’s honestly addictive.
- Freezer Friend: I double the batch and stash half for those no-time nights. (Yes, they reheat beautifully.)
Step-by-Step Instructions for Oven-Crisped Chicken Tenders
Here’s the method that guarantees perfectly crispy tenders with juicy centers every time.
Step 1: Prep and Season the Chicken
Cut the 1.5 lb chicken breast into uniform strips, about 1-inch thick. This ensures even cooking and consistent texture. Pat each piece dry with paper towels—moisture is the enemy of crispiness.
Season the chicken lightly with 1 tsp salt and 0.5 tsp black pepper. I prefer Diamond Crystal kosher salt for its clean flavor and even distribution. Place the seasoned chicken in a bowl and pour over the 0.5 cup buttermilk, ensuring each piece is fully coated. Let it marinate for 15-20 minutes to tenderize the meat.
Step 2: Create the Breading Station
In a shallow dish, whisk together the 1 cup all-purpose flour and 2 tbsp cornstarch. The cornstarch creates a lighter, crispier coating. In a second dish, beat the 2 whole large eggs until uniform.
In a third dish, combine the 2 cups panko breadcrumbs, 0.5 cup grated parmesan cheese, 1 tsp garlic powder, 1 tsp onion powder, and 1 tsp paprika. The parmesan adds a savory depth, while the spices infuse the breading with warmth and color.
Step 3: Dredge, Dip, and Coat
Remove each piece of chicken from the buttermilk, letting excess drip off, then dredge it in the flour-cornstarch mixture. Shake off any excess—you want a thin, even layer. Next, dip it into the beaten eggs, allowing any excess to drip back into the bowl.
Finally, press each piece firmly into the panko-parmesan mixture, ensuring it’s fully coated on all sides. The key here is pressure—press hard so the breading adheres completely. Place the breaded tenders on a wire rack set over a baking sheet to allow air circulation underneath.
Step 4: Bake to Golden Perfection
Preheat your oven to 400°F. Lightly brush each tender with 2 tbsp olive oil—this promotes browning and crispiness. Bake on the middle rack for 15 minutes, then flip each tender and bake for an additional 10-12 minutes.
You’ll know they’re done when the coating is deep golden brown and the internal temperature reaches 165°F. The tenders should feel firm to the touch, and the breading should be crisp enough to audibly crunch when bitten. Serve immediately while hot and crispy.
Pro Tips For Making Best Baked Chicken Tenders Recipe Ever
- Preheat the Pan: Crank your oven to 425°F and let it fully preheat—I learned this the hard way after pulling out pale, soggy tenders from a lukewarm oven.
- Pound the Breast: Slice the chicken breast into even 1-inch thick strips, then pound the thicker parts gently. Sounds weird, but it works: uniform thickness means every piece cooks at the same rate.
- Skip the Overcrowding: Leave at least an inch between tenders on the baking sheet—after burning three batches, I finally figured out they steam instead of crisp if packed too tight.
- Double-Dip the Crust: Drag each strip through the flour, egg, then panko-parmesan mix twice for an extra-crispy coat. My grandmother swore by this, and she was right: it actually changes the outcome.
Essential Equipment for This Dish
Baking Sheet Setup
Use a half-sheet pan (13×18 inches) with a wire cooling rack for optimal air circulation. I prefer Nordic Ware baking sheets—they’re durable and heat evenly. The rack prevents soggy bottoms by allowing hot air to reach all sides. 💡
Dredging Dishes
Three shallow dishes are essential: one for flour, one for eggs, and one for breading. I use 9-inch pie plates from Pyrex—they’re wide enough for easy dredging and dishwasher-safe. For the flour mix, a whisk helps break up cornstarch lumps.
Oven Thermometer
Don’t trust your oven’s built-in gauge. A hanging oven thermometer from Taylor Precision costs under $10 and ensures your 400°F is accurate. Even small temperature variations can affect crispiness. Place it on the center rack where you’ll bake.
Pastry Brush
A silicone pastry brush is perfect for applying olive oil to the tenders before baking. I like OXO’s angled brush—it reaches edges easily and withstands high heat. Light, even strokes prevent soggy spots while promoting browning.
Instant-Read Thermometer
Check doneness with a ThermoWorks ThermoPop instant-read thermometer. It gives accurate readings in 3-4 seconds and has a thin probe that doesn’t tear the breading. Aim for 165°F in the thickest part. 🌡️
Tongs for Flipping
Use 12-inch stainless steel tongs to flip tenders halfway through baking. OXO’s spring-loaded tongs provide a firm grip without crushing the breading. Look for ones with silicone tips to prevent scratching your baking sheet.
Nutrition Facts
Frequently Asked Questions
What’s the best way to keep them crispy?
Bake on a wire rack to allow air circulation underneath. Skip the foil—it traps steam and makes the coating soggy. Serve immediately for maximum crunch.
Can I use regular breadcrumbs instead of panko?
You can, but panko’s larger flakes create a lighter, crispier texture. If using regular breadcrumbs, add 2 tbsp extra cornstarch to help with crunch.
Why did my breading fall off during baking?
This usually means the chicken wasn’t dry before dredging or the egg wash didn’t fully coat the flour layer. Press firmly into the panko mixture and let tenders rest 5 minutes before baking.
Can I make these ahead of time?
Yes! Bread the tenders, then refrigerate uncovered for up to 24 hours before baking. This actually helps the coating adhere better for extra crispiness.

- Jollof Rice Sauce Recipe: West African Tomato and Spice Infusion - September 25, 2026
- Japanese Rice Soup Recipe: Umami-Rich Comfort in a Bowl - September 25, 2026
- Homemade Cream Of Rice Recipe: Silk-Smooth Breakfast in Minutes - September 25, 2026