
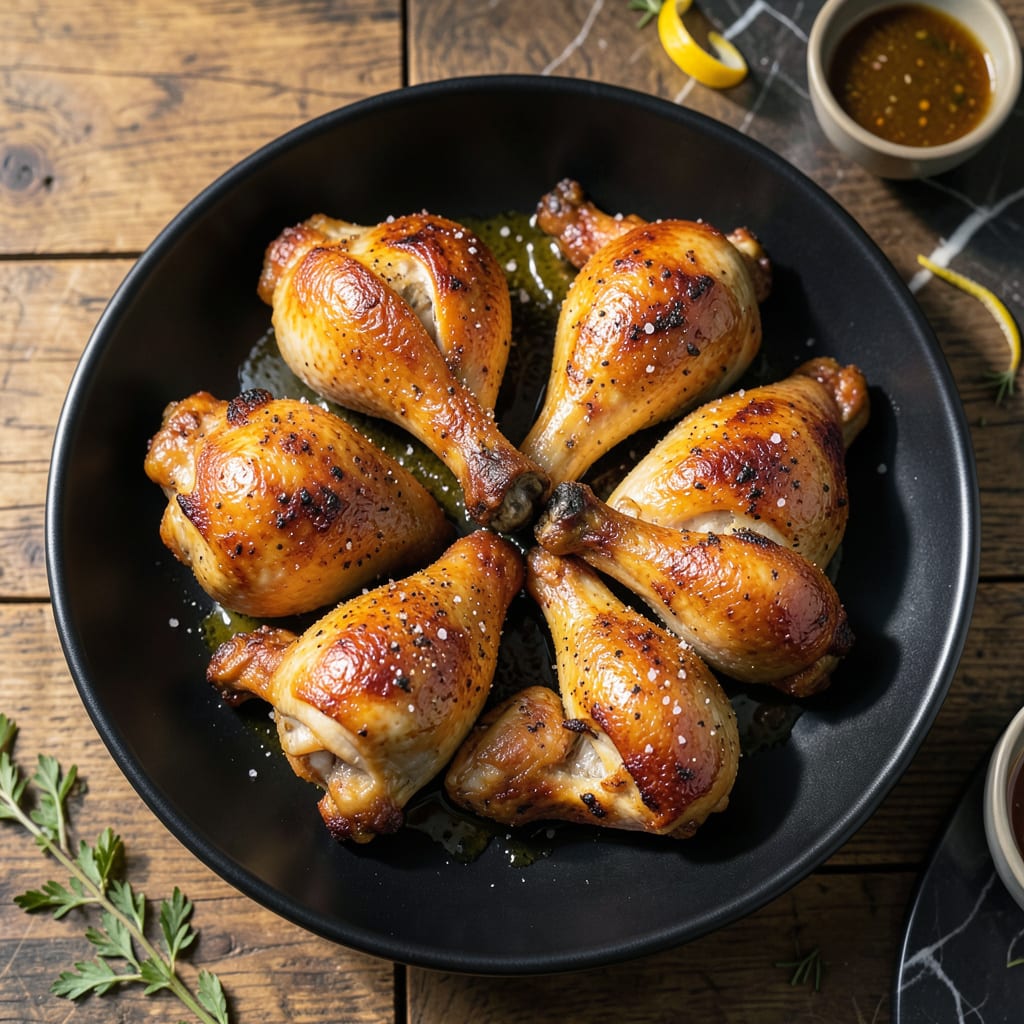
Achieving perfectly crispy skin while keeping meat juicy is the hallmark of exceptional baked chicken. This method delivers consistent results through precise temperature control and strategic seasoning.
With a high-heat start and gentle finish, the chicken develops a golden crust outside while staying tender inside. The simple technique requires minimal prep but yields restaurant-quality flavor every time.
Ingredients for Best Baked Cut Up Chicken
Bone-in chicken plus bold spices deliver that signature crispy skin and juicy meat every time.
| Ingredient | Amount | Notes |
|---|---|---|
| Chicken Thighs 🍗 | 4 whole | Bone-in, skin-on preferred |
| Chicken Drumsticks 🍗 | 4 whole | Skin-on for crispiness |
| Olive Oil 🫒 | 2 tbsp | Extra-virgin for richness |
| Kosher Salt 🧂 | 1 ½ tsp | Diamond Crystal preferred |
| Black Pepper 🌶️ | 1 tsp | Freshly ground for best flavor |
| Garlic Powder 🧄 | 1 tsp | Not garlic salt |
| Onion Powder 🧅 | 1 tsp | Fresh ground preferred |
| Paprika 🌶️ | 1 tsp | Sweet or smoked variety |
| Dried Thyme 🍃 | ½ tsp | Crushed between fingers |
| Dried Oregano 🌿 | ½ tsp | Mediterranean oregano ideal |
| Cayenne Pepper 🔥 | ¼ tsp | Adjust for heat preference |
| Lemon 🍋 | 1 whole | Zested and juiced |
[recipeingredientscaler]
The chicken pieces matter here. Thighs and drumsticks stay juicier than breasts during baking. Look for skin-on, bone-in at your butcher or grocery store—Whole Foods and Costco both carry quality options. The skin should be taut and slightly tacky, not shriveled or dry. For the best texture, pat the pieces thoroughly dry before seasoning—this is non-negotiable for achieving that golden crust.
No fresh herbs on hand? Dried work perfectly at one-third the amount. Short on paprika? Smoked paprika adds depth if you have it. The cayenne can be omitted if serving heat-sensitive palates, but I recommend keeping a pinch—it balances the richness. For the olive oil, use something robust; light olive oils lack the flavor punch needed here.
Seasoned chicken keeps in the fridge for 24 hours before baking. Leftovers? They reheat surprisingly well—crisp the skin under the broiler for 2-3 minutes. The dish holds its quality for 4 days refrigerated, though the skin loses some crispness over time.
Why You’ll Love This Recipe
- One Pan Magic: I toss the thighs and drumsticks with olive oil, salt, and pepper, then let the oven do the rest—no babysitting required.
- Crispy Outside, Juicy Inside: The high heat turns the skin crackling while keeping the meat so tender it falls off the bone.
- Weeknight MVP: I’ve served this for lazy Sundays and frantic Tuesdays—it’s my reliable, no-fail dinner.
- Budget Stretcher: A few pounds of thighs and drumsticks feed my whole family, with leftovers for sandwiches. Honestly, it’s my wallet’s best friend.
Step-by-Step Instructions for Baked Cut Up Chicken
Achieve perfectly crispy skin and juicy meat with this method that guarantees excellent results.
Step 1: Season the Chicken Thoroughly
Pat the 4 whole Chicken Thighs and 4 whole Chicken Drumsticks completely dry with paper towels. I emphasize this step because moisture prevents proper browning and crispiness. Place them in a large mixing bowl.
Drizzle with the 2 tbsp Olive Oil and toss to coat evenly. In a small bowl, combine the 1.5 tsp Kosher Salt, 1 tsp Black Pepper, 1 tsp Garlic Powder, 1 tsp Onion Powder, 1 tsp Paprika, 0.5 tsp Dried Thyme, 0.5 tsp Dried Oregano, and 0.25 tsp Cayenne Pepper. Sprinkle this seasoning blend over the chicken pieces and massage it in thoroughly, ensuring every surface is well coated.
Step 2: Arrange for Optimal Browning
Preheat your oven to 425°F. This high temperature is crucial for achieving that coveted crispy skin while keeping the meat juicy. Line a large rimmed baking sheet with parchment paper for easy cleanup.
Arrange the seasoned chicken pieces skin-side up on the prepared baking sheet, spacing them at least 1 inch apart to allow for proper air circulation. This spacing prevents steaming and ensures even browning. Place the baking sheet on the middle rack of your oven.
Step 3: Bake to Perfection
Bake for 25 minutes at 425°F, then carefully flip each piece and continue baking for another 15-20 minutes. The chicken is done when the internal temperature reaches 165°F and the skin is deep golden brown and crispy.
During the last 5 minutes of baking, I recommend broiling on high to intensify the browning and crispiness. Keep a close eye to prevent burning. The juices should run clear when the thickest piece is pierced with a knife.
Step 4: Rest and Finish with Citrus
Transfer the baked chicken to a serving platter and tent loosely with foil. Let it rest for 5-10 minutes—this allows the juices to redistribute throughout the meat. Meanwhile, zest and juice the 1 whole Lemon.
Drizzle the fresh lemon juice over the chicken just before serving and sprinkle with some of the zest. This final touch adds a bright, fresh note that balances the rich, savory flavors. Serve immediately while the skin is still crisp.
Pro Tips For Making Best Baked Cut Up Chicken
- Pat It Dry: Use paper towels to thoroughly dry each piece of chicken before seasoning—this guarantees a crispy skin rather than steamed, soggy meat.
- Hot Oven Start: Crank the oven to 425°F for the first 20 minutes, then drop to 375°F to finish; this sears the outside while keeping the dark meat juicy.
- Skip the Crowding: Arrange pieces at least an inch apart on the pan so they brown instead of steam; I learned this the hard way after a few pale, limp batches.
- Rest Before Serving: Let the chicken rest 10 minutes under foil after baking—it keeps the juices inside where they belong, not all over your cutting board.
Common Mistakes When Making best baked cut up chicken
Skipping the Dry Step
Never skip patting the chicken completely dry with paper towels before seasoning. Even a little moisture prevents proper browning and leads to steamed, soggy skin instead of that coveted crisp. I learned this the hard way my first few attempts. 🌟
Overcrowding the Pan
Arrange pieces at least 1 inch apart on the baking sheet. Crowding causes the chicken to steam rather than roast, resulting in pale, rubbery skin. Use two pans if needed for larger batches.
Neglecting Seasoning
Don’t be shy with the spice blend. Each piece needs a thorough coating on all sides. I recommend rubbing the seasoning under the skin as well for maximum flavor penetration. Even distribution is key for balanced taste in every bite.
Improper Temperature
Start at 425°F for the first 25 minutes, then flip before finishing. Lower temperatures won’t achieve that deep golden color. Use an oven thermometer to verify your oven’s accuracy—many run 25°F off. 🌡️
Skipping the Rest
Let the chicken rest for 5-10 minutes after baking. Cutting too soon causes juices to spill out, leaving the meat dry. Tent with foil to keep warm while the juices redistribute throughout.
Forgetting to Flip
Always flip the pieces halfway through baking. This ensures even browning on both sides and prevents the bottoms from sticking. The skin side should go down first, then up for the final crisping under the broiler.
Nutrition Facts
Frequently Asked Questions
Can I use boneless chicken thighs instead?
Yes, but reduce baking time to 20-25 minutes total. Boneless cooks faster and may dry out at the longer time. Still use skin-on for best crispiness.
How do I know when it’s fully cooked?
Use a meat thermometer to check the thickest piece reaches 165°F. Juices should run clear, not pink, when pierced. The skin will be deep golden brown.
Can I make this ahead of time?
Season chicken up to 24 hours ahead and refrigerate. Bake just before serving for best crispiness. Leftovers keep 4 days refrigerated.
What’s the best way to reheat leftovers?
Place pieces on a wire rack over a baking sheet. Broil on high for 3-5 minutes to recrisp the skin. Microwaving makes it soggy.

- Jollof Rice Sauce Recipe: West African Tomato and Spice Infusion - September 25, 2026
- Japanese Rice Soup Recipe: Umami-Rich Comfort in a Bowl - September 25, 2026
- Homemade Cream Of Rice Recipe: Silk-Smooth Breakfast in Minutes - September 25, 2026