
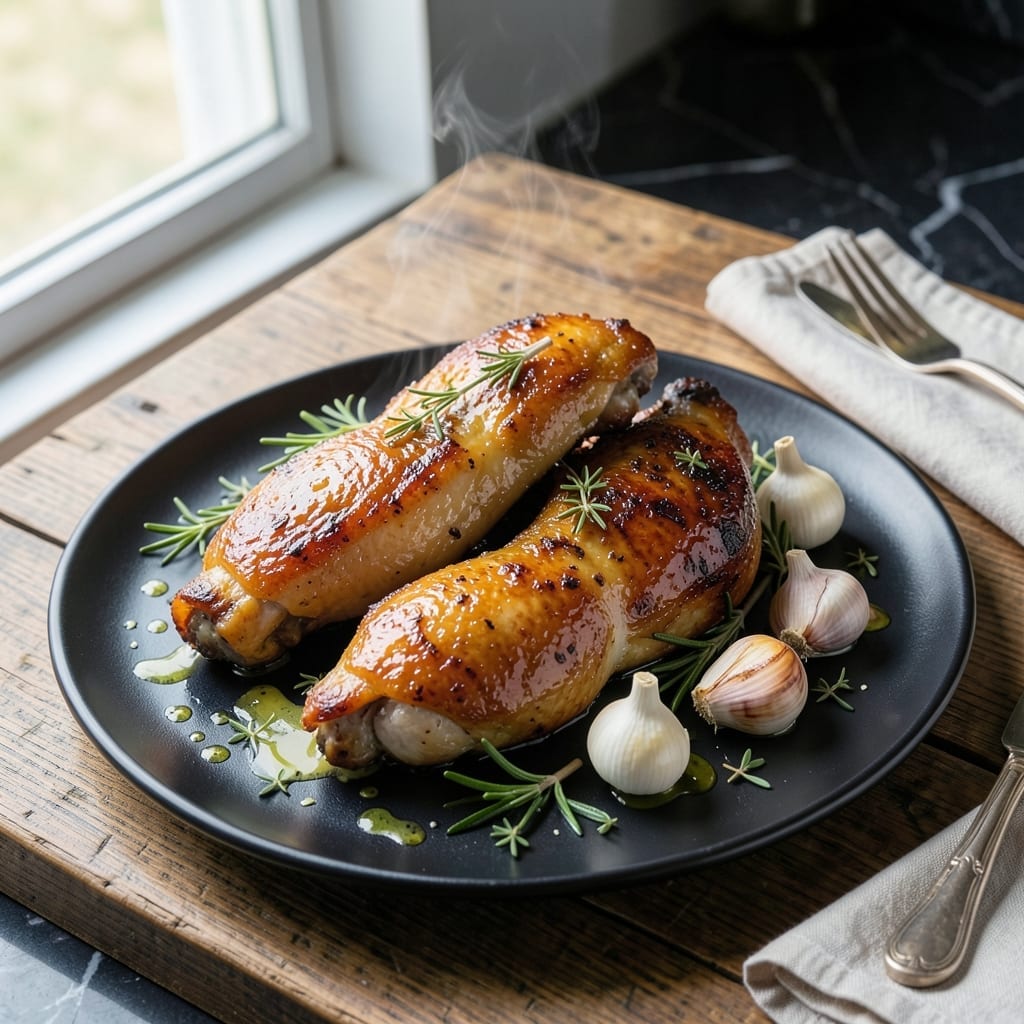
This recipe delivers the best chicken thighs you’ll ever make, with a proven method that guarantees perfectly crispy skin and juicy meat every time.
The secret lies in a hot oven and a simple garlic butter baste that infuses every bite with rich, aromatic flavor. No complicated techniques—just a straightforward approach that works.
What emerges is golden, shatteringly crisp skin giving way to tender, flavorful meat. The garlic butter creates a glossy finish that’s impossible to resist.
Ready in under an hour, this dish transforms an ordinary dinner into something extraordinary. Serve with your favorite sides for a meal that feels special.
Ingredients for Best Chicken Thigh Recipe Ever
Bone-in thighs, fresh herbs, and a killer garlic butter baste. Simple stuff, huge flavor.
| Ingredient | Amount | Notes |
|---|---|---|
| Bone-In Chicken Thighs 🍗 | 2 lb | Skin-on for crispiness |
| Unsalted Butter 🧈 | ½ cup | 1 stick, melted |
| Garlic Cloves 🧄 | 6 cloves | Minced for maximum flavor |
| Fresh Rosemary 🌿 | 2 tbsp | Finely chopped |
| Fresh Thyme 🍃 | 2 tbsp | Leaves stripped from stems |
| Kosher Salt 🧂 | 1 ½ tsp | Diamond Crystal preferred |
| Freshly Ground Black Pepper 🌶️ | 1 tsp | Coarse grind preferred |
| Olive Oil 🫒 | 1 tbsp | For initial searing |
| Lemon Juice 🍋 | 1 tbsp | Freshly squeezed |
| Honey 🍯 | 1 tbsp | For subtle sweetness |
| Dijon Mustard 🟡 | 1 tsp | For depth in baste |
| Shallot 🧅 | 1 whole | Finely minced |
The chicken is everything here—bone-in, skin-on thighs are non-negotiable for that crispy skin and juicy meat. Grab them from Whole Foods or your local butcher if you can (the quality shows). I’ve tried boneless and it’s just not the same. The herbs should be fresh—rosemary and thyme from the produce section, not the sad dried stuff in jars (those have their place, but not here).
No fresh herbs? Dried at one-third the amount works in a pinch, but you’ll lose some brightness. Swap honey for maple syrup if that’s what you’ve got. The Dijon can be regular mustard, but the sharpness of Dijon really sings with the garlic. And if you’re out of shallots, red onion will do—just use half the amount since it’s stronger.
Prep the baste ahead—it keeps for 3 days in the fridge. The chicken? Cook it the day you buy it for best results, but it’ll hold in the fridge for 1-2 days if needed. Leftovers taste even better cold (if they last that long).
Why You’ll Love This Recipe
- One Pan Wonder: I toss everything on a single sheet pan—thighs, butter, garlic, herbs—then let the oven do the work.
- Buttery Herb Magic: The rosemary and thyme infuse into the butter, creating a sauce so good I sop it up with bread.
- Weeknight Hero: Between us, this is my Tuesday dinner MVP—fancy enough for guests, simple enough for a chaotic evening.
- Budget Stretcher: Bone-in thighs stay juicy and cost half what breasts do, and leftovers taste even better the next day.
Step-by-Step Instructions for Garlic Butter Basted Chicken Thighs
This is the method that turns humble chicken thighs into restaurant-quality perfection.
Step 1: Season and Sear the Chicken Thighs
Pat the 2 lb bone-in chicken thighs dry with paper towels—this is non-negotiable for crispy skin. Season both sides aggressively with the 1.5 tsp kosher salt and 1 tsp freshly ground black pepper. I press the seasoning in to make sure it sticks.
Heat the 1 tbsp olive oil in a large, heavy skillet over medium-high heat until shimmering. Add the chicken thighs skin-side down and sear undisturbed for 6-8 minutes until the skin is deep golden brown and crisp. Don’t rush this step—this is where the magic happens.
Step 2: Prepare the Garlic Butter Baste
While the chicken sears, melt the 0.5 cup unsalted butter in a small saucepan over low heat. Add the 6 cloves minced garlic cloves, 1 whole minced shallot, 2 tbsp fresh rosemary, and 2 tbsp fresh thyme. Let it simmer for 2-3 minutes until the garlic turns fragant and just golden—don’t let it brown.
Stir in the 1 tbsp honey, 1 tbsp lemon juice, and 1 tsp Dijon mustard. This trio adds the perfect balance of sweetness, acidity, and depth. Keep the mixture warm on the stove—you’ll use it to baste the chicken repeatedly.
Step 3: Finish Cooking with the Baste
Flip the chicken thighs and immediately begin basting them with the garlic butter mixture using a spoon. Reduce the heat to medium and continue cooking for another 8-10 minutes, basting every 2 minutes and turning the thighs occasionally for even coating.
The chicken is done when an instant-read thermometer inserted into the thickest part (avoiding bone) reads 175°F and the juices run clear. The skin should be deeply browned and glossy from the butter. If the butter starts to brown too quickly, lower the heat slightly.
Step 4: Rest and Serve
Transfer the chicken thighs to a plate and let them rest for 5-10 minutes. This allows the juices to redistribute so they stay moist when you cut into them. Pour any remaining garlic butter from the pan over the top—the flavor is too good to waste.
Serve the chicken thighs hot, spooning any pan juices over the top. The skin should be crisp enough to crackle when you bite into it, while the meat stays tender and juicy. This is the kind of dish that makes people ask for seconds before they’ve finished their first serving.
Pro Tips For Making Best Chicken Thigh Recipe Ever
- Pat Thighs Dry: Use paper towels to thoroughly dry the skin—this is what guarantees that crispy, golden crust everyone fights over at the table.
- Start Skin-Side Down: Place the thighs in the pan skin-side down first and resist the urge to move them for 5-6 minutes; this builds the foundation for even cooking and maximum crunch.
- Baste With Butter: Once the skin is crisp, tilt the pan and spoon the melted butter, garlic, and herbs over the thighs repeatedly for the last 3 minutes—it adds flavor and keeps the meat juicy.
- Rest Before Serving: I learned this the hard way—let the thighs rest 5-10 minutes after cooking so the juices redistribute, or you’ll lose half the moisture to the cutting board.
Make-Ahead Tips for best chicken thigh recipe ever
Prep the Baste Early
You can make the garlic butter baste up to 3 days ahead—just store it in an airtight container in the fridge. Reheat gently over low heat before using to bring back its creamy texture. 💡
Season Chicken Ahead
Season your 2 lb bone-in chicken thighs the night before and leave them uncovered in the fridge. This dries the skin surface, ensuring even crispier results when cooked. Just pat them dry again before searing.
Cold Chicken Hack
If cooking straight from the fridge, let the thighs sit at room temperature for 20-30 minutes first. This promotes even cooking, preventing dry edges while the center finishes. I always set a timer for this step.
Store Cooked Thighs
Cooked thighs keep beautifully in the fridge for 3-4 days in a sealed container. The flavors deepen as they rest, making leftovers taste even better. Reheat gently to preserve the crispy skin.
Freeze for Later
Freeze cooled, cooked thighs in a single layer first, then transfer to a freezer bag for up to 3 months. Thaw overnight in the fridge before reheating. This prevents them from sticking together. ❄️
Reheat Like a Pro
For best results, reheat in a 350°F oven for 10-12 minutes until the internal temperature hits 165°F. This revives the skin’s crispness better than a microwave ever could.
Nutrition Facts
Frequently Asked Questions
Can I use boneless thighs instead?
You can, but the results won’t be as good. Bone-in thighs stay juicier during cooking, and the skin crisps better. If using boneless, reduce cooking time by 3-4 minutes to prevent drying out.
Why rest the chicken before serving?
Resting for 5-10 minutes lets juices redistribute through the meat. Cutting too soon causes all those flavorful juices to spill out, leaving the meat dry. Patience pays off here.
How do I know when it’s done?
Use an instant-read thermometer—it should read 175°F at the thickest part. The juices should run clear, and the skin will be deep golden brown and crisp. Never guess with poultry.
Can I make this in a slow cooker?
Not recommended. The high, dry heat of searing and basting is what creates that perfect crispy skin. A slow cooker would make the skin soggy, though the meat would still be tender.

- Jollof Rice Sauce Recipe: West African Tomato and Spice Infusion - September 25, 2026
- Japanese Rice Soup Recipe: Umami-Rich Comfort in a Bowl - September 25, 2026
- Homemade Cream Of Rice Recipe: Silk-Smooth Breakfast in Minutes - September 25, 2026