
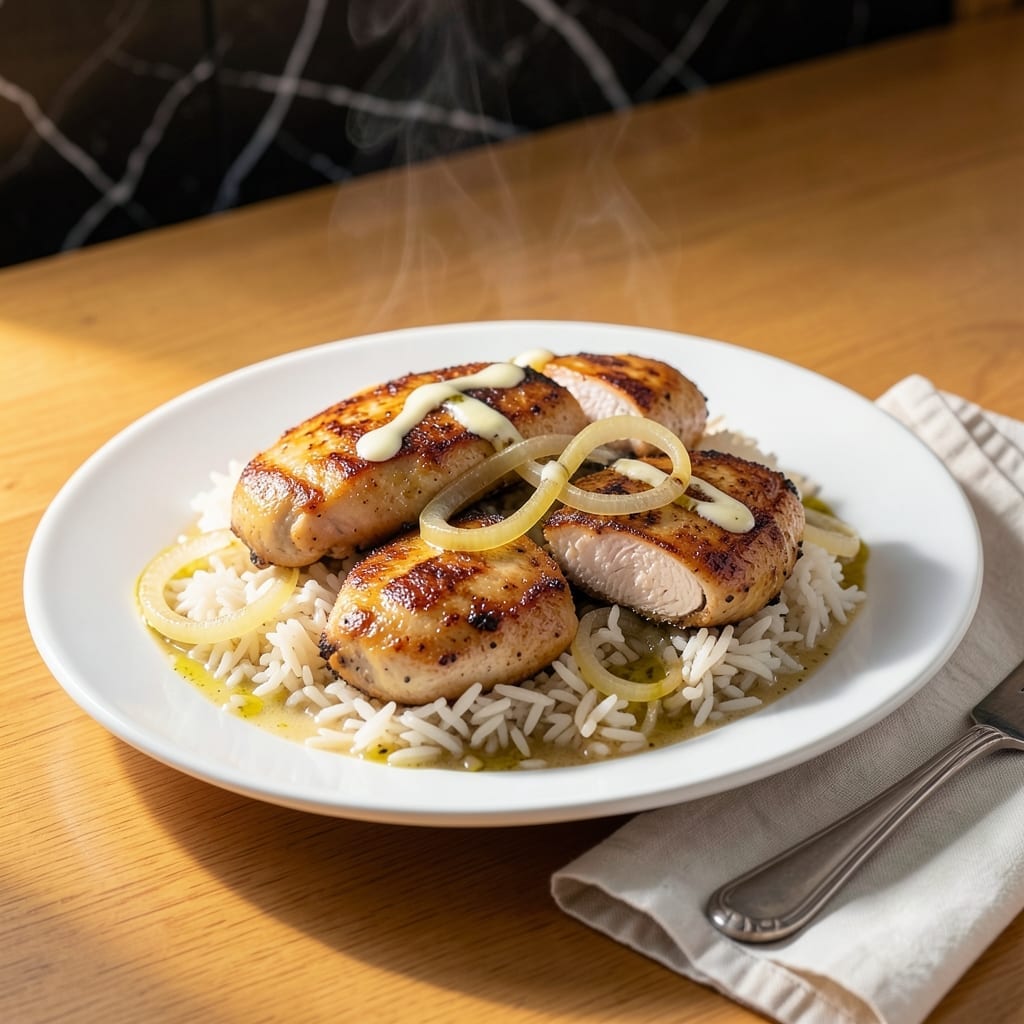
There’s a reason this dish has stood the test of time as a family favorite. A simple yet classic combination of tender chicken, fluffy rice, and creamy sauce comes together in one pan for effortless prep.
I’ve refined this method over years of weeknight cooking, ensuring every bite delivers that comforting, home-style flavor. The chicken stays juicy while the rice absorbs rich, savory notes from the broth and seasonings.
The result is a balanced, satisfying meal that’s just as good reheated the next day. No complicated techniques—just straightforward cooking that delivers reliable, classic results every time.
Perfect for busy evenings when you want a hearty dinner without the fuss. Here’s how to make it right.
Ingredients for Betty Crocker Chicken and Rice
Classic comfort in one pan: chicken, rice, and creamy sauce come together effortlessly.
| Ingredient | Amount | Notes |
|---|---|---|
| Boneless Skinless Chicken Thighs 🍗 | 1 ½ lb | Patted dry for even browning |
| Long-Grain White Rice 🍚 | 1 ½ cups | Uncooked, rinsed thoroughly |
| Chicken Broth 🥣 | 2 ½ cups | Low-sodium preferred for control |
| Cream of Chicken Soup 🍲 | 1 can | Condensed, undiluted |
| Unsalted Butter 🧈 | 2 tbsp | Divided for cooking and finishing |
| Yellow Onion 🧅 | 1 whole | Medium, finely diced |
| Garlic Cloves 🧄 | 3 cloves | Minced for maximum flavor |
| Dried Thyme 🌿 | 1 tsp | Crushed between fingers to release oils |
| Dried Parsley 🍃 | 1 tsp | For color and freshness |
| Kosher Salt 🧂 | 1 tsp | Diamond Crystal preferred for even seasoning |
| Ground Black Pepper 🌶️ | ½ tsp | Freshly ground for best results |
| All-Purpose Flour 🌾 | ¼ cup | For light thickening of sauce |
| Whole Milk 🥛 | ½ cup | Full-fat for creaminess |
| Frozen Peas 🌱 | ¾ cup | Thawed and drained (optional but classic) |
The chicken thighs are non-negotiable here—bone-in loses too much moisture during cooking, and breasts dry out. Costco has great boneless, skinless thighs in bulk (freeze what you don’t use). For the rice, long-grain white absorbs the broth best—jasmine or basmati work too but may need a splash more liquid. Always rinse it first to remove excess starch.
No cream of chicken soup? Cream of mushroom works fine, or whisk together 1 cup milk + 2 tbsp flour + 1 tsp bouillon. Fresh garlic and onion are ideal, but 1 tsp each of powdered gets you close in a pinch. The peas are optional but add that classic Betty Crocker touch—frozen works perfectly (just thaw and drain first).
Leftovers taste even better the next day. Store in an airtight container for up to 4 days in the fridge, or freeze for 3 months. Reheat gently on the stove with a splash of broth to restore creaminess.
Why You’ll Love This Recipe
- One Pan Magic: I toss everything in one dish—chicken, rice, broth—and let the oven do the work. No babysitting, no fuss.
- Creamy Comfort: The cream of chicken soup and butter create this ridiculous richness that coats every bite. I’ll be real: it’s the kind of flavor that makes you go back for seconds.
- Weeknight Hero: Honestly, this is my Tuesday night lifesaver—ready before the kids finish their homework, and just as good reheated the next day.
- Budget Friendly: Chicken thighs and pantry staples keep it cheap, but it tastes like I spent hours. Between us, it’s my secret for feeding four without breaking the bank.
Step-by-Step Instructions for Chicken and Rice
This classic one-dish method delivers comfort in every bite with minimal effort.
Step 1: Sear and Season the Chicken
Pat the 1.5 lb boneless skinless chicken thighs completely dry with paper towels. Season both sides generously with 1 tsp kosher salt and 0.5 tsp ground black pepper. I always use freshly ground pepper for the best aroma and flavor.
Heat 1 tbsp unsalted butter in a large skillet over medium-high heat until it stops foaming. Add the chicken thighs and sear for 4-5 minutes per side until deep golden brown and cooked through. You’ll know they’re ready to flip when they release easily from the pan.
Transfer the chicken to a plate and tent with foil to keep warm. Leave that flavorful butter and rendered juices in the skillet—it’s the foundation for your sauce.
Step 2: Build the Flavor Base
In the same skillet, melt the remaining 1 tbsp unsalted butter over medium heat. Add the finely diced yellow onion and cook for 3-4 minutes until it becomes translucent and just starts to turn golden at the edges.
Add the minced garlic cloves and cook for 30 seconds until fragrant. Stir in the 1 can cream of chicken soup, 1 tsp dried thyme, and 1 tsp dried parsley. I crush the thyme between my fingers as I add it to release its aromatic oils.
Sprinkle the 0.25 cup all-purpose flour over the mixture and whisk constantly for 1-2 minutes to cook out the raw flour taste. This creates a smooth, velvety base for your sauce.
Step 3: Combine and Simmer
Slowly pour in the 2.5 cups chicken broth and 0.5 cup whole milk, whisking constantly to prevent lumps. Bring the mixture to a gentle simmer over medium heat.
Stir in the 1.5 cups long-grain white rice and 0.75 cup frozen peas. Return the chicken thighs to the skillet, nestling them into the rice mixture. The peas will thaw as the dish cooks, so no need to pre-thaw.
Reduce heat to low, cover, and let it simmer for 20-25 minutes until the rice is tender and has absorbed most of the liquid. Check at the 20-minute mark—the rice should be tender with no chalky center and the chicken should register 165°F on an instant-read thermometer.
Step 4: Rest and Serve
Remove from heat and let the dish rest, covered, for 5-10 minutes. This allows the rice to fully absorb any remaining liquid and the flavors to meld together beautifully.
Fluff the rice gently with a fork and adjust seasoning if needed. The chicken should be fall-apart tender at this point, with the rice perfectly cooked and the sauce thick and creamy. Serve hot, with the chicken thighs either whole or shredded into the rice.
Pro Tips For Making Betty Crocker Chicken And Rice
- Brown the chicken first: Sear the boneless skinless chicken thighs in butter until golden before adding liquids—I learned this the hard way after making pale, bland chicken too many times.
- Use warm broth: Heat the chicken broth before mixing it with the cream of chicken soup, or you’ll end up with a greasy, separated sauce that never fully incorporates.
- Rinse the rice: Give the long-grain white rice a quick rinse to remove excess starch, which prevents the final dish from turning gummy.
- Skip the stirring: Resist the urge to stir the rice while it simmers, as breaking the grains ruins the texture—cover it and let it steam undisturbed for 20 minutes.
Essential Equipment for This Dish
Essential Cookware
You’ll need a large, heavy skillet with a tight-fitting lid—I swear by my 12-inch Lodge cast iron for even heat distribution. It handles the searing and simmering beautifully without hot spots. The lid is crucial for trapping steam to cook the rice perfectly. 🔥
Precision Tools
A good instant-read thermometer is non-negotiable. I use the ThermoWorks ThermoPop for $29—it gives accurate readings in 3-4 seconds. You’ll also want a wooden spoon for stirring and a whisk for smoothing the sauce.
Prep Helpers
Invest in a sharp chef’s knife (my 8-inch Wüsthof is my ride-or-die) for dicing the onion. A microplane makes quick work of the garlic. These tools make prep faster and more precise, which matters when you’re working with medium-high heat.
Serving Essentials
A rice paddle or wide spatula helps fluff the finished dish without mashing the grains. I also keep small ramekins nearby for holding prepped ingredients—it keeps my workspace organized. This dish comes together fast once it starts cooking. 💡
Optional Upgrades
If you’re making this often, consider a splatter screen for the searing step—it keeps your stovetop clean. A second skillet lets you prep the next batch while the first rests. These aren’t essential but make the process smoother.
Nutrition Facts
Frequently Asked Questions
Can I use chicken breasts instead of thighs?
You can, but thighs stay juicier during the 20-25 minutes simmering. If using breasts, reduce cooking time to 15-18 minutes and check internal temp reaches 165°F to prevent dryness.
What if my rice is still firm after 25 minutes?
Add 1/4 cup hot broth, cover, and cook 5 more minutes on low heat. Ensure liquid fully covers rice before simmering. Old rice may need extra time.
Can I make this ahead of time?
Yes! Prepare completely, cool, and refrigerate up to 2 days. Reheat gently on stove with 2 tbsp broth to restore creaminess. Avoid microwave to prevent dry rice.
How do I make it creamier?
Stir in 1/4 cup sour cream or 1/2 cup shredded cheddar at the end. For extra richness, use whole milk instead of low-fat in the sauce.

- Chuy’s Green Chili Rice Copycat Recipe: Spicy Southwest Flavor in Every Bite - September 25, 2026
- Beaten Rice Recipe: Fluffy Grains With Nutty Depth - September 25, 2026
- Machboos Rice Recipe: Bahraini Spiced One-Pot Tradition - September 25, 2026