
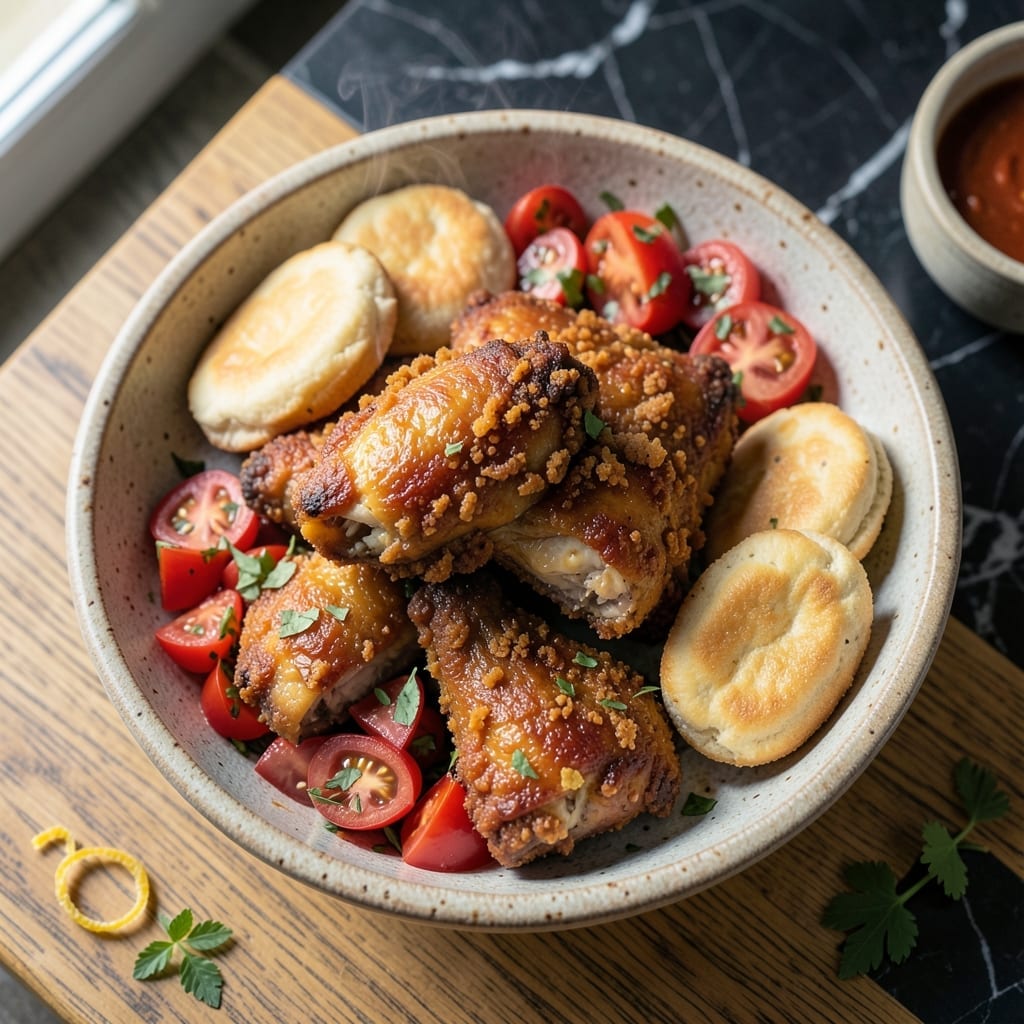
Achieving a crispy coating on chicken doesn’t require complicated techniques or special equipment. This method delivers homestyle flavor with minimal effort and maximum satisfaction.
The secret lies in using Bisquick to create a perfectly seasoned, golden crust that stays crispy without becoming greasy. With just a few pantry staples and 30 minutes, you can have restaurant-quality results at home.
Each piece emerges golden brown, with a texture that shatters at the first bite while keeping the meat inside juicy and tender. The coating clings beautifully, ensuring every mouthful delivers that signature crunch.
Serve hot for the best experience, as the contrast between the crispy exterior and moist interior is at its peak right out of the oven.
Ingredients for Bisquick Chicken
Pantry staples come together for a golden, crispy coating that shatters with every bite.
| Ingredient | Amount | Notes |
|---|---|---|
| Chicken Thighs 🍗 | 2 lb | Boneless, skinless, patted dry |
| Bisquick Baking Mix 🥣 | 2 cups | Original or buttermilk variety |
| Large Eggs 🥚 | 2 whole | Beaten for binding |
| Milk 🥛 | ¾ cup | Whole milk for richness |
| Garlic Powder 🧄 | 1 tsp | For savory depth |
| Onion Powder 🧅 | 1 tsp | Balances the seasoning |
| Paprika 🌶️ | 1 tsp | Sweet or smoked for color |
| Salt 🧂 | 1 tsp | Kosher or sea salt |
| Black Pepper 🌶️ | ½ tsp | Freshly ground preferred |
| Vegetable Oil 🫒 | ½ cup | For frying, high smoke point |
| All-Purpose Flour 🌾 | ¼ cup | For extra crispiness |
| Butter 🧈 | 2 tbsp | Melted, for added flavor |
The chicken is the foundation here. Boneless, skinless thighs stay juicier than breasts—look for uniform thickness so they cook evenly. Bisquick is non-negotiable for that signature crunch (the original or buttermilk box works best). Most grocery stores carry it in the baking aisle. For the oil, vegetable or canola handles the high heat without burning.
No Bisquick? Self-rising flour plus a pinch of baking powder gets you close. Out of milk? Buttermilk or even water works in a pinch (though the richness suffers). Want extra flavor? Swap the paprika for Cajun seasoning or add a dash of cayenne. The egg wash can be replaced with mayonnaise for an even crispier crust.
The coating keeps best on chicken used within 2 days of purchase. Leftovers? Reheat in the oven at 350°F for 10-12 minutes to restore crispiness. Don’t microwave—it’ll turn soggy. Store Bisquick in a cool, dry place for up to 6 months.
Why You’ll Love This Recipe
- I’ll be real: chicken thighs are cheap, and this recipe turns them into a meal that feels special without breaking the bank.
- One Bowl Wonder: I just dump Bisquick, eggs, milk, and garlic powder in a bowl—no fancy prep work, just mix and coat the thighs.
- Crispy Garlic Bite: That Bisquick crust gets golden and flaky with a punch of garlic that makes every bite irresistible.
- Weeknight Hero: Honestly, this is my Tuesday night lifesaver—ready before the kids finish their homework.
Step-by-Step Instructions for Bisquick Chicken
This proven method delivers golden, crispy results with minimal effort and maximum flavor.
Step 1: Prepare and Season the Chicken Thighs
Pat the 2 lb Chicken Thighs completely dry with paper towels—this removes surface moisture that would prevent crispiness. Trim any excess fat or skin if necessary, though the skin-on version will yield an extra-crispy texture.
Season both sides evenly with 1 tsp Salt, 0.5 tsp Black Pepper, 1 tsp Garlic Powder, 1 tsp Onion Powder, and 1 tsp Paprika. These spices create a well-balanced foundation that enhances the Bisquick coating. Set aside while you prepare the batter.
Step 2: Create the Bisquick Battering Station
In a large bowl, whisk together 2 cups Bisquick Baking Mix and 0.25 cup All-Purpose Flour until fully combined. This blend provides the perfect crispy texture with a slight crumble. In a separate bowl, beat 2 whole Large Eggs with 0.75 cup Milk until smooth—this creates the binding liquid for the coating.
Dip each seasoned chicken thigh into the egg-milk mixture, letting any excess drip off. Then dredge it thoroughly in the Bisquick-flour mixture, pressing gently to ensure full coverage. Place the coated thighs on a wire rack set over a baking sheet to allow any excess to drip off.
Step 3: Pan-Fry to Golden Perfection
Heat 0.5 cup Vegetable Oil and 2 tbsp Butter in a large, heavy skillet over medium-high heat until the butter melts and the oil shimmers. The combination of oil and butter creates a rich flavor and high smoke point for even cooking.
Carefully place the coated chicken thighs in the hot oil, being careful not to overcrowd the pan—work in batches if necessary. Fry for 6-7 minutes per side until the coating is deep golden brown and the internal temperature reaches 165°F. The coating should be crisp and audible when tapped with a spatula.
Step 4: Drain and Rest for Maximum Crispiness
Transfer the cooked chicken to a paper towel-lined plate to drain excess oil. Do not stack the pieces—this would cause steam to build up and soften the crispy coating. Instead, arrange them in a single layer to maintain airflow.
Let the chicken rest for 5 minutes before serving. This brief rest allows the juices to redistribute within the meat while the coating remains crisp. The result is tender, flavorful chicken with a perfectly golden exterior that holds up to serving.
Pro Tips For Making Bisquick Chicken
- Preheat the Oil: I learned this the hard way—cold oil makes the Bisquick coating absorb too much grease. Heat your oil to 350°F before adding the chicken for that perfect crisp.
- Pat Chicken Dry: Wet chicken ruins the coating’s crunch. Use paper towels to dry the thighs completely before dipping in the Bisquick mix.
- Rest Before Frying: After coating, let the chicken rest for 5 minutes. This helps the Bisquick cling better and prevents it from sliding off in the pan.
- Boost the Seasoning: Sounds weird, but it works: add an extra teaspoon of garlic powder to the Bisquick mix. The plain mix needs the extra flavor kick.
Essential Equipment for This Recipe
Skillet Selection
I always reach for my 12-inch cast iron skillet—it retains heat beautifully and develops that perfect sear. A heavy-bottomed stainless steel skillet works too, but avoid nonstick as the high heat can damage the coating.
Thermometer Essentials
An instant-read thermometer like the ThermoWorks ThermoPop ensures your chicken hits 165°F without overcooking. I check multiple pieces, especially if they vary in thickness. 🌡️
Dredging Setup
Use shallow, wide bowls for your wet and dry mixtures—9-inch pie plates are ideal. A wire rack over a baking sheet catches drips while letting air circulate for an even crisper coating.
Oil Management
For frying, a splatter screen is your best friend. Pair it with a slotted metal spatula to flip chicken without piercing the coating. I keep a small bowl nearby for excess oil between batches.
Draining Station
Line a baking sheet with a wire rack and paper towels. This setup lets oil drain while keeping the chicken elevated, so steam doesn’t soften that crispy Bisquick crust. 💪
Extras for Success
A pair of tongs helps with dredging, and a paper towel roll at arm’s reach manages grease. These small tools make the process smoother and your cleanup easier.
Nutrition Facts
Frequently Asked Questions
Can I use chicken breasts instead of thighs?
Yes, but adjust cooking time to 5-6 minutes per side since breasts cook faster. Thighs stay juicier, but breasts work in a pinch. Just monitor the internal temp to hit 165°F.
Why add flour to the Bisquick coating?
The extra 0.25 cup flour creates a thicker, crispier crust. It helps the coating cling better and adds structure. Skip it only if you prefer a lighter texture.
How do I keep the coating from falling off?
Pat chicken completely dry before dredging and let it rest 5 minutes after coating. Press the mixture firmly onto the meat. Avoid moving it too much while frying.
Can I bake this instead of frying?
Yes! Bake at 400°F for 20-25 minutes, flipping halfway. Use a wire rack on a baking sheet for even browning. The texture will be slightly less crispy.

- Jollof Rice Sauce Recipe: West African Tomato and Spice Infusion - September 25, 2026
- Japanese Rice Soup Recipe: Umami-Rich Comfort in a Bowl - September 25, 2026
- Homemade Cream Of Rice Recipe: Silk-Smooth Breakfast in Minutes - September 25, 2026