
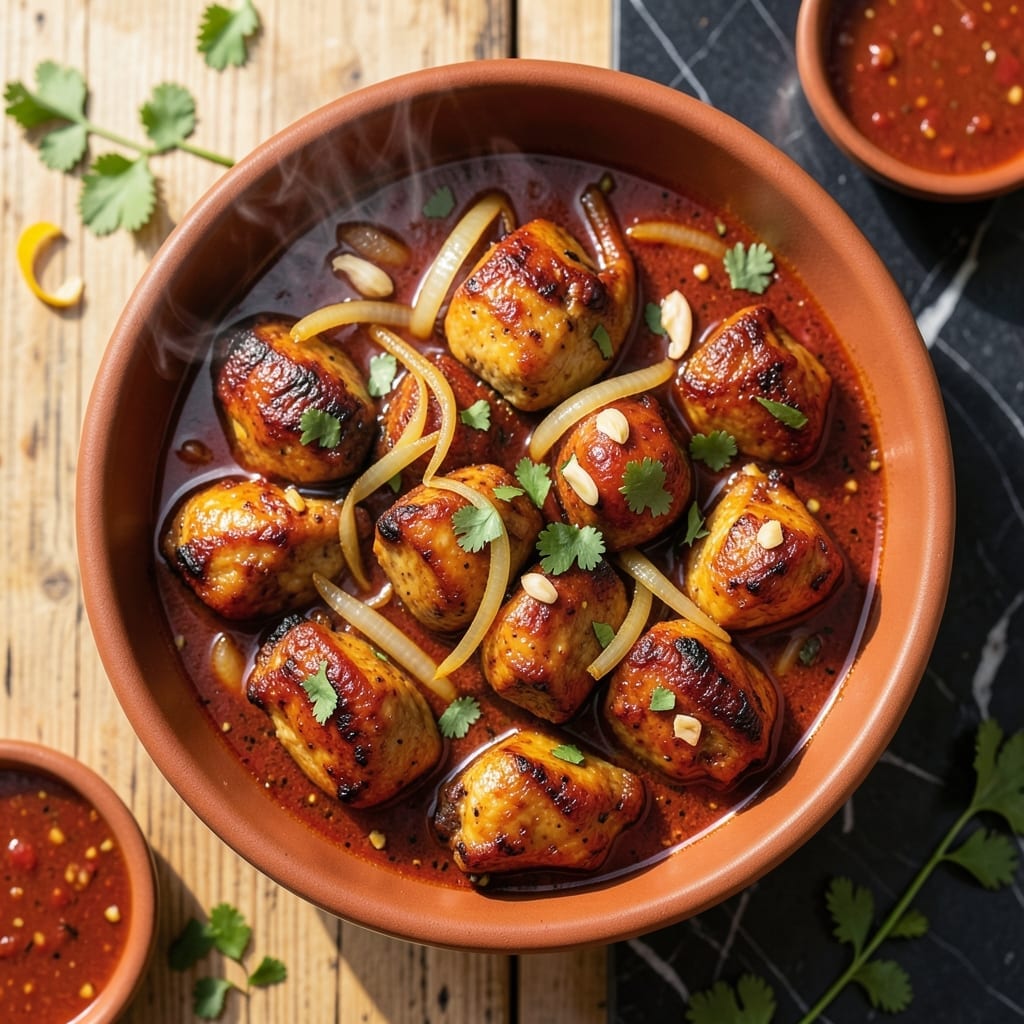
This Bombay-style curry delivers tender chicken in a richly spiced sauce that’s aromatic without being overwhelming. The secret lies in the balance of warm spices and slow cooking.
I’ve refined this method to ensure the chicken stays succulent while absorbing all the complex flavors. The sauce thickens beautifully, coating each piece in a velvety, fragrant blanket.
What makes this dish special is its depth—layered spices, caramelized onions, and a touch of tang from tomatoes create a curry that’s both comforting and sophisticated.
Ready in under an hour, it’s perfect for a weeknight dinner that feels like a restaurant meal. Here’s how to make it.
Ingredients for Bombay Chicken Curry
Pantry staples and fresh aromatics create this deeply flavored dish with ease.
| Ingredient | Amount | Notes |
|---|---|---|
| Boneless Chicken Thighs 🍗 | 1 ½ lb | Skin-on for extra flavor |
| Yellow Onion 🧅 | 2 whole | Thinly sliced for caramelization |
| Garlic Cloves 🧄 | 6 cloves | Minced for depth of flavor |
| Fresh Ginger 🌿 | 1 tbsp | Grated or minced finely |
| Canned Diced Tomatoes 🍅 | 1 can | 14.5 oz can, undrained |
| Tomato Paste 🍅 | 2 tbsp | For rich sauce base |
| Garam Masala 🌶️ | 1 tbsp | Essential spice blend |
| Ground Cumin 🌿 | 1 tsp | Toasted for warmth |
| Ground Coriander 🌿 | 1 tsp | Balances the spices |
| Turmeric Powder 🌶️ | ½ tsp | For golden color |
| Cayenne Pepper 🔥 | ¼ tsp | Adjust to heat preference |
| Heavy Cream 🥛 | ½ cup | Full-fat for richness |
| Vegetable Oil 🫒 | 3 tbsp | Neutral flavor for cooking |
| Fresh Cilantro 🌿 | ¼ cup | Chopped for garnish |
| Salt 🧂 | 1 ½ tsp | Kosher or sea salt |
The chicken is key here. Thighs stay tender where breasts might dry out—look for skin-on, bone-in if you can find them (the skin renders down beautifully). For the spices, Penzeys or bulk bins ensure freshness. Garam masala can vary by brand, so taste as you go. Indian grocery stores often carry the most authentic blends, worth seeking out if you’re near one.
No garam masala? Mix equal parts cumin, coriander, and cinnamon with half as much cardamom and cloves—close enough for a weeknight. Fresh ginger is non-negotiable though (the jarred stuff lacks punch). Heavy cream can be half-and-half in a pinch, but it won’t be as rich. For a lighter version, coconut milk works surprisingly well.
This curry tastes even better the next day—flavors meld overnight. Keeps 4-5 days refrigerated, freezes for 3 months. Reheat gently to avoid breaking the sauce. Always garnish with fresh cilantro just before serving.
Why You’ll Love This Recipe
- I’ll be real: the flavors deepen overnight, so leftovers taste even richer.
- One Pan Wonder: I love that everything cooks together—chicken, onions, and tomatoes simmer in one pot.
- Aromatic Bomb: The garlic, ginger, and spices fill my kitchen with the most intoxicating scent while it cooks.
- Feeds a Crowd: Honestly, it’s my go-to when friends drop by unexpectedly—always a hit.
Step-by-Step Instructions for Bombay Chicken Curry
This method delivers perfectly tender chicken in a rich, aromatic sauce every time.
Step 1: Sear the Chicken Thighs
Heat 3 tbsp vegetable oil in a large, heavy pot over medium-high heat. While the oil heats, pat the 1.5 lb boneless chicken thighs dry with paper towels and season both sides with 1.5 tsp salt.
Add the chicken to the hot oil in a single layer, working in batches if necessary to avoid crowding. Sear for 4-5 minutes per side until deep golden brown. The pieces should release easily from the pot when ready to flip.
Transfer the seared chicken to a plate and set aside. This initial sear builds deep flavor and ensures the meat stays juicy during the simmering process.
Step 2: Build the Aromatic Base
In the same pot, reduce heat to medium and add 2 whole yellow onion, thinly sliced. Cook for 6-8 minutes, stirring occasionally, until soft and golden brown at the edges.
Add 6 cloves minced garlic cloves and 1 tbsp fresh ginger, stirring constantly for 1 minute until fragrant. Be careful not to let the garlic burn—it should turn just slightly golden.
Stir in 2 tbsp tomato paste, 1 tbsp garam masala, 1 tsp ground cumin, 1 tsp ground coriander, 0.5 tsp turmeric powder, and 0.25 tsp cayenne pepper. Cook for 2 minutes, stirring constantly, until the spices release their aromas and the mixture darkens slightly.
Step 3: Simmer the Sauce with Chicken
Pour in 1 can canned diced tomatoes with their juices, scraping up any browned bits from the bottom of the pot. Return the seared chicken and any accumulated juices to the pot, nestling the pieces into the sauce.
Bring the mixture to a gentle simmer, then reduce heat to low. Cover and let it cook for 25-30 minutes, stirring occasionally, until the chicken is tender and cooked through.
Step 4: Finish with Cream and Garnish
Remove the pot from heat and stir in 0.5 cup heavy cream. The sauce should turn a rich, creamy shade and coat the back of a spoon.
Taste and adjust seasoning if needed, though the initial salt should be sufficient. Sprinkle with 0.25 cup chopped fresh cilantro just before serving to add a bright, fresh contrast to the deep, spiced flavors.
Let the curry rest for 5 minutes off the heat to allow the flavors to meld fully. Serve hot with rice or naan to soak up the luxurious sauce.
Pro Tips For Making Bombay Chicken Curry
- Brown the Chicken Well: Sear the boneless thighs on medium-high heat until deeply browned—about 4-5 minutes per side. I learned this the hard way; pale chicken means weak flavor in the final curry.
- Bloom the Spices: After sautéing onion, garlic, and ginger, add your spices and toast them for 30 seconds in the oil. Sounds weird, but it actually changes the outcome, waking up the flavors before the tomatoes go in.
- Skip the Watery Tomatoes: Drain the canned diced tomatoes well, or even better, use crushed tomatoes. My grandmother swore by this, and she was right: the curry thickens faster and tastes richer.
- Simmer Uncovered: Once everything’s in the pot, let it simmer uncovered for 15-20 minutes. This reduces the sauce just enough to coat the chicken without turning it into soup.
Pro Cooking Tips for Perfect Results
Spice Blooming Technique
Always toast your spices in oil before adding liquids. I cook 1 tbsp garam masala, 1 tsp cumin, and 1 tsp coriander for 2 minutes until fragrant. This releases essential oils, deepening the flavor profile of your curry. 🌡️
Low and Slow Simmer
After adding tomatoes and chicken, maintain a gentle simmer. Too high heat can toughen the meat. I keep it at low heat for 25-30 minutes, stirring occasionally to prevent sticking.
Cream Integration
Always temper the cream before adding to prevent curdling. I remove the pot from heat, let it sit for 1 minute, then stir in 0.5 cup heavy cream slowly. This ensures a silky, stable sauce.
Chicken Selection
Use skin-on, bone-in thighs if available. The skin renders fat that enriches the sauce. I pat them dry before searing to achieve that deep golden brown crust that locks in juices.
Flavor Layering
Don’t rush the onion caramelization. I cook 2 whole yellow onion for 6-8 minutes until golden. This sweet base balances the spices beautifully. The garlic and ginger should follow, cooking just until fragrant.
Resting Time
Let the finished curry rest off heat for 5 minutes before serving. This allows the flavors to meld and the sauce to thicken slightly. I always taste and adjust salt at this stage if needed. 💡
Nutrition Facts
Frequently Asked Questions
Can I use chicken breast instead of thighs?
You can, but thighs are ideal for their fat content. Breast meat dries out more easily during the 25-30 minutes simmer. If using breasts, reduce cooking time to 15-20 minutes and check for doneness early.
How do I make this less spicy?
Simply reduce or omit the 0.25 tsp cayenne pepper. The other spices provide plenty of flavor without heat. For extra mildness, seed any fresh chili peppers before adding.
What should I serve with this curry?
Basmathi rice or warm naan are classic choices. The rice soaks up the rich sauce beautifully. For a lighter option, try cauliflower rice or a side of cucumber raita to balance the spices.
Can I make this ahead of time?
Yes! The flavors actually improve overnight. Store in an airtight container for up to 4-5 days in the fridge or freeze for 3 months. Reheat gently to avoid separating the sauce.

- Jollof Rice Sauce Recipe: West African Tomato and Spice Infusion - September 25, 2026
- Japanese Rice Soup Recipe: Umami-Rich Comfort in a Bowl - September 25, 2026
- Homemade Cream Of Rice Recipe: Silk-Smooth Breakfast in Minutes - September 25, 2026