
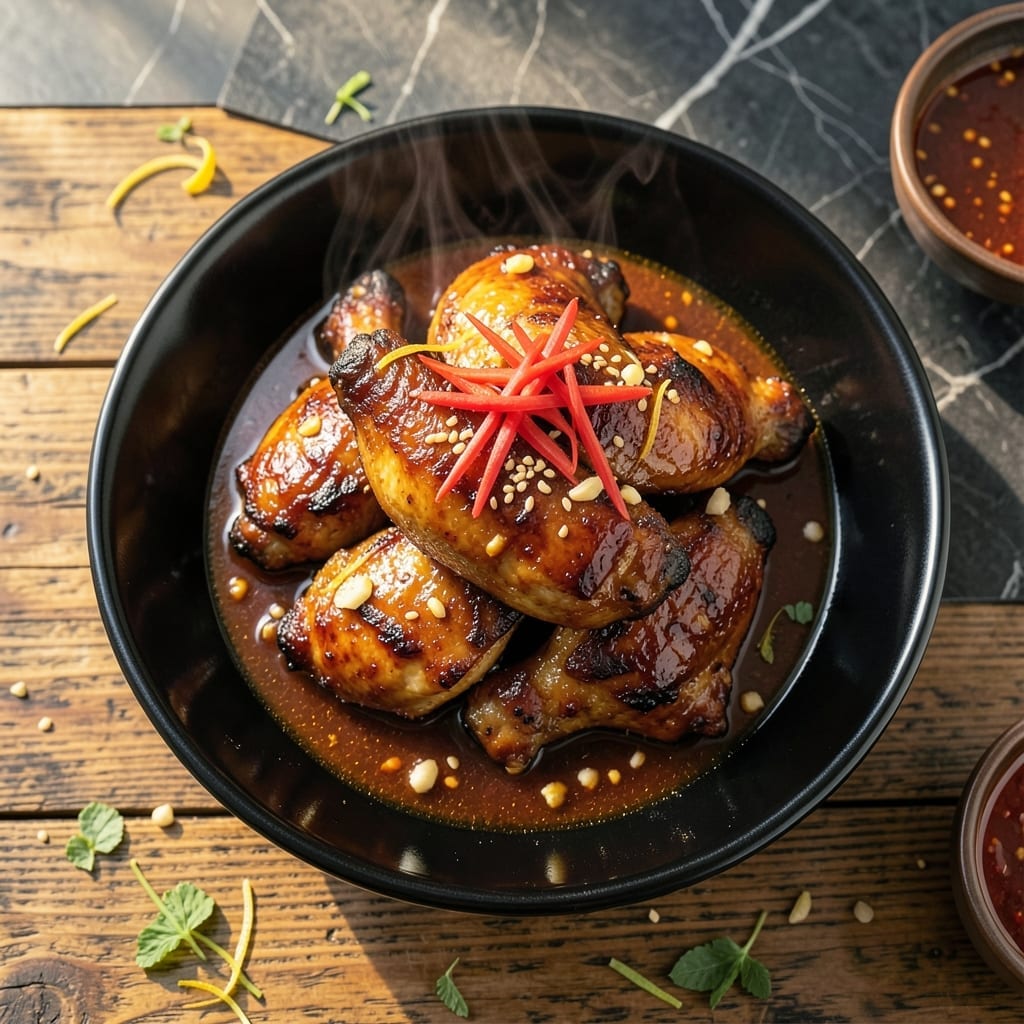
Achieving that signature Korean-style crispiness at home is entirely possible with this proven double-frying technique. The method ensures a shatteringly crispy exterior while keeping the meat juicy and tender inside.
This recipe transforms ordinary chicken into restaurant-quality results through precise marinating and frying steps. The secret lies in the two-stage frying process, which creates an ultra-crispy crust that stays crunchy even after coating.
You’ll end up with pieces of chicken that are golden, crispy, and perfectly seasoned, with a sauce that clings to every bite. The balance of sweet, spicy, and savory flavors makes this dish irresistibly addictive.
Serve with pickled radish and steamed rice for the full experience. Let’s get started.
Ingredients for Bon Chon Chicken
Transform ordinary chicken with this carefully curated list of ingredients for restaurant-quality results.
| Ingredient | Amount | Notes |
|---|---|---|
| Chicken Thighs 🍗 | 2 lb | Boneless, skin-on, cut into bite-sized pieces |
| Soy Sauce 🫒 | ½ cup | Low-sodium preferred for balance |
| Brown Sugar 🍚 | ½ cup | Packed for sweetness depth |
| Garlic Cloves 🧄 | 6 cloves | Minced finely for even distribution |
| Fresh Ginger 🌿 | 2 tbsp | Grated for maximum flavor infusion |
| Gochujang 🌶️ | 3 tbsp | Korean chili paste for authentic heat |
| Rice Vinegar 💧 | 2 tbsp | For tangy brightness in sauce |
| Sesame Oil 🫒 | 2 tbsp | Toasted for nutty aroma |
| Cornstarch 🌾 | ¾ cup | For ultra-crispy coating |
| All-Purpose Flour 🌾 | ½ cup | Combined with cornstarch for texture |
| Baking Powder 🧂 | 1 tsp | Keeps coating light and airy |
| Kosher Salt 🧂 | 1 tsp | Diamond Crystal preferred for consistency |
| Black Pepper 🌶️ | ½ tsp | Freshly ground for best flavor |
| Vegetable Oil 🫒 | 4 cups | For deep frying, neutral flavor required |
| Green Onions 🧅 | 4 whole | Thinly sliced for garnish |
The chicken thighs are non-negotiable for authentic texture—bone-in, skin-on works but boneless skin-on cooks more evenly. Korean markets or H Mart will have gochujang, but larger Whole Foods locations carry it too. Look for Sempio or Chung Jung One brands for consistent heat and depth. Fresh ginger and garlic are essential—powdered versions won’t deliver the same punch. The vegetable oil must have a high smoke point; peanut oil is a great alternative if you prefer its flavor.
No gochujang? Sriracha plus 1 tsp miso paste gets you 80% there. Need a gluten-free version? Swap soy sauce for tamari and use rice flour instead of all-purpose. Brown sugar substitutes like coconut sugar work, but may alter the caramelization slightly. The cornstarch is critical—do not substitute with flour alone, as it won’t achieve the same crispiness. For extra crunch, some chefs add a touch of baking soda to the dredge.
Marinate the chicken for at least 4 hours (overnight is ideal) for maximum flavor penetration. The frying oil can be reused once if strained and stored properly—cool completely and refrigerate in a sealed container for up to 1 week. Leftovers? They’ll keep 3-4 days in the fridge, but the coating loses crispness with each reheat. Best eaten immediately after the second fry.
Why You’ll Love This Recipe
- One Pan Wonder: I just toss the thighs with soy sauce, brown sugar, and minced garlic, then let the oven do the work.
- Sweet & Sticky: That caramelized brown sugar with garlic and ginger creates a glaze I could drink with a straw.
- Crowd Pleaser: Honestly, it’s the only dish my picky nephew and spice-loving sister both fight over.
- Budget Hero: Chicken thighs stay cheap, and this recipe turns them into something restaurant-worthy for pennies.
Step-by-Step Instructions for Korean-Style Double Fried Chicken
Master the technique that creates shatteringly crisp chicken with a sweet-spicy glaze every time.
Step 1: Marinate the Chicken Thighs
Combine the 2 lb Chicken Thighs with 0.5 cup Soy Sauce, 0.5 cup Brown Sugar, minced 6 cloves Garlic Cloves, 2 tbsp Fresh Ginger, 3 tbsp Gochujang, 2 tbsp Rice Vinegar, and 2 tbsp Sesame Oil in a large bowl. Mix thoroughly to ensure each piece is fully coated.
Cover and refrigerate for at least 4 hours, or preferably overnight. This extended marination allows the flavors to penetrate deeply and the brown sugar to begin tenderizing the meat. The mixture should appear glossy and thickly coated when ready.
Step 2: Prepare the Crispy Coating
In a separate bowl, whisk together 0.75 cup Cornstarch, 0.5 cup All-Purpose Flour, 1 tsp Baking Powder, 1 tsp Kosher Salt, and 0.5 tsp Black Pepper until fully combined. The baking powder creates micro-bubbles in the coating, ensuring an extra-light, airy crispness.
Remove the chicken from the marinade, allowing excess to drip off, then dredge each piece thoroughly in the dry mixture. Press gently to adhere the coating evenly on all sides. Place the coated pieces on a wire rack to rest for 10 minutes—this helps the coating set before frying.
Step 3: First Fry for Structure
Heat 4 cups Vegetable Oil in a heavy pot to 325°F. Working in batches to avoid crowding, carefully lower the chicken into the oil. Fry for 6-8 minutes, turning occasionally, until the coating is set and just beginning to turn light golden.
Drain on a wire rack set over a baking sheet. This first fry at a lower temperature cooks the chicken through and establishes the coating’s structure without over-browning. The pieces should feel firm but not yet fully crisp when removed from the oil.
Step 4: Second Fry for Maximum Crispness
Increase the oil temperature to 375°F. Return the chicken to the hot oil in batches and fry for an additional 3-4 minutes until deep golden brown and ultra-crispy. The double-frying technique is essential for achieving that signature shatter.
Drain again on the wire rack. The coating should audibly crackle when touched and maintain its crispness even as the chicken cools slightly. This second fry at higher heat creates the final texture that makes this dish extraordinary.
Step 5: Garnish and Serve Immediately
While the chicken is hot, transfer to a serving platter. Thinly slice the 4 whole Green Onions and sprinkle generously over the top. The contrast of the cool, fresh green onions against the hot, crispy chicken completes the dish.
Serve immediately while the coating is at its peak crispness. The chicken should have a glossy, crackly exterior with tender, flavorful meat inside. Any leftover marinade can be simmered for 3 minutes and served as a dipping sauce.
Pro Tips For Making Bon Chon Chicken
- Double Fry for Crisp: Fry the chicken once at 325°F for 8 minutes, rest it, then fry again at 375°F for 3-4 minutes. I learned this the hard way—single frying leaves the coating soggy under the sauce.
- Grate the Ginger: Use a microplane for the fresh ginger instead of mincing it. Sounds weird, but it works: the fine texture blends seamlessly into the soy-brown sugar glaze.
- Skip the Skin Trimming: Leave the skin on the thighs—it renders down during frying and adds that signature Bon Chon richness. I used to trim it off until I realized the flavor was missing.
- Warm the Sauce: Heat the soy sauce, brown sugar, garlic, and ginger mixture for 2-3 minutes before tossing. Cold sauce clings unevenly and makes the coating gummy—my grandmother swore by this, and she was right.
Regional Styles of This bon chon chicken
Korean Original Style
In Korea, Bonchon typically uses a soy-garlic glaze that’s less sweet than Western versions. The sauce combines soy sauce, garlic, sesame oil, and honey for a balanced flavor. I’ve found adding 1 tbsp toasted sesame seeds to the glaze enhances the authentic taste. 🔥
American Adaptation
Stateside versions often amplify the sweetness with extra brown sugar or honey in the sauce. Some US locations use a spicier blend, adding 1-2 tbsp sriracha to the glaze. The crispiness level remains consistent, but the flavor profile leans sweeter to match local preferences.
Philippine Variation
In the Philippines, they sometimes incorporate calamansi juice into the marinade for a citrusy kick. The coating often includes rice flour for extra crunch. I noticed this version tends to be slightly less spicy, making it more kid-friendly.
Japanese Interpretation
Japanese adaptations frequently use panko breadcrumbs in the coating for added texture. The sauce might include mirin for a subtle sweetness. Some chefs add grated daikon radish to the marinade for a unique twist.
Spicy Challenge Version
For heat seekers, Korean locations offer a “Fire” version with doubled gochujang and added chili flakes. The sauce gets an extra 1 tbsp gochugaru (Korean chili powder). I recommend serving with extra pickled radish to balance the intense heat. 🌶️
Vegetarian Option
Some modern adaptations use cauliflower florets or tofu cubes instead of chicken. The marinade and coating remain similar, but frying time reduces to 3-4 minutes per batch. The result is surprisingly crispy and flavorful.
Nutrition Facts
Frequently Asked Questions
Why use two frying steps?
The first fry at 325°F cooks the chicken through, while the second at 375°F creates the ultra-crispy coating. This double-fry method ensures a shatteringly crisp exterior while keeping the meat juicy inside.
Can I use chicken breast instead of thighs?
Thighs are ideal for their fat content, which keeps the meat moist during frying. Chicken breast can work but may dry out more easily. If using breast, reduce the second fry time to 2-3 minutes to prevent overcooking.
How do I keep the coating crispy after frying?
Drain on a wire rack, not paper towels, to prevent steam from softening the coating. Serve immediately for maximum crispiness. If storing, reheat in a 375°F oven for 5-10 minutes to revive the crunch.
What if I don’t have gochujang?
Substitute with 1 tbsp sriracha plus 1 tsp miso paste for a similar flavor profile. The mix won’t be identical but will still deliver heat and depth to your sauce.

- Jollof Rice Sauce Recipe: West African Tomato and Spice Infusion - September 25, 2026
- Japanese Rice Soup Recipe: Umami-Rich Comfort in a Bowl - September 25, 2026
- Homemade Cream Of Rice Recipe: Silk-Smooth Breakfast in Minutes - September 25, 2026