
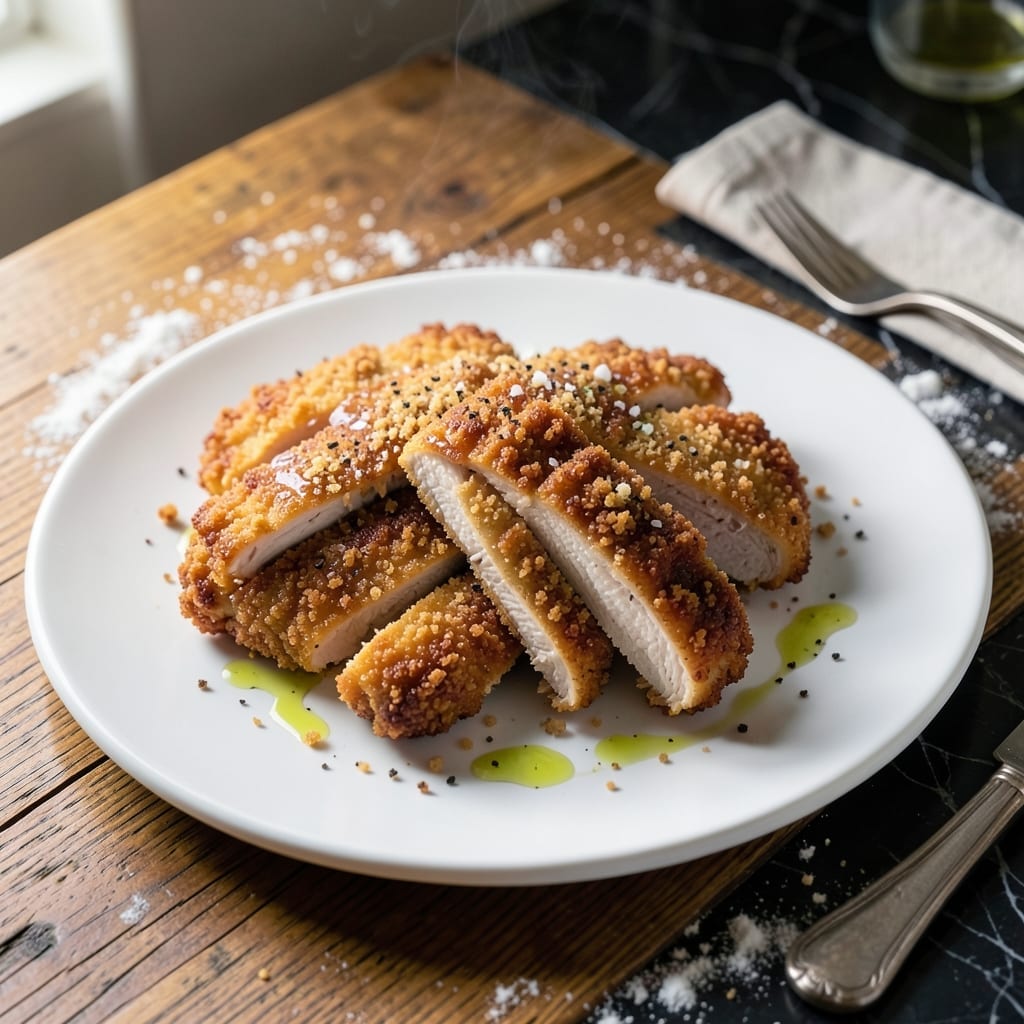
Achieving a crispy breaded coating without eggs is simpler than you think. This method uses everyday pantry staples to create a binding solution that holds breading perfectly to chicken.
The secret lies in a milk and flour slurry that replaces eggs entirely. It creates a tacky surface for breadcrumbs to adhere to, ensuring every piece emerges golden and crispy from the pan or oven.
I developed this technique after burning through several failed attempts. The result is chicken with a shatteringly crispy exterior and juicy interior that holds up to frying or baking.
Whether pan-fried or baked, this approach delivers restaurant-quality texture without the mess of traditional egg washes. The coating stays put through cooking and serving.
Ingredients for Breaded Chicken Recipe No Egg
Crispy breaded chicken without eggs starts with these pantry staples and a clever milk slurry.
| Ingredient | Amount | Notes |
|---|---|---|
| Boneless Skinless Chicken Breasts 🍗 | 1 ½ lb | Pounded to even thickness |
| All-Purpose Flour 🌾 | 1 cup | Divided for dredging and slurry |
| Whole Milk 🥛 | ½ cup | For egg-free binding slurry |
| Fine Dry Breadcrumbs 🍞 | 2 cups | Panko for extra crispiness |
| Kosher Salt 🧂 | 1 tsp | Plus more for seasoning |
| Freshly Ground Black Pepper 🌶️ | ½ tsp | Season to taste |
| Garlic Powder 🧄 | 1 tsp | For flavor depth |
| Onion Powder 🧅 | 1 tsp | Balances seasoning blend |
| Paprika 🌶️ | 1 tsp | Sweet or smoked variety |
| Neutral Cooking Oil 🫒 | ¾ cup | For pan-frying or baking |
| Unsalted Butter 🧈 | 2 tbsp | Optional for extra richness |
| Dried Parsley Flakes 🌿 | 1 tbsp | For color and garnish |
The chicken breasts are critical—pound them to even thickness (about ½-inch) so they cook uniformly. Costco or Sam’s Club offer great bulk options, but any supermarket’s organic or free-range works. For the breadcrumbs, panko from Kikkoman delivers superior crunch. The milk needs to be whole for proper binding—2% won’t cut it.
No whole milk? Half-and-half or evaporated milk work in a pinch. For gluten-free, swap all-purpose flour for rice flour or cornstarch at a 1:1 ratio. The paprika can be hot or smoked if you prefer a bolder flavor. Fresh herbs like thyme or rosemary can replace dried parsley—use one-third the amount.
Store raw chicken in the coldest part of the fridge for up to 2 days. Breadcrumbs keep in a sealed container for 6 months. Once cooked, this chicken stays crispy for 3-4 days refrigerated, or freeze for up to 3 months.
Why You’ll Love This Recipe
- No Fuss Coating: I skip the egg and just use milk to bind the breadcrumbs—still sticks perfectly, zero extra steps.
- Crispy Every Time: The flour and breadcrumb combo gives that golden crunch without any weird aftertaste.
- Weeknight Hero: I serve it with mashed potatoes or toss it in a salad—works for picky kids and fancy-ish dinners alike.
- Budget Stretch: Boneless breasts on sale plus pantry staples make this my go-to when I need to feed four for under ten bucks.
Step-by-Step Instructions for Breaded Chicken Without Egg
This method guarantees a golden, crispy coating using a simple milk-based slurry as the binder.
Step 1: Prepare the Chicken and Seasoning Blend
Begin by pounding the 1.5 lb boneless skinless chicken breasts to an even ½-inch thickness between sheets of plastic wrap. This ensures uniform cooking and prevents dry spots. Season both sides lightly with additional kosher salt and freshly ground black pepper—this first layer of seasoning penetrates the meat.
In a shallow dish, combine 1 cup all-purpose flour with 1 tsp kosher salt, 0.5 tsp freshly ground black pepper, 1 tsp garlic powder, 1 tsp onion powder, and 1 tsp paprika. Whisk thoroughly to distribute the spices evenly throughout the flour.
Step 2: Create the Milk Slurry and Bread the Chicken
Pour 0.5 cup whole milk into a second shallow dish. This will act as your egg substitute, providing the necessary moisture to help the coating adhere. Place 2 cups fine dry breadcrumbs in a third dish, breaking up any large pieces with your fingers for consistent texture.
Dredge each piece of chicken in the seasoned flour, pressing gently to ensure full coverage. Shake off any excess, then dip it into the whole milk, allowing any excess to drip back into the dish. Finally, press the chicken into the fine dry breadcrumbs, turning to coat completely. The breadcrumbs should cling evenly, creating a thick, textured layer.
Step 3: Pan-Fry for Maximum Crispiness
Heat 0.75 cup neutral cooking oil in a large, heavy skillet over medium-high heat until it shimmers but does not smoke—this indicates the oil is at the optimal frying temperature of about 350-375°F. To test, drop in a pinch of breadcrumbs; if it sizzles immediately, the oil is ready.
Carefully place the breaded chicken in the hot oil, working in batches if necessary to avoid crowding the pan. Fry for 4-5 minutes per side until the coating is deep golden brown and crispy. Maintain consistent heat throughout—if the oil cools, the chicken will absorb oil and become greasy rather than crisp.
Step 4: Finish with Butter and Rest
In the final 2 minutes of cooking, add 2 tbsp unsalted butter to the pan. As it melts, baste the chicken with the foaming butter to add an extra layer of richness and flavor. The butter will also contribute to the golden hue of the crust.
Transfer the cooked chicken to a wire rack set over a baking sheet to allow air circulation, which keeps the coating crisp. Let it rest for 5 minutes before serving. This brief rest allows the juices to redistribute, ensuring the meat stays moist and tender beneath the crispy exterior.
Step 5: Garnish and Serve Immediately
Sprinkle the chicken with 1 tbsp dried parsley flakes for a pop of color and a subtle herbaceous note. Serve immediately while the coating is at its crispiest—the contrast between the crunchy breadcrumbs and the juicy chicken is best experienced fresh from the pan.
For optimal results, avoid stacking the pieces, as this can cause the coating to steam and lose its crispness. Pair with a simple side salad or roasted vegetables to complete the meal.
Pro Tips For Making Breaded Chicken Recipe No Egg
- Dry the Chicken: Pat the chicken breasts completely dry with paper towels before dredging—I learned this the hard way after my first few batches turned out soggy instead of crispy.
- Warm the Milk: Take the whole milk out of the fridge 10 minutes before using; cold milk makes the breading clump and slide right off.
- Skip the Overcrowding: Leave at least an inch between pieces in the pan, or they’ll steam instead of brown—after burning three batches, I finally figured out spacing matters most.
- Double Dredge: Dip each piece in flour, then milk, then breadcrumbs, then back in milk and breadcrumbs again for a crust that actually stays put and crisps up right.
Storing and Reheating This Dish
Refrigerator Storage
Let your breaded chicken cool completely before storing—this prevents condensation from making the coating soggy. I place pieces in a single layer on a paper towel-lined plate, then transfer to airtight containers with parchment between layers. It keeps for 3-4 days at 40°F or below. ❄️
Freezer Storage
For longer storage, freeze cooked chicken on a baking sheet first to prevent sticking. Once solid, transfer to freezer-safe bags with all air pressed out. It maintains quality for 3 months. I learned the hard way that skipping the flash-freeze step leads to clumped, sad chicken.
Oven Reheating
My favorite method for reviving crispiness: preheat oven to 400°F and place chicken on a wire rack over a baking sheet. Heat for 10-12 minutes until the internal temperature reaches 165°F. The rack allows air circulation to crisp all sides evenly.
Air Fryer Reheating
For quick results, arrange pieces in a single layer in your air fryer basket. Set to 375°F and heat for 4-5 minutes, flipping halfway. No need to preheat—just check that the coating turns golden again. This method works best for smaller batches. 🔥
Microwave Reheating
When time is tight, place chicken on a microwave-safe plate with a paper towel underneath. Heat on 50% power for 1-2 minutes, checking frequently. The paper towel absorbs moisture, but expect slightly less crispiness than other methods.
Nutrition Facts
Frequently Asked Questions
Why skip eggs in breading?
Eggs can be problematic for allergies or dietary restrictions. The milk slurry here creates an equally effective binder that holds breadcrumbs just as well.
Can I use a different liquid?
Yes! Buttermilk or evaporated milk work well for extra richness. Avoid water or low-fat milk—they lack the fat needed for proper adhesion.
How do I prevent the coating from falling off?
Press firmly when coating and let the milk slurry sit for 1-2 minutes before breading. Also, ensure oil is hot enough before frying.
Can this be baked instead of fried?
Bake at 400°F for 20-25 minutes on a wire rack for even crispiness. Use a light spray of oil for extra browning.

- Jollof Rice Sauce Recipe: West African Tomato and Spice Infusion - September 25, 2026
- Japanese Rice Soup Recipe: Umami-Rich Comfort in a Bowl - September 25, 2026
- Homemade Cream Of Rice Recipe: Silk-Smooth Breakfast in Minutes - September 25, 2026