
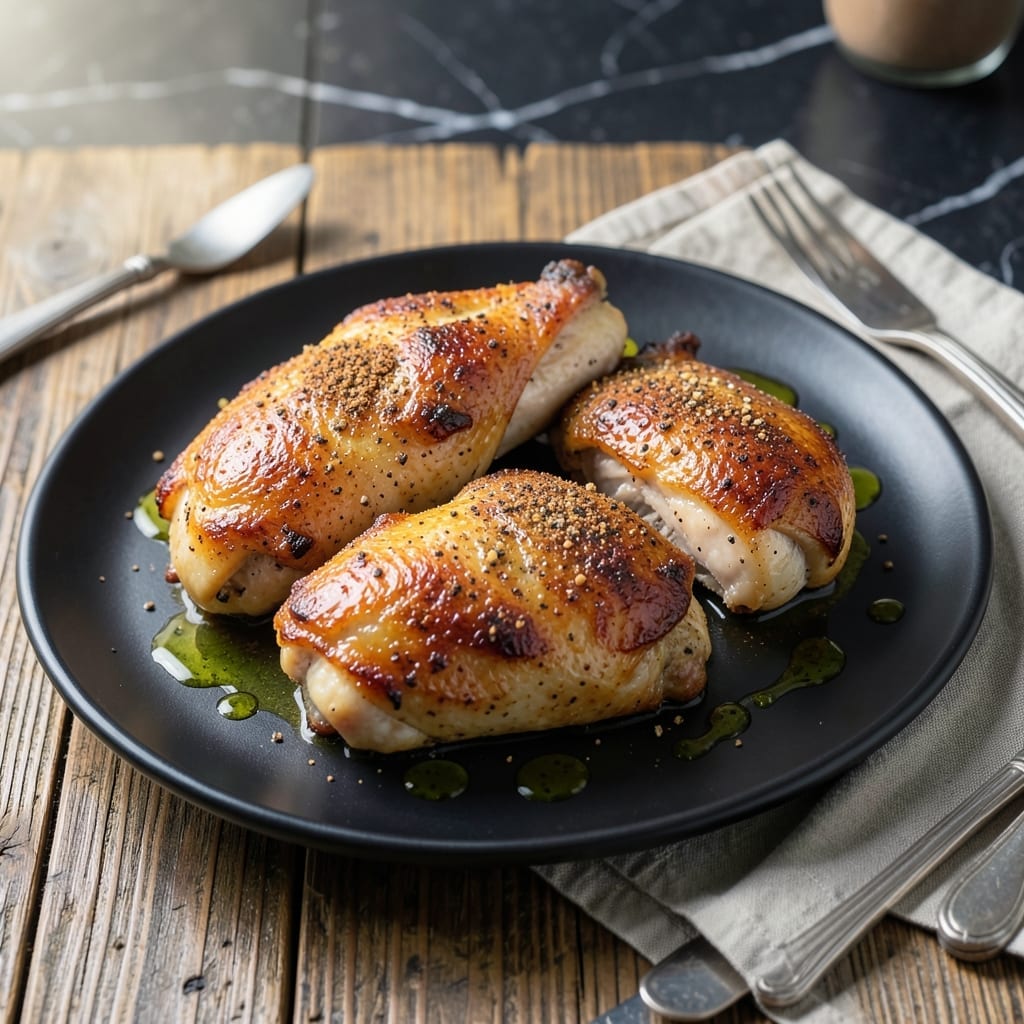
Mastering perfectly browned chicken is all about technique, not luck. This method delivers crispy golden skin and juicy meat every single time, with no guesswork involved.
The secret lies in proper drying, even seasoning, and precise heat control. I’ve refined this approach through years of testing to ensure consistent results, whether you’re cooking for two or ten.
By the time it comes out of the pan, you’ll have chicken with shatteringly crispy skin that gives way to tender, flavorful meat underneath. The visual appeal is matched only by the satisfying crunch with each bite.
This technique works for any cut—thighs, breasts, or whole birds. The process is straightforward but requires attention to detail for the best outcome.
Ingredients for Brown Chicken
These essential ingredients create restaurant-quality browned chicken with crispy skin and juicy meat every time.
| Ingredient | Amount | Notes |
|---|---|---|
| Chicken Thighs 🍗 | 2 lb | Bone-in, skin-on for best texture |
| Kosher Salt 🧂 | 1 ½ tsp | Diamond Crystal preferred for even seasoning |
| Freshly Ground Black Pepper 🌶️ | 1 tsp | Coarse grind for better adherence |
| Garlic Powder 🧄 | 1 tsp | Not garlic salt for pure flavor |
| Onion Powder 🧅 | 1 tsp | Adds depth to seasoning blend |
| Smoked Paprika 🌶️ | ½ tsp | For subtle smoky undertones |
| Dried Thyme 🌿 | ½ tsp | Crushed between fingers to release oils |
| Extra-Virgin Olive Oil 🫒 | 2 tbsp | High smoke point for searing |
| Unsalted Butter 🧈 | 2 tbsp | For basting during cooking |
| Fresh Rosemary Sprigs 🌿 | 2 whole | Optional for aromatic basting |
| Lemon 🍋 | ½ whole | Juiced for finishing acidity |
The chicken must be bone-in, skin-on for optimal browning and flavor retention. Thighs from Whole Foods or Costco consistently offer superior marbling. Pat the skin dry thoroughly—moisture is the enemy of crispiness. Diamond Crystal kosher salt is preferred for its clean flavor and even distribution, though Morton works in a pinch.
No bone-in thighs? Bone-in breasts work but require more careful timing. Skip the smoked paprika? Regular paprika plus a pinch of cayenne achieves similar depth. The butter can be swapped for ghee if avoiding dairy, but unsalted is crucial—salted will throw off your seasoning. Fresh herbs like thyme or oregano can replace rosemary if unavailable.
Store raw chicken in the coldest part of your fridge for up to 2 days. Cooked chicken keeps 4-5 days refrigerated or freezes for 3 months. The seasoning blend can be pre-mixed and stored indefinitely—ideal for quick weeknight meals.
Why You’ll Love This Recipe
- One Pan Wonder: I toss the thighs with salt, pepper, and those powders, then let the oven do the rest—one sheet pan, zero fuss.
- Garlic-Onion Magic: The powder duo packs a punch that turns simple chicken into something I crave all week.
- Weeknight Hero: Honestly, it’s my Tuesday lifesaver—ready before the kids finish their homework.
- Budget Stretcher: Chicken thighs stay cheap, and this recipe makes them taste like a million bucks.
Step-by-Step Instructions for Brown Chicken
Master the technique for achieving golden skin and juicy meat with this proven approach.
Step 1: Season and Prepare the Chicken Thighs
Pat the 2 lb Chicken Thighs thoroughly dry with paper towels—this is non-negotiable for crispy skin. I always use bone-in, skin-on thighs for superior texture and flavor. Season both sides aggressively with the 1.5 tsp Kosher Salt, 1 tsp Freshly Ground Black Pepper, 1 tsp Garlic Powder, 1 tsp Onion Powder, 0.5 tsp Smoked Paprika, and 0.5 tsp Dried Thyme.
Crush the dried thyme between your fingers as you sprinkle it to release its aromatic oils. Let the seasoned thighs rest at room temperature for 15-20 minutes while you preheat your pan—this ensures even cooking and better seasoning penetration.
Step 2: Sear the Chicken to Golden Perfection
Heat the 2 tbsp Extra-Virgin Olive Oil in a large, heavy skillet over medium-high heat until it shimmers. Carefully place the thighs skin-side down in the hot oil. You should hear an immediate sizzle—if not, wait for the oil to get hotter.
Cook undisturbed for 6-8 minutes until the skin develops a deep, golden-brown crust and releases easily from the pan. Resist the urge to move them prematurely; this builds the crispy foundation. The fat should render out and pool around the thighs as they cook.
Step 3: Baste with Aromatics for Depth of Flavor
Flip the thighs skin-side up and reduce heat to medium. Add the 2 tbsp Unsalted Butter, 2 whole Fresh Rosemary Sprigs, and any accumulated pan juices. Tilt the pan slightly and use a spoon to repeatedly baste the chicken with the foaming butter and rosemary for 2-3 minutes.
This basting technique infuses the meat with aromatic flavors while continuing to crisp the skin. The rosemary will sizzle and perfume the kitchen—this is the moment the dish transforms from simple to exceptional. Cook until the internal temperature reaches 165°F.
Step 4: Rest and Finish with Citrus Brightness
Transfer the cooked thighs to a wire rack set over a plate to maintain crispiness. Let them rest for 5-10 minutes—this allows the juices to redistribute for maximum tenderness. The skin should remain audibly crisp when probed.
While still warm, squeeze the 0.5 whole Lemon evenly over the thighs. The acidity cuts through the richness and brightens all the flavors. Serve immediately to preserve the skin’s perfect texture, garnished with the spent rosemary sprigs if desired.
Pro Tips For Making Brown Chicken
- Pat Thighs Dry: Blot the chicken thighs with paper towels before seasoning—excess moisture steams the skin instead of browning it. I learned this the hard way after too many sad, pale thighs.
- Hot Pan, Cold Oil: Heat the pan until it’s nearly smoking, then add the oil and chicken immediately. Sounds counterintuitive, but it prevents the meat from sticking and guarantees a deep golden crust.
- Skip the Crowding: Give each thigh at least an inch of space in the pan, or they’ll boil in their own juices instead of searing. After ruining a batch with overcrowding, I now cook in two shifts if needed.
- Season Twice: Hit the thighs with salt, pepper, and powders before cooking, then again right after flipping. That second sprinkle of garlic and onion powder amps up the flavor in the final minutes.
Creative Variations of These Flavors
Spicy Cajun Kick
Swap the seasoning blend for 2 tbsp Cajun seasoning (I use Tony Chachere’s) mixed with ½ tsp cayenne pepper. This New Orleans twist adds smoky heat that pairs perfectly with the crispy skin. Serve with a cooling ranch dressing dip. 🌶️
Honey Garlic Glaze
After searing, add 3 minced garlic cloves, 2 tbsp honey, and 1 tbsp soy sauce to the pan. Baste the thighs with this sticky-sweet glaze for the final 3 minutes of cooking. Garnish with sesame seeds for an Asian-inspired twist.
Mediterranean Herb
Replace the dried thyme with 1 tbsp dried oregano and add 1 tsp dried basil. Finish the dish with chopped Kalamata olives and crumbled feta cheese for a Greek-inspired variation that’s bright and briny.
Lemon Pepper
Increase the lemon to 1 whole (zested and juiced) and add 1 tbsp cracked black pepper to the seasoning. The citrus-forward profile cuts through the richness beautifully. I love this version in summer with a cold beer. 🍋
Smoky Chipotle
Add 1 tsp chipotle powder and ½ tsp ground cumin to the original seasoning. The smoky heat works wonderfully with the crispy skin. Serve with avocado slices and lime wedges for a Southwestern flair.
Buttermilk Fried
Before seasoning, soak the thighs in 1 cup buttermilk for 4 hours. Dredge in seasoned flour (same spices) before searing. This creates an extra-crispy coating reminiscent of Southern fried chicken. 🔥
Nutrition Facts
Frequently Asked Questions
Why pat the chicken skin dry first?
Moisture prevents crispiness. Thoroughly drying with paper towels ensures the skin can brown properly and develop that perfect crunch. Even a little dampness creates steam, which softens the skin instead of crisping it.
How do I know when it’s done?
Use a meat thermometer to check for 165°F internally. The skin should be deep golden-brown and release easily from the pan. Juices should run clear, not pink.
Can I use boneless thighs?
Yes, but they cook faster. Reduce time by 2-3 minutes per side. Bone-in is preferred for flavor and moisture, but boneless works in a pinch. Just watch carefully to avoid overcooking.

- Jollof Rice Sauce Recipe: West African Tomato and Spice Infusion - September 25, 2026
- Japanese Rice Soup Recipe: Umami-Rich Comfort in a Bowl - September 25, 2026
- Homemade Cream Of Rice Recipe: Silk-Smooth Breakfast in Minutes - September 25, 2026