
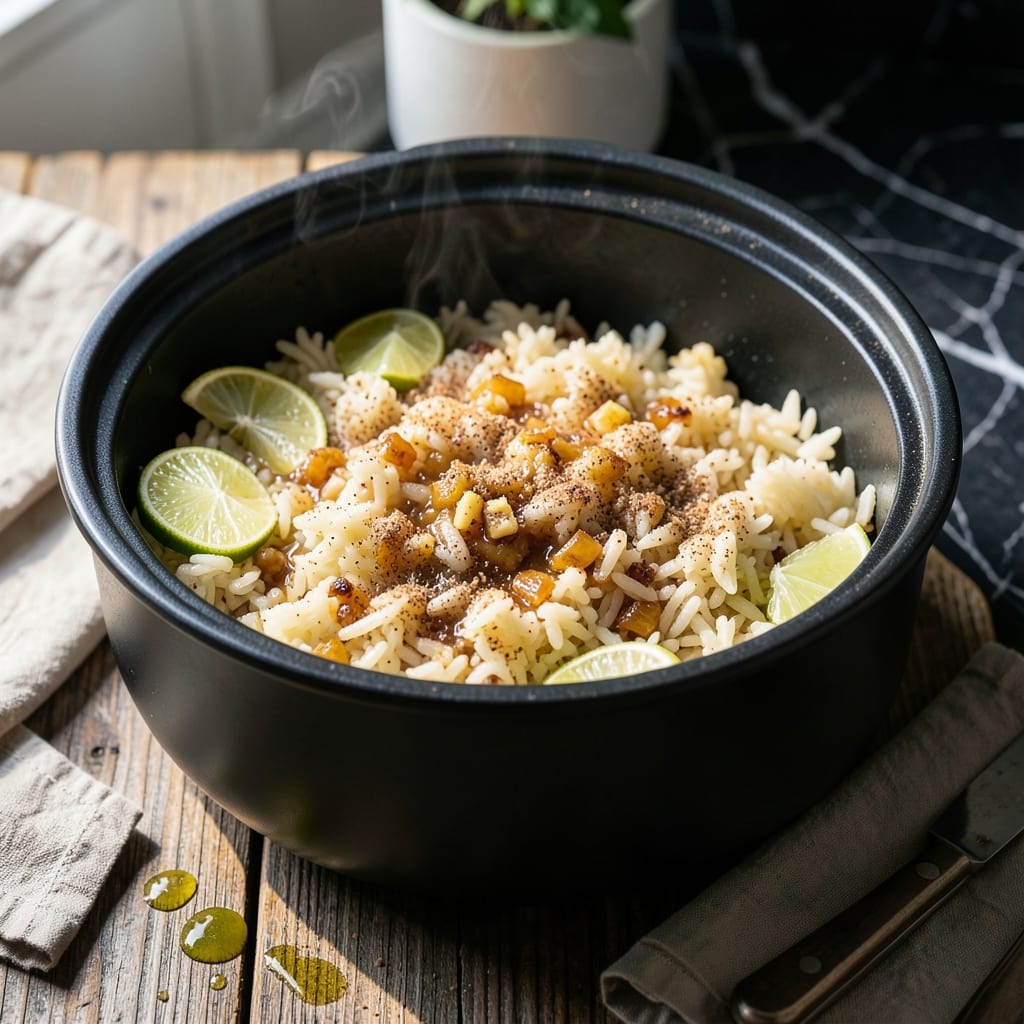
This rice cooker method delivers perfectly seasoned burrito rice with zero hands-on effort. The appliance handles the cooking while you focus on the rest of your meal.
You’ll get fluffy, flavorful grains every time—just add the right ratio of liquid, spices, and a touch of lime. The result is restaurant-quality rice ready in 20 minutes.
Ingredients for Burrito Rice Recipe Rice Cooker
Simple pantry staples transform into restaurant-quality rice with minimal effort in your cooker.
| Ingredient | Amount | Notes |
|---|---|---|
| Long-Grain White Rice 🍚 | 2 cups | Rinsed until water runs clear |
| Vegetable Broth 🥣 | 2 ½ cups | Low-sodium preferred for control |
| Lime 🍈 | 1 whole | Zested and juiced separately |
| Garlic Cloves 🧄 | 3 cloves | Minced finely for even distribution |
| Yellow Onion 🧅 | ½ whole | Finely diced, about 3/4 cup |
| Ground Cumin 🌿 | 1 tsp | Toasted briefly for depth |
| Chili Powder 🌶️ | 1 tsp | Mild or medium heat blend |
| Dried Oregano 🍃 | ½ tsp | Mexican oregano if available |
| Sea Salt 🧂 | 1 tsp | Adjust to taste after cooking |
| Black Pepper 🌶️ | ½ tsp | Freshly ground preferred |
| Cilantro 🌿 | ¼ cup | Fresh, chopped for garnish |
| Extra-Virgin Olive Oil 🫒 | 2 tbsp | For sautéing aromatics |
| Bay Leaf 🍃 | 1 whole | Removed before serving |
| Tomato Paste 🍅 | 1 tbsp | For depth of flavor |
The rice quality matters here. Jasmine or basmati work beautifully, but long-grain white is my go-to for that classic burrito texture. I grab Lundberg brand at Whole Foods—consistent and affordable. The broth is your flavor base, so use low-sodium to control the salt level. Lime zest (not just juice) adds that bright pop that makes this taste fresh, not flat.
No fresh cilantro? Parsley or green onions work in a pinch (though the flavor shifts slightly). Out of chili powder? Half the amount of cayenne plus smoked paprika gets you close. The tomato paste is subtle but important—those squeeze tubes at Trader Joe’s are perfect for small amounts. For extra richness, stir in a spoonful of vegetarian refried beans at the end.
Cooked rice holds in the cooker on ‘warm’ for 2 hours without issue. Store leftovers in an airtight container—they’ll keep 4-5 days in the fridge. Freezes well too, up to 3 months. Reheat with a splash of water to revive the texture.
Why You’ll Love This Recipe
- Set and Forget: The rice cooker does all the work—I just toss in the rice, broth, and aromatics, then walk away.
- Zesty Kick: That fresh lime juice at the end brightens up the garlic and onion in a way that’s ridiculously good.
- Meal Prep Hero: I make a big batch on Sunday and it’s my base for burrito bowls all week long.
Step-by-Step Instructions for Burrito Rice in a Rice Cooker
This hands-off method delivers perfectly seasoned rice with minimal effort and maximum flavor.
Step 1: Sauté Aromatics for Depth of Flavor
Heat the 2 tbsp Extra-Virgin Olive Oil in the rice cooker pot on the sauté setting, if available. Otherwise, use a skillet. Add the 0.5 whole Yellow Onion and cook for 3-4 minutes until translucent and slightly softened.
Stir in the 3 cloves Garlic Cloves and cook for 30 seconds until fragrant but not browned. Add the 1 tbsp Tomato Paste, 1 tsp Ground Cumin, 1 tsp Chili Powder, and 0.5 tsp Dried Oregano. Cook for 1 minute, stirring constantly to toast the spices.
Step 2: Combine Rice and Liquids
Add the 2 cups Long-Grain White Rice to the pot and stir for 1 minute to coat the grains in the aromatic oil and spices. This step ensures every bite is packed with flavor.
Pour in the 2.5 cups Vegetable Broth and add the 1 whole Bay Leaf, 1 tsp Sea Salt, and 0.5 tsp Black Pepper. Stir once more to distribute the ingredients evenly. The liquid should cover the rice by about ½ inch.
Step 3: Cook Until Tender
Secure the lid on your rice cooker and select the standard white rice setting. Let it cook undisturbed for the full cycle, which typically takes 20-25 minutes. Most rice cookers will switch to “keep warm” automatically once done.
Resist the urge to open the lid during cooking. The trapped steam is essential for even cooking and fluffy texture. You’ll know it’s ready when the rice is tender and the liquid is fully absorbed.
Step 4: Finish and Fluff
Once cooking is complete, let the rice sit covered for 5-10 minutes. This allows the grains to steam and become even more tender. Remove the 1 whole Bay Leaf before serving.
Gently fluff the rice with a fork to separate the grains. Zest the 1 whole Lime over the rice and stir in the juice. Taste and adjust seasoning with additional Sea Salt if needed.
Step 5: Garnish and Serve
Transfer the rice to a serving bowl and sprinkle with the 0.25 cup Cilantro. The fresh herb adds a bright, citrusy finish that completes the dish.
Serve immediately while hot and fluffy. The rice should be tender with a slight bite, and every grain should be infused with the bold, savory flavors of the spices and aromatics. This rice is ready to be the star of your next burrito bowl or side dish.
Pro Tips For Making Burrito Rice Recipe Rice Cooker
- Rinse the Rice: Always rinse your long-grain white rice until the water runs clear—it removes excess starch so your burrito rice comes out fluffy, not gummy.
- Sauté the Aromatics: Before adding rice and broth, sauté the diced yellow onion and minced garlic in the rice cooker pot for 2-3 minutes until fragrant. I learned this the hard way—raw garlic tastes harsh in the finished dish.
- Use the Right Ratio: Stick to a 1:1.5 rice-to-broth ratio (1 cup rice to 1.5 cups vegetable broth) for perfectly tender grains. Steer clear of using water instead—it misses the depth of flavor.
- Zest Before Juicing: Grate the lime zest into the rice cooker along with the juice. Sounds weird, but it works—the oils in the zest make the citrus flavor pop without needing extra seasoning.
Wine and Beer Pairings for This Dish
Light Beer Pairings
I love a crisp Mexican lager like Modelo Especial or Pacifico with this dish. The light body and subtle malt sweetness balance the rice’s bold spices without overpowering them. Serve ice-cold for maximum refreshment. 🍺
Wheat Beer Options
A hefeweizen such as Weihenstephaner offers citrusy notes that complement the lime in your meal. The effervescence cuts through the richness, making each bite taste lighter and brighter.
Craft IPA Choices
For beer lovers, a West Coast IPA like Sierra Nevada works beautifully. The piney, resinous hops stand up to the cumin and chili powder, creating a flavorful contrast that’s surprisingly harmonious.
White Wine Pairings
A chilled Sauvignon Blanc from New Zealand delivers crisp acidity and grassy notes. The wine’s brightness enhances the lime zest in the rice, making the citrus flavors pop even more. 🍷
Red Wine Alternatives
If you prefer red, go for a light-bodied Pinot Noir from Oregon. Its earthy undertones and gentle tannins won’t clash with the dish’s spice profile. Serve slightly chilled for best results.
Non-Alcoholic Options
For a zero-proof pairing, try Jarritos Mandarin soda. The citrusy sweetness mirrors the lime in the rice, while the bubbles cleanse your palate between bites.
Nutrition Facts
Frequently Asked Questions
Can I use brown rice instead of white?
Yes, but adjust the liquid to 3 cups broth and cook for 45-60 minutes. Brown rice needs more water and time to soften.
What if my rice cooker doesn’t have a sauté function?
Sauté the aromatics in a skillet first, then transfer to the cooker with rice and broth. The flavor won’t suffer!
How do I fix mushy rice?
Spread it on a tray to cool and dry slightly. Next time, reduce broth by ¼ cup and rinse rice thoroughly.
Can I make this ahead?
Cooked rice keeps 4-5 days refrigerated or 3 months frozen. Reheat with a splash of water.

- Jollof Rice Sauce Recipe: West African Tomato and Spice Infusion - September 25, 2026
- Japanese Rice Soup Recipe: Umami-Rich Comfort in a Bowl - September 25, 2026
- Homemade Cream Of Rice Recipe: Silk-Smooth Breakfast in Minutes - September 25, 2026