
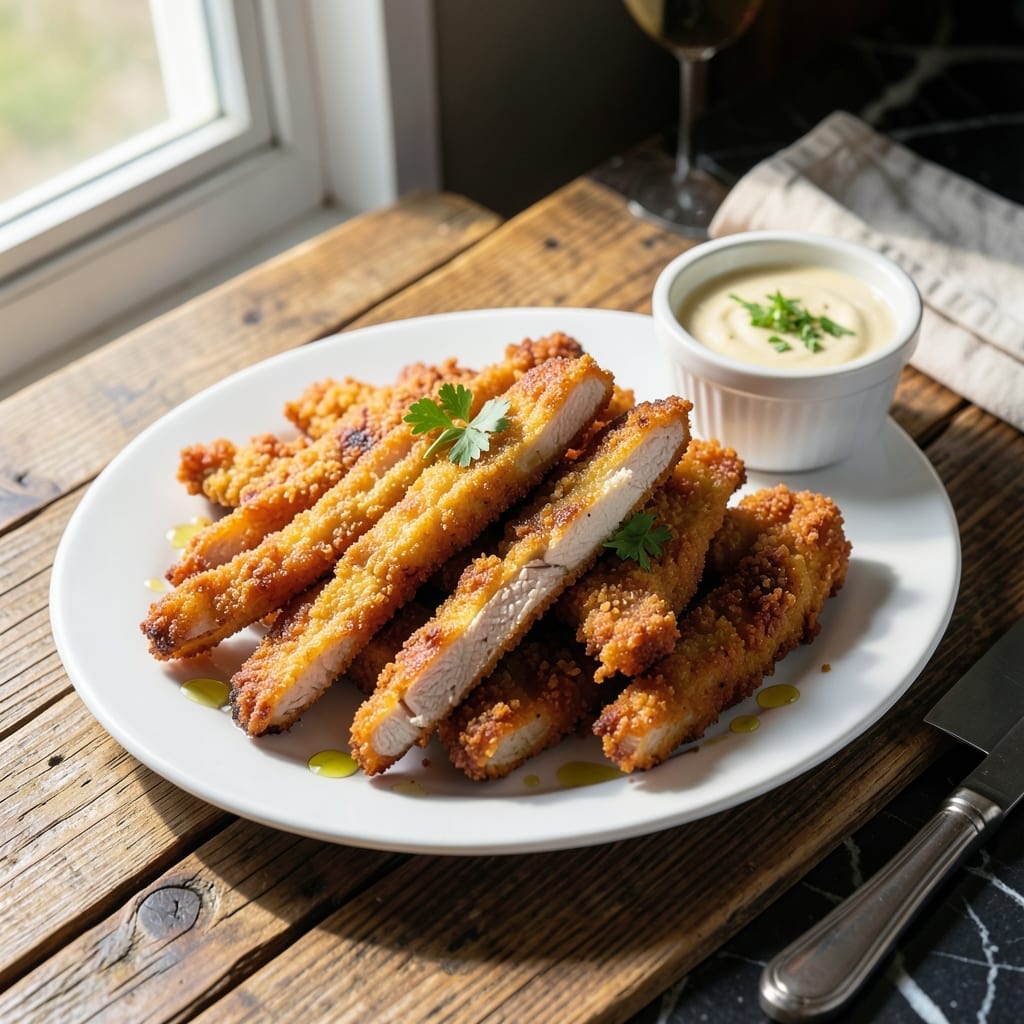
This recipe delivers that signature crispy texture you love from the original, right from your own kitchen. No deep fryer required—just a simple oven-baked method that produces golden, crunchy results every time.
I developed this copycat version after countless attempts to perfect the batter and cooking technique. The secret lies in a double-dredging process that creates an extra-thick, shatteringly crispy coating.
The strips emerge from the oven with a satisfying crunch and juicy interior, just like the restaurant favorite. Each bite delivers that familiar flavor and texture without the grease of traditional frying.
Serve these with your favorite dipping sauces for a meal that satisfies every craving. Here’s how to make them perfectly at home.
Ingredients for Cane’s Chicken Strip
Crispy, golden chicken strips with a double-dredged coating. No fryer needed here.
| Ingredient | Amount | Notes |
|---|---|---|
| Boneless Skinless Chicken Breasts 🍗 | 1 ½ lb | Cut into 1-inch thick strips |
| All-Purpose Flour 🌾 | 2 cups | Divided for double dredging |
| Cornstarch 🌽 | ½ cup | For extra crispiness |
| Large Eggs 🥚 | 2 whole | For egg wash binding |
| Buttermilk 🥛 | 1 cup | Full-fat for richness |
| Salt 🧂 | 2 tsp | Diamond Crystal preferred |
| Black Pepper 🌶️ | 1 tsp | Freshly ground for best flavor |
| Garlic Powder 🧄 | 1 tsp | Not garlic salt |
| Onion Powder 🧅 | 1 tsp | Adds depth to coating |
| Paprika 🌶️ | 1 tsp | Sweet or smoked variety |
| Cayenne Pepper 🔥 | ¼ tsp | Optional for heat |
| Vegetable Oil 🫒 | ¼ cup | For light brushing |
The chicken is everything here. Boneless, skinless breasts cut into even strips cook uniformly—avoid the pre-cut tenders as they dry out faster. I grab mine from Costco for consistency, but any supermarket works. The buttermilk soak (use full-fat if available) is non-negotiable for that juicy interior. For the flour, King Arthur all-purpose is my go-to for reliable results.
No buttermilk? Whole milk plus 1 tbsp vinegar does the trick. Skip the cornstarch? Double the flour, but you’ll lose some crunch. The egg wash can be water or milk in a pinch, though the binding won’t be as strong. For spice swaps, smoked paprika adds depth, and if you love heat, bump the cayenne to half a teaspoon (or skip it entirely for milder flavor).
Uncooked strips keep in the fridge for 24 hours in their buttermilk soak. Baked strips? Best eaten fresh but reheat in a 400°F oven for 5-7 minutes to revive the crunch. Leftovers? They’ll soften, but they’re still tasty for 2-3 days in an airtight container.
Why You’ll Love This Recipe
- One Pan Magic: I mix the flour and cornstarch in one bowl, dip the chicken in buttermilk and egg in another—cleanup’s a breeze.
- That Cane’s Crunch: The cornstarch in the coating gives it that signature crispy bite, while the buttermilk keeps the chicken juicy inside.
- Freezer Friendly: I double the batch, freeze half, and toss them in the air fryer later for a quick meal.
- Budget Stretcher: Boneless chicken breasts on sale plus pantry staples mean I feed my family for less than takeout.
Step-by-Step Instructions for Crispy Chicken Strips
Here’s how I make these strips achieve that signature crunch without a deep fryer.
Step 1: Prep and Season the Chicken
Cut the 1.5 lb boneless skinless chicken breasts into 1-inch thick strips. This uniform size ensures even cooking. Pat them completely dry with paper towels—any moisture will prevent the coating from adhering properly.
Season both sides of the chicken strips with 2 tsp salt, 1 tsp black pepper, 1 tsp garlic powder, 1 tsp onion powder, 1 tsp paprika, and 0.25 tsp cayenne pepper. I press the spices into the meat so they stick well. This seasoning layer is the foundation of flavor for your strips.
Step 2: Set Up the Double Dredging Station
In a shallow dish, whisk together the 2 cups all-purpose flour and 0.5 cup cornstarch until fully combined. The cornstarch is the secret to that extra crispiness. In a separate bowl, beat the 2 whole large eggs with the 1 cup buttermilk until smooth. This egg wash acts as the glue for your coating.
Dredge each seasoned chicken strip in the flour mixture first, pressing firmly so it adheres completely. Then dip it in the buttermilk-egg mixture, letting any excess drip off. Finally, dredge it in the flour mixture again for that double coating that creates an ultra-crispy exterior.
Step 3: Air Fry or Bake to Golden Perfection
Lightly brush the basket of your air fryer with 0.25 cup vegetable oil to prevent sticking. Arrange the coated chicken strips in a single layer, ensuring they don’t touch. This allows hot air to circulate around each piece for even cooking.
Cook at 375°F for 12-15 minutes, flipping halfway through, until the coating is golden brown and the internal temperature reaches 165°F. If you’re baking instead, use a wire rack on a baking sheet at 400°F for 20-25 minutes with a flip at the halfway point. The strips should be crispy on the outside and juicy on the inside.
Step 4: Rest and Serve While Hot
Transfer the cooked strips to a wire rack or paper towel-lined plate. Let them rest for 2-3 minutes—this helps the coating set and retain its crispiness. I like to sprinkle a pinch of extra salt on them right out of the air fryer to enhance the flavor.
Serve immediately while they’re still hot and at their crispiest. These strips are best enjoyed fresh, with your favorite dipping sauce. The double-dredged coating should have a satisfying crunch with every bite, just like the original you’re copying.
Pro Tips For Making Cane’S Chicken Strip
- Pound the Breasts: Use a meat mallet to even out the chicken to ½-inch thickness—I learned this the hard way after too many dry, overcooked ends.
- Double Dredge: Dip the chicken in the buttermilk-egg mix, then flour, then back in the wet mix and flour again for that signature Cane’s crunch.
- Rest Before Frying: Let the dredged strips sit for 10 minutes before frying so the coating adheres properly and doesn’t slide off in the oil.
- Use Peanut Oil: It’s got a higher smoke point than vegetable oil, so you can fry at 350°F without burning—sounds weird, but it works.
Perfect Pairings for canes chicken strip
Dipping Sauce Pairings
You can’t have crispy strips without the perfect dipping companions. I always serve mine with Cane’s signature sauce—a creamy blend you can mimic with ½ cup mayo, ¼ cup ketchup, 1 tbsp Worcestershire, and ½ tsp black pepper. It’s tangy and slightly sweet. 💛
Fresh Side Options
For a lighter pairing, I love serving these with a simple iceberg wedge salad. Just halve a head of iceberg, drizzle with blue cheese dressing, and top with crumbled bacon and cherry tomatoes. The cool crunch contrasts beautifully with the hot, crispy strips.
Classic Comfort Sides
My go-to comfort combo is crinkle-cut fries baked at 425°F for 20 minutes. Toss them with 1 tsp paprika and ½ tsp garlic salt before baking. The salty, crispy fries complement the chicken perfectly without overpowering it.
Beverage Pairings
For drinks, I reach for an ice-cold sweet tea—Lipton is my brand of choice. The sweetness balances the savory crunch. For beer lovers, a crisp lager like Corona or Bud Light cleanses the palate between bites.
A lemonade with a hint of mint also works wonders, especially in warmer months.
Nutrition Facts
Frequently Asked Questions
Can I use chicken tenders instead of breasts?
Yes, but they cook faster due to their smaller size. Reduce baking time by 3-5 minutes and check for 165°F internal temperature. Breasts give more uniform strips.
Why is my coating falling off?
This usually happens if the chicken isn’t dry before dredging. Pat strips completely with paper towels first. Also, let the first flour layer set for 2-3 minutes before adding the egg wash.
Can I make these ahead of time?
Coat the strips and refrigerate uncooked for up to 24 hours. For best results, bake just before serving. Reheated strips lose some crispiness.
What’s the best way to reheat leftovers?
Place strips on a wire rack in a 400°F oven for 5-7 minutes. This revives the crunch better than a microwave. Avoid stacking to prevent sogginess.

- Jollof Rice Sauce Recipe: West African Tomato and Spice Infusion - September 25, 2026
- Japanese Rice Soup Recipe: Umami-Rich Comfort in a Bowl - September 25, 2026
- Homemade Cream Of Rice Recipe: Silk-Smooth Breakfast in Minutes - September 25, 2026