
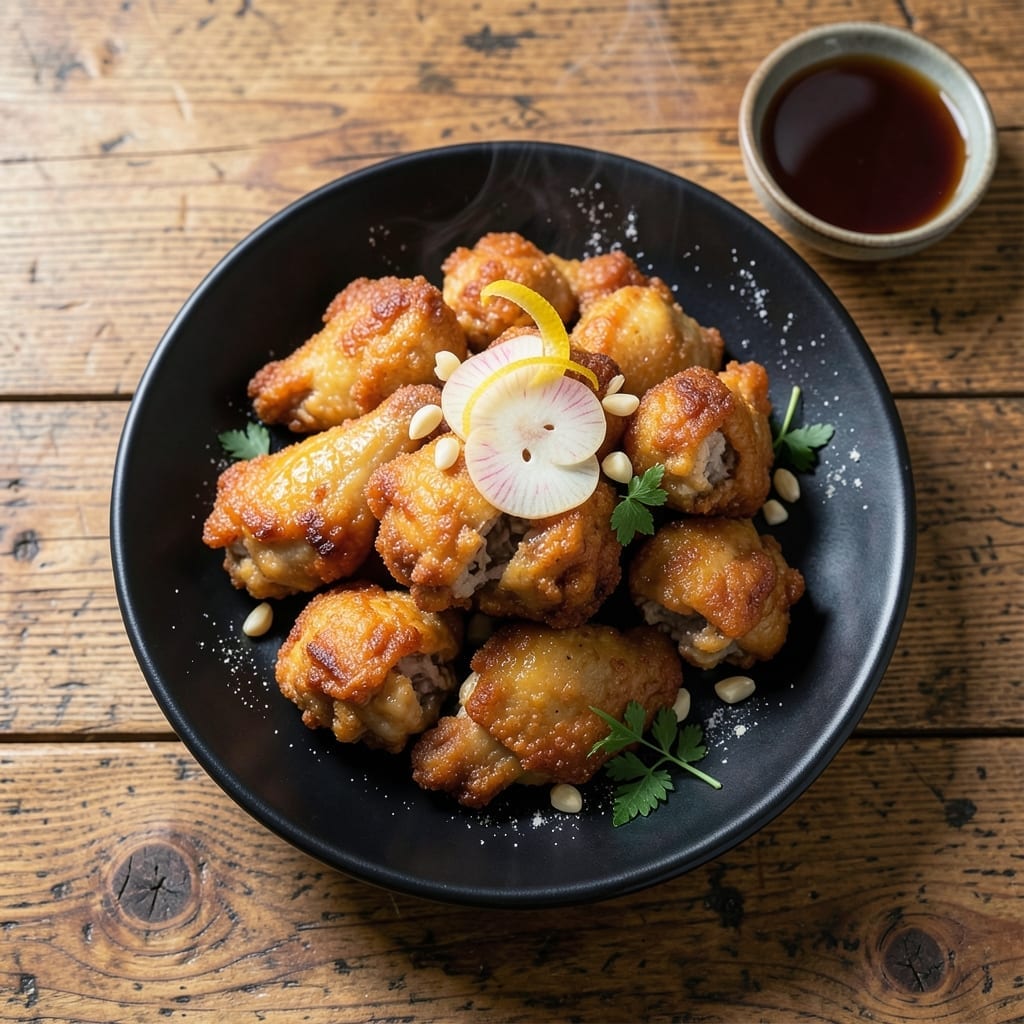
This Japanese fried chicken delivers crispy perfection with a tender, juicy center every time. The secret lies in a double-frying technique that creates an ultra-crunchy exterior while keeping the meat moist and flavorful.
I’ve refined this method to use simple ingredients like soy sauce, garlic, and ginger for marinating, ensuring deep flavor penetration. The potato starch coating is the key to achieving that signature light, airy crunch.
Each bite offers a satisfying contrast—shatteringly crispy on the outside, succulent and juicy within. It’s a dish that elevates any meal with minimal effort and maximum reward.
Serve hot with a side of steamed rice and shredded cabbage for a complete experience. This recipe stays true to tradition while being easy to master at home.
Ingredients for Japanese Fried Chicken
Simple yet precise ingredients deliver that signature crispy exterior and juicy interior every time.
| Ingredient | Amount | Notes |
|---|---|---|
| Boneless Chicken Thighs 🍗 | 1 ½ lb | Skin-on for extra crispiness |
| Soy Sauce 🫒 | ¼ cup | Low-sodium preferred |
| Garlic Cloves 🧄 | 4 cloves | Minced finely |
| Fresh Ginger 🌿 | 1 tbsp | Grated or minced |
| Sake 🍶 | 2 tbsp | Dry variety recommended |
| Potato Starch 🥔 | ¾ cup | For ultra-crispy coating |
| All-Purpose Flour 🌾 | ¼ cup | For dredging |
| Baking Powder 🧂 | 1 tsp | Ensures light texture |
| Kosher Salt 🧂 | 1 tsp | Diamond Crystal preferred |
| Black Pepper 🌶️ | ½ tsp | Freshly ground |
| Neutral Oil 🫒 | 4 cups | For deep frying |
| Green Onions 🧅 | 3 whole | Thinly sliced for garnish |
| Lemon Wedges 🍋 | 4 pieces | For serving |
The chicken thighs are non-negotiable for authentic karaage. Bone-in, skin-on yields the juiciest results, though boneless works too. For the potato starch, Katakuriko is the gold standard (found at Asian markets or Amazon). Sake adds depth—dry sherry works in a pinch. The baking powder is the secret to that airy crunch, so don’t skip it.
No sake? Dry white wine or even apple cider vinegar can substitute. Potato starch can be replaced with cornstarch, but the texture won’t be quite as light. For a gluten-free version, tamari instead of soy sauce does the trick. The oil must have a high smoke point—peanut, vegetable, or canola are ideal. Fresh ginger is key, but ground ginger at half the amount works if needed.
Marinated chicken keeps in the fridge for up to 24 hours—perfect for prepping ahead. The starch coating won’t hold long once applied, so fry immediately. Leftovers? Reheat in a toaster oven or air fryer for 3-4 minutes to revive the crisp. Best eaten fresh, but stores in the fridge for 3 days.
Why You’ll Love This Recipe
- One Pan Magic: I just toss the chicken thighs with soy sauce, garlic, and ginger, then fry—no fancy steps, no extra bowls.
- Umami Bomb: The sake and soy sauce create this deep, savory flavor that’s honestly addictive.
- Weeknight Hero: I’ve served this for quick dinners, lunchboxes, and even as a snack for game night.
- Budget Stretcher: Boneless thighs are cheap, and this recipe makes them taste like a restaurant dish. Between us, leftovers disappear fast.
Step-by-Step Instructions for Japanese Fried Chicken
Master the technique for achieving that signature crispy exterior while keeping the meat tender and juicy inside.
Step 1: Marinate the Chicken for Maximum Flavor
In a large bowl, combine the 1.5 lb Boneless Chicken Thighs with 0.25 cup Soy Sauce, minced 4 cloves Garlic Cloves, 1 tbsp Fresh Ginger, and 2 tbsp Sake. I use my hands to thoroughly coat each piece, ensuring the marinade penetrates deeply.
Cover and refrigerate for at least 1 hour, though I prefer 4 hours for maximum flavor development. The soy sauce tenderizes the meat while the sake adds a subtle depth that defines authentic karaage. Don’t skip this step—it’s what makes the chicken so flavorful beneath the crust.
Step 2: Prepare the Ultra-Crispy Coating
In a separate bowl, whisk together 0.75 cup Potato Starch, 0.25 cup All-Purpose Flour, 1 tsp Baking Powder, 1 tsp Kosher Salt, and 0.5 tsp Black Pepper. The potato starch is non-negotiable—it creates that shatteringly crisp texture that sets this apart from regular fried chicken.
The baking powder adds tiny air pockets to the coating, making it lighter and crispier. I always use a whisk to break up any lumps in the potato starch, which can otherwise create uneven patches on the chicken. This mixture should look like fine, homogeneous powder.
Step 3: Double-Coat and Fry to Golden Perfection
Remove the chicken from the marinade (let excess drip off) and dredge each piece thoroughly in the starch mixture, pressing gently to adhere. For extra crispiness, I repeat the process: dip back in the marinade, then coat in the starch mixture a second time. This double-coating creates that coveted crunch.
Heat 4 cups Neutral Oil in a deep pot to 340°F. Fry the chicken in batches to avoid crowding for 6-8 minutes, turning occasionally, until golden brown and the internal temperature reaches 165°F. The oil temperature will drop when you add the chicken—maintain it between 325-340°F for even cooking.
Step 4: Drain and Rest for Optimal Texture
Transfer the fried chicken to a wire rack set over a baking sheet (not paper towels—this keeps the crust crispy). The rack allows air to circulate around the pieces, preventing steam from making the coating soggy. I always let it rest for 5 minutes before serving.
This resting period allows the juices to redistribute throughout the meat. You’ll notice the coating stays audibly crisp when you bite into it, while the inside remains remarkably tender. The contrast between the crunchy exterior and juicy interior is what makes this dish so addictive.
Step 5: Garnish and Serve Immediately
Thinly slice the 3 whole Green Onions and sprinkle them over the chicken just before serving. The fresh, sharp bite cuts through the richness. Arrange with 4 pieces Lemon Wedges on the side for a bright, citrusy accompaniment that enhances the flavors.
Serve while hot—the coating loses its crispness as it cools. I recommend eating with your hands to fully appreciate the texture. Each piece should have a uniform golden color, with the coating adhering firmly to the meat without any greasy residue.
Pro Tips For Making Japanese Fried Chicken
- Double Fry for Crisp: Fry the chicken once at 320°F for 3-4 minutes, rest it, then fry again at 375°F for 2 minutes. I learned this the hard way—single frying leaves the crust soggy under the sauce.
- Grate the Ginger: Skip the mincing and grate fresh ginger directly into the marinade. Sounds weird, but it works: you get more juice and even flavor distribution without fibrous bits.
- Skip the Overcrowding: Fry in small batches—about 4 pieces at a time in a 10-inch pan. After burning three batches, I finally figured out that crowding drops the oil temp and leads to greasy, unevenly cooked chicken.
- Use Thighs, Not Breasts: Boneless thighs stay juicy even when fried twice, while breasts dry out. My grandmother swore by this, and she was right: the fat in thighs actually changes the outcome for the better.
Flavor Customization for This japanese fried chicken
Spicy Kick
Add 1 tbsp gochujang or 1 tsp cayenne pepper to your marinade for heat. The gochujang blends beautifully with soy sauce, creating a sweet-spicy depth. I also toss finished pieces with 1 tsp chili flakes for extra punch. 🌶️
Citrus Zing
Brighten the marinade with 1 tbsp yuzu juice or regular lemon juice. The acidity tenderizes the meat while adding a refreshing note. Serve with extra lemon wedges for a vibrant finish that cuts through the richness.
Herb Infusion
Stir 1 tbsp chopped shiso leaves or 1 tsp dried oregano into your starch coating. Shiso offers an authentic Japanese herbal note, while oregano adds Mediterranean flair. Both complement the garlic and ginger beautifully.
Sweet Glaze
After frying, toss the chicken in 2 tbsp honey mixed with 1 tbsp soy sauce and 1 tsp grated ginger. Heat briefly to create a glossy coating. This sweet-savory glaze is a crowd-pleaser in my experience.
Umami Boost
Enhance the marinade with 1 tbsp miso paste or 1 tsp fish sauce. Miso adds a deep, fermented richness, while fish sauce provides a subtle salty complexity. Both intensify the traditional karaage flavor profile.
Garlic Lover’s
Double the garlic in your marinade to 8 cloves for intense flavor. Or add 1 tsp garlic powder to your starch coating. The result is a robust, aromatic chicken that garlic enthusiasts will adore. 💪
Nutrition Facts
Frequently Asked Questions
Why use potato starch instead of flour?
Potato starch creates a lighter, crispier coating that stays crunchy longer. It absorbs less oil than regular flour, resulting in a less greasy finish. This is the secret to authentic karaage texture.
Can I bake instead of frying?
Yes, but the texture won’t be as crispy. Bake at 400°F for 20-25 minutes, flipping halfway. For better results, spray with oil and broil for 2 minutes at the end.
How do I keep it crispy after frying?
Drain on a wire rack, not paper towels. Keep pieces in a single layer and avoid covering. Reheat in an air fryer at 375°F for 3-4 minutes if needed.
What’s the best oil to use?
Use a neutral oil with a high smoke point like peanut, vegetable, or canola. Avoid olive oil as its low smoke point can burn. Maintain oil temp between 325-340°F.

- Jollof Rice Sauce Recipe: West African Tomato and Spice Infusion - September 25, 2026
- Japanese Rice Soup Recipe: Umami-Rich Comfort in a Bowl - September 25, 2026
- Homemade Cream Of Rice Recipe: Silk-Smooth Breakfast in Minutes - September 25, 2026