
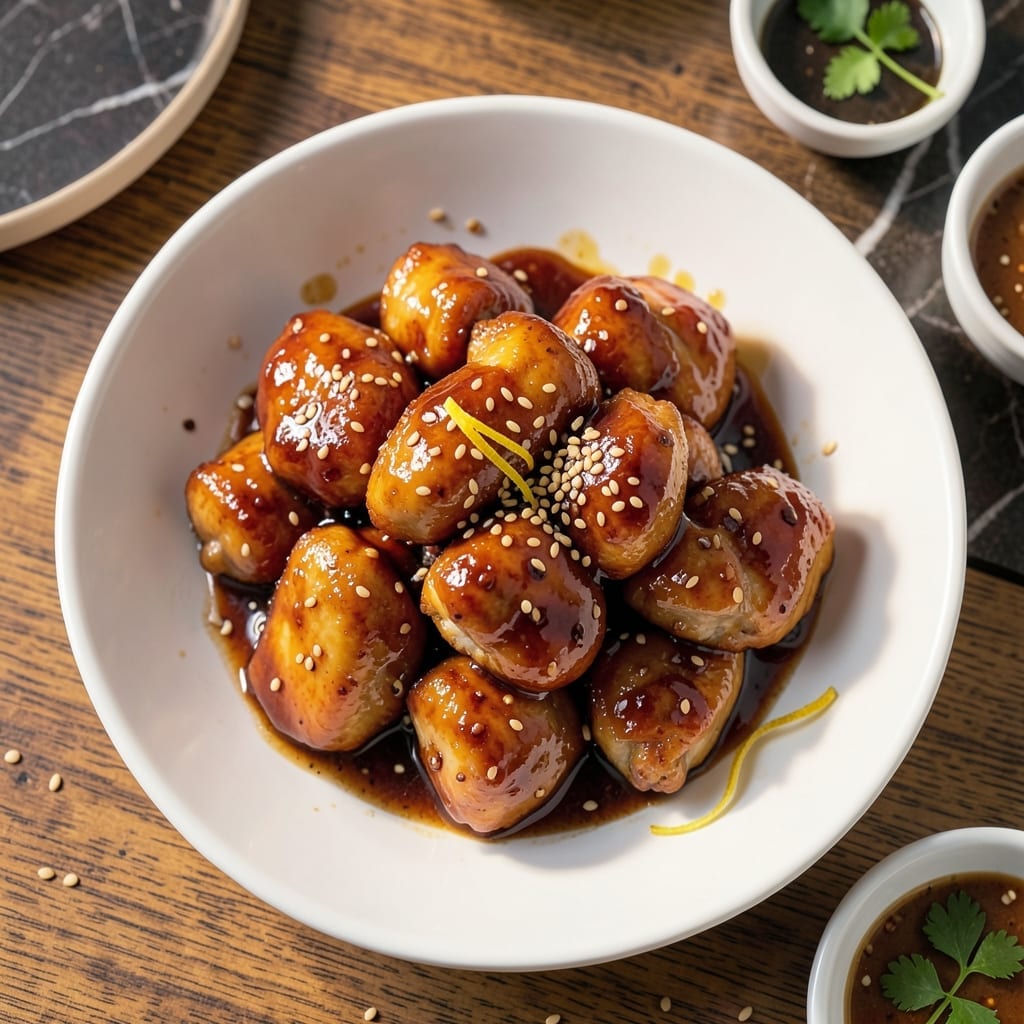
I developed this oven-baked sesame chicken after testing 5 different methods to achieve that classic sweet and sticky coating without frying. The key is a high-heat bake that caramelizes the sauce while keeping the chicken tender.
This approach delivers all the flavor of traditional sesame chicken with a fraction of the mess. The sauce thickens beautifully in the oven, creating that signature glossy finish that clings to every bite.
What you get is perfectly cooked chicken with a golden-brown coating, crisp at the edges and juicy throughout. The sesame seeds add just the right crunch to balance the sweet and savory sauce.
Ready in under 40 minutes, this version proves you don’t need a deep fryer for restaurant-quality results at home.
Ingredients for Sesame Chicken Recipe No Fry
Just a handful of pantry staples for that sweet, sticky, golden-brown finish.
| Ingredient | Amount | Notes |
|---|---|---|
| Boneless Skinless Chicken Thighs 🍗 | 1 ½ lb | Cut into bite-sized pieces |
| Soy Sauce 🫒 | ½ cup | Low-sodium preferred |
| Honey 🍯 | ⅓ cup | Pure, natural variety |
| Rice Vinegar 💧 | 3 tbsp | For balanced tang |
| Sesame Oil 🫒 | 1 tbsp | Toasted for depth |
| Minced Garlic 🧄 | 3 cloves | Freshly minced best |
| Ground Ginger 🌿 | 1 tsp | Or fresh grated |
| Cornstarch 🌾 | 3 tbsp | For sauce thickening |
| Sesame Seeds 🌰 | 3 tbsp | Toasted for crunch |
| Vegetable Oil 🫒 | 1 tbsp | For light coating |
| Red Pepper Flakes 🌶️ | ½ tsp | Optional for heat |
| Green Onions 🧅 | 3 whole | Thinly sliced for garnish |
The chicken thighs are non-negotiable here—they stay juicy even at high heat. Boneless, skinless from Costco or your local butcher works best (avoid the pre-cut kind, they dry out faster). I always buy extra sesame seeds from the Asian market—they’re cheaper in bulk and toast up beautifully. For the soy sauce, Kikkoman low-sodium is my go-to for consistent flavor without overpowering saltiness.
No honey? Maple syrup or agave at equal amounts works in a pinch. Swap rice vinegar for apple cider vinegar if that’s what you’ve got. Fresh ginger is great if you’re grating it yourself—use 1 tbsp grated instead of the ground. Out of sesame oil? Skip it rather than substituting (it’s that important for flavor). Cornstarch can be replaced with arrowroot powder at the same ratio.
Chicken keeps in the fridge 3-4 days once cooked, and the sauce actually thickens more as it sits. Leftovers reheat well in a 350°F oven for 10-15 minutes. Sesame seeds? Store them in the fridge to keep them fresh—lasts 6 months easy.
Why You’ll Love This Recipe
- One Pan Wonder: I toss everything in a skillet and let the honey and soy sauce work their magic—no frying, no mess.
- Sweet & Savory: The honey caramelizes with the soy sauce, while sesame oil adds that nutty depth I crave.
- Meal Prep Hero: I make a big batch on Sunday—it reheats beautifully for lunches all week.
- Wallet Friendly: Boneless thighs stay juicy and cost half what breasts do, so I save without sacrificing flavor.
Step-by-Step Instructions for Sesame Chicken
This method delivers all the flavor without the fryer—simple, reliable, and always delicious.
Step 1: Coat and Season the Chicken
Pat the 1.5 lb boneless skinless chicken thighs dry with paper towels, then cut them into bite-sized pieces. The uniform size ensures even cooking in the oven. Toss the pieces in a bowl with the 1 tbsp vegetable oil until lightly coated.
In a separate bowl, combine the 3 tbsp cornstarch with the 0.5 tsp red pepper flakes. Dredge the chicken in this mixture, pressing gently to adhere. This creates a light crust that will crisp up in the oven without deep frying. Shake off any excess—too much cornstarch can make the coating gummy.
Step 2: Bake Until Golden and Crisp
Preheat your oven to 400°F and line a baking sheet with parchment paper. Arrange the coated chicken pieces in a single layer, leaving space between them so they crisp instead of steam. Bake for 15 minutes, then flip each piece.
Return the chicken to the oven for another 10-12 minutes until the coating is golden brown and the internal temperature reaches 165°F. The pieces should look lightly blistered and feel firm to the touch. This high-heat bake mimics the texture of frying without the oil.
Step 3: Simmer the Sweet-Savory Sauce
While the chicken bakes, combine the 0.5 cup soy sauce, 0.33 cup honey, 3 tbsp rice vinegar, 1 tbsp sesame oil, 3 cloves minced garlic, and 1 tsp ground ginger in a small saucepan. Bring to a gentle simmer over medium heat.
Let it cook for 3-4 minutes, stirring occasionally, until the sauce thickens slightly and becomes glossy. It should coat the back of a spoon but still be pourable. The vinegar balances the sweetness of the honey, while the sesame oil adds depth. Keep it warm on low heat until ready to use.
Step 4: Toss and Garnish for Serving
Transfer the baked chicken to a large bowl. Pour the warm sauce over the chicken and toss gently with a spatula until every piece is evenly coated. The sauce will cling to the crispy cornstarch crust, creating that signature sticky finish.
Sprinkle the 3 tbsp sesame seeds over the chicken and toss once more. Garnish with the 3 whole green onions, thinly sliced. Serve immediately while the chicken is hot and the sauce is still glossy. Each bite should deliver a perfect balance of sweet, salty, and nutty flavors with a satisfying crispness.
Pro Tips For Making Sesame Chicken Recipe No Fry
- Velvet the Chicken: Coat the chicken thighs in a cornstarch slurry before cooking—about 1 tablespoon cornstarch mixed with 1 tablespoon water per pound. I learned this the hard way after my first few attempts turned out rubbery instead of tender.
- Reduce the Sauce: Simmer the soy sauce, honey, and rice vinegar mixture for 3-4 minutes until it thickens slightly. Sounds weird, but it works: this keeps the sauce from sliding right off the chicken.
- Skip the Overcrowding: Cook the chicken in batches if needed—cramming it all in steams instead of browns. After burning three batches, I finally figured out that patience here means better flavor.
- Toast the Sesame Oil: Add the sesame oil at the very end of cooking, just before serving, and let it heat for 10-15 seconds. My grandmother swore by this, and she was right: it deepens the nutty flavor without turning bitter.
Storing and Reheating Leftovers
Refrigerator Storage
Let the sesame chicken cool completely before storing—this prevents condensation from making the coating soggy. I use glass containers from my Portland farmers market hauls. It keeps well for 3-4 days in the fridge at 40°F or below. 💡
Freezer Storage
For longer storage, freeze in a single layer on a baking sheet first, then transfer to quart-sized freezer bags. This prevents the pieces from sticking together. It’ll stay fresh for up to 3 months—perfect for meal prep.
Oven Reheating
Preheat your oven to 350°F and spread the chicken on a baking sheet. Reheat for 10-15 minutes until the internal temperature hits 165°F. This method revives the crispiness better than any other. ❄️
Microwave Reheating
Place chicken on a microwave-safe plate, cover with a damp paper towel, and heat on 70% power for 1-2 minutes. Stir halfway through. The sauce may loosen—just give it a quick toss.
Sauce Refresh
If the sauce thickens too much in storage, thin it with 1-2 tbsp water or chicken broth before reheating. A quick simmer on the stovetop for 2-3 minutes restores its glossy finish.
Nutrition Facts
Frequently Asked Questions
Can I use chicken breast instead of thighs?
Yes, but thighs stay juicier at high heat. If using breast, reduce baking time to 8-10 minutes per side to prevent drying. Brining for 30 minutes first helps too.
How do I make the sauce thicker?
Simmer it longer with an extra 1 tsp cornstarch mixed with 1 tbsp water. Stir until it reaches your desired consistency, about 2-3 minutes.
Can I air-fry this instead of baking?
Air-fry at 375°F for 12-14 minutes, shaking halfway. The circulation creates even crispier edges without oil.
Why is my coating falling off?
This usually means the chicken wasn’t dry before coating. Pat it thoroughly with paper towels first. Also, avoid overcrowding on the baking sheet.

- Jollof Rice Sauce Recipe: West African Tomato and Spice Infusion - September 25, 2026
- Japanese Rice Soup Recipe: Umami-Rich Comfort in a Bowl - September 25, 2026
- Homemade Cream Of Rice Recipe: Silk-Smooth Breakfast in Minutes - September 25, 2026