
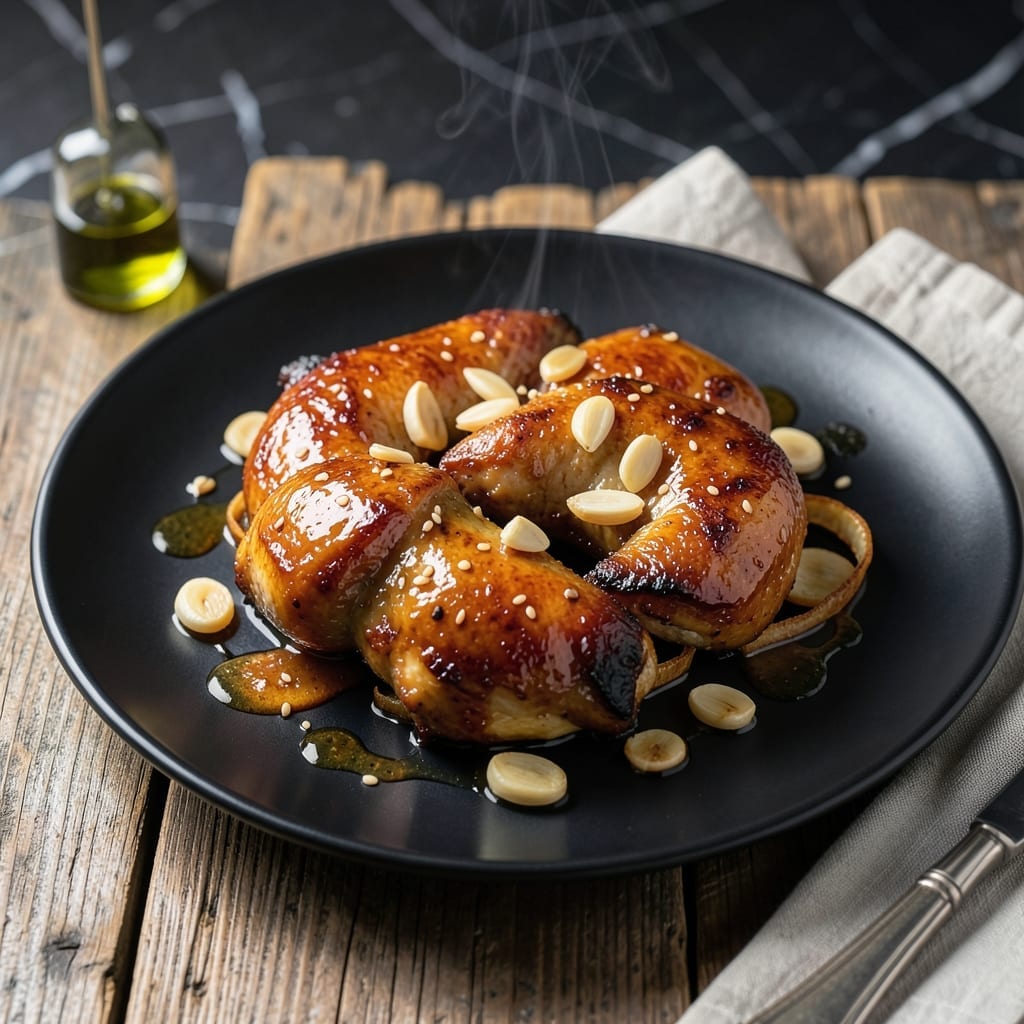
This caramelised chicken delivers a perfect balance of sweet and savory flavors with minimal effort. The technique transforms ordinary chicken into something extraordinary with a glossy, golden finish.
I’ve refined this method to ensure consistent results every time. The key lies in patiently building the caramelization, which creates a rich, deeply flavored crust while keeping the meat juicy and tender inside.
The dish comes together quickly with pantry staples, making it ideal for weeknight dinners. A simple pan-searing process develops the signature caramelized exterior that pairs beautifully with the natural sweetness.
Serve it with steamed rice or roasted vegetables to soak up the delicious sauce. This recipe proves that impressive results don’t require complicated techniques.
Ingredients for Caramelised Chicken
Pantry staples meet pan-seared perfection in this glossy, golden dish.
| Ingredient | Amount | Notes |
|---|---|---|
| Chicken Thighs 🍗 | 1 ½ lb | Boneless, skin-on preferred |
| Brown Sugar 🍚 | ¼ cup | Light or dark variety |
| Soy Sauce 🫒 | 3 tbsp | Low-sodium for control |
| Garlic Cloves 🧄 | 4 cloves | Minced finely for even flavor |
| Fresh Ginger 🌿 | 1 tbsp | Peeled and grated |
| Rice Vinegar 🍶 | 2 tbsp | Balances sweetness with acidity |
| Olive Oil 🫒 | 2 tbsp | Divided for cooking and finishing |
| Sesame Oil 🫒 | 1 tsp | Toasted for depth of flavor |
| Cornstarch 🌾 | 1 tbsp | For thickening the sauce |
| Salt 🧂 | ½ tsp | Kosher or sea salt preferred |
| Black Pepper 🌶️ | ½ tsp | Freshly ground for best results |
| Red Pepper Flakes 🌶️ | ¼ tsp | Optional for heat adjustment |
The chicken thighs are non-negotiable here. Skin-on, bone-in yields the best caramelization and juiciness, though boneless works in a pinch. Source from Whole Foods or your local butcher for consistent quality. The brown sugar’s caramel depth defines the dish—Domino or C&H brands dissolve evenly. Fresh ginger and garlic should be firm and aromatic; avoid pre-minced for maximum punch.
No brown sugar? White sugar plus a teaspoon of molasses substitutes well. Soy sauce can be coconut aminos for gluten-free needs. Missing rice vinegar? Apple cider vinegar at equal volume works. The sesame oil adds depth, but toasted vegetable oil can replace it if needed. Cornstarch is key for the sauce’s gloss—don’t skip it unless you’re okay with a thinner consistency.
The sauce thickens as it cools, so let it rest 5 minutes before serving. Leftovers keep 4 days refrigerated or freeze for 3 months. Reheat gently to preserve the caramelized crust—microwave at half power or warm in a skillet with a splash of water.
Why You’ll Love This Recipe
- One Pan Wonder: I toss everything in a single skillet—chicken, brown sugar, soy sauce—minimal cleanup, maximum flavor.
- Sticky Sweet Bite: The brown sugar caramelizes into this glossy glaze that clings to every piece. Honestly, I could eat it straight from the pan.
- Meal Prep Hero: Makes enough for leftovers that taste even better the next day over rice or noodles.
- Budget Friendly: Chicken thighs stay juicy and cheap, and the sauce comes from pantry staples I always have.
Step-by-Step Instructions for Caramelised Chicken
Master the technique for perfectly balanced sweet and savory flavors with this method.
Step 1: Season and Coat the Chicken Thighs
Pat the 1.5 lb chicken thighs dry with paper towels to ensure proper browning. Season both sides evenly with 0.5 tsp salt, 0.5 tsp black pepper, and 0.25 tsp red pepper flakes. The salt enhances the natural flavors while the peppers add subtle heat.
Place the 1 tbsp cornstarch in a shallow dish and dredge each thigh lightly, shaking off excess. This creates a crispy exterior that will hold the caramelized sauce beautifully. The cornstarch also thickens the pan sauce later.
Step 2: Sear the Chicken to Golden Perfection
Heat 1 tbsp olive oil in a large skillet over medium-high heat until shimmering. Add the chicken thighs skin-side down and cook undisturbed for 5-6 minutes until the skin is deep golden brown and crisp.
Flip and sear the other side for 4-5 minutes until equally browned. The chicken should release easily from the pan when properly seared. Remove the thighs to a plate and set aside—they’ll finish cooking in the sauce.
Step 3: Build the Caramelized Sauce
In the same skillet, reduce heat to medium and add the remaining 1 tbsp olive oil. Sauté 4 cloves minced garlic cloves and 1 tbsp grated fresh ginger for 30-45 seconds until fragrant but not browned.
Stir in 0.25 cup brown sugar, 3 tbsp soy sauce, and 2 tbsp rice vinegar. Let the mixture bubble for 2-3 minutes, stirring occasionally, until it thickens slightly and turns a rich amber color. The vinegar balances the sweetness perfectly.
Step 4: Finish and Glaze the Chicken
Return the chicken thighs to the skillet, skin-side up, along with any accumulated juices. Spoon the sauce over the thighs to coat evenly. Drizzle 1 tsp sesame oil over the top for depth of flavor.
Simmer for 3-4 minutes until the sauce reduces to a glossy glaze and the chicken reaches 165°F internally. The sauce should cling to the chicken and thicken enough to coat the back of a spoon.
Step 5: Rest and Serve
Transfer the chicken to a serving platter and let it rest for 5 minutes. This allows the juices to redistribute, ensuring moist, tender meat. Spoon any remaining sauce from the skillet over the thighs before serving.
The finished dish should have a sticky, caramelized coating with a balance of sweet, salty, and umami flavors. Serve immediately with steamed rice or vegetables to soak up the sauce.
Pro Tips For Making Caramelised Chicken
- Pat Dry First: Always blot the chicken thighs with paper towels before caramelizing—I learned this the hard way after my first three batches steamed instead of sizzled. Dry skin = better browning.
- Sear Before Saucing: Brown the thighs in a screaming-hot pan for 4-5 minutes per side before adding sugar or soy sauce. Skipping this step means pale, sad chicken instead of deep caramel color.
- Watch the Sugar: Brown sugar burns fast once it melts, so keep the heat at medium and stir the sauce constantly. After ruining a batch with blackened bits, I now pull the pan off heat the second it starts bubbling aggressively.
- Slice Ginger Thin: Fresh ginger can be fibrous, so slice it paper-thin or mince it fine so it melts into the sauce. Sounds fussy, but it actually changes the outcome—no one wants to chew on ginger strings.
Perfect Pairings for caramelised chicken
Side Dish Pairings
Steamed jasmine rice is my top choice—it soaks up the glossy sauce perfectly. I use 1 cup rice to 1.5 cups water for fluffy results. For extra flavor, cook the rice in chicken broth instead of water. 🥗
Vegetable Sides
Roasted broccoli with a drizzle of olive oil and a pinch of red pepper flakes complements the sweetness. Toss 4 cups florets with 2 tbsp oil and roast at 400°F for 20 minutes until crispy.
Fresh Accompaniments
A simple cucumber salad with rice vinegar and sesame seeds adds a refreshing crunch. Thinly slice 1 cucumber and toss with 1 tbsp vinegar and ½ tsp sesame seeds.
Beverage Pairings
An ice-cold lager like Sapporo cuts through the richness beautifully. For non-alcoholic options, jasmine iced tea with a squeeze of lime enhances the dish’s Asian-inspired flavors. 🍺
Garnish Ideas
Sprinkle with toasted sesame seeds and sliced green onions for color. A dash of sriracha on the side lets guests add heat to taste.
Nutrition Facts
Frequently Asked Questions
Can I use chicken breast instead of thighs?
Thighs are ideal for their fat content, which keeps the meat juicy. Breast can work but risks drying out. If using, reduce cooking time to 4-5 minutes per side and monitor internal temperature closely.
Why did my sauce not thicken?
This usually means the sauce didn’t reduce enough. Let it bubble for an extra 2-3 minutes on medium heat. Also, ensure you used 1 tbsp cornstarch as specified—it’s key for the glossy finish.
How can I make it less sweet?
Reduce the brown sugar to 2 tbsp and add an extra 1 tbsp rice vinegar for balance. The vinegar’s acidity will cut through the sweetness while maintaining depth.
Can I make this ahead of time?
Yes! Cook as directed, then store in an airtight container for up to 4 days. Reheat gently in a skillet with a splash of water to revive the sauce.

- Jollof Rice Sauce Recipe: West African Tomato and Spice Infusion - September 25, 2026
- Japanese Rice Soup Recipe: Umami-Rich Comfort in a Bowl - September 25, 2026
- Homemade Cream Of Rice Recipe: Silk-Smooth Breakfast in Minutes - September 25, 2026