
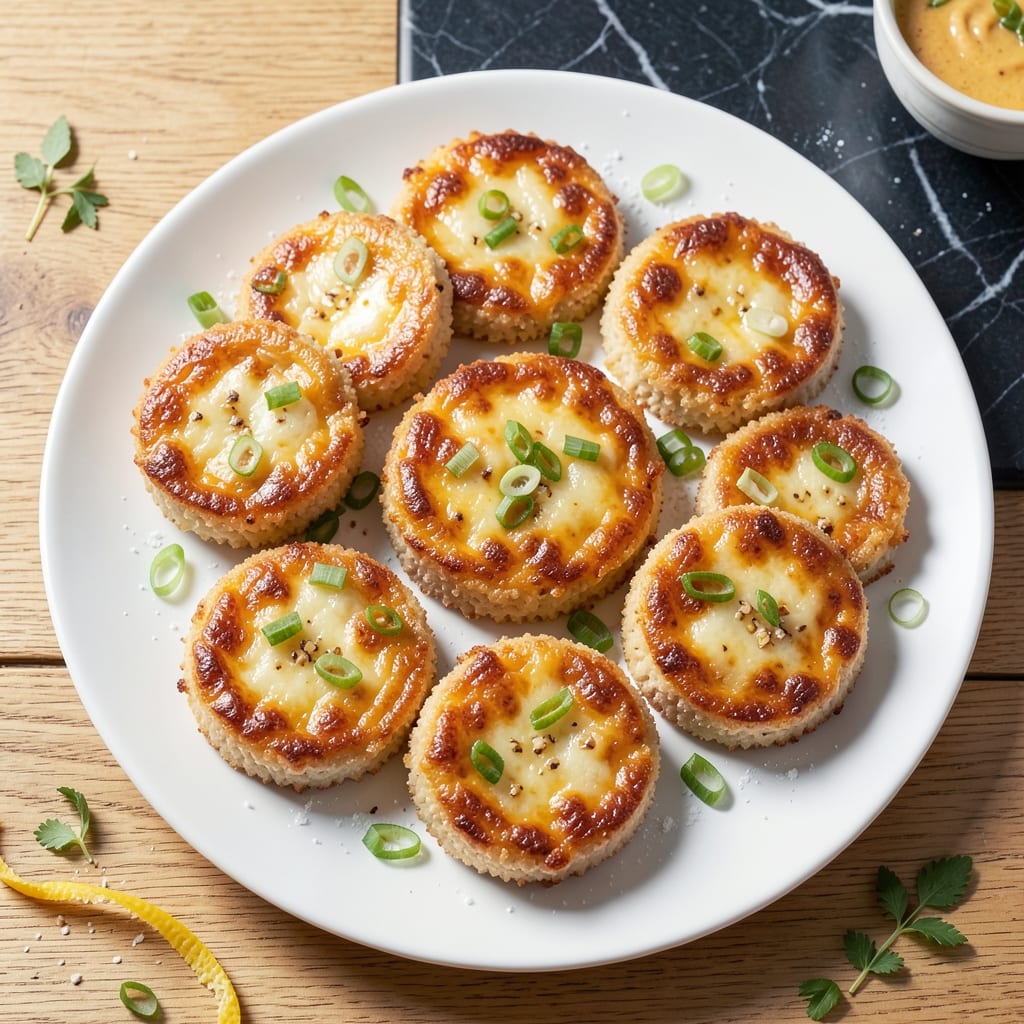
Achieving crispy cheddar rice cakes at home is simpler than you think. This vegetarian-friendly recipe transforms basic ingredients into golden, cheese-infused bites with a satisfying crunch.
The secret lies in proper pressing and frying technique. With just a few pantry staples and sharp cheddar, you’ll create restaurant-quality rice cakes that stay perfectly crispy inside and out.
Ingredients for Cheddar Rice Cakes
Transform simple pantry staples into golden, crispy cheese-infused bites with these ingredients.
| Ingredient | Amount | Notes |
|---|---|---|
| White Rice 🍚 | 2 cups | Short-grain preferred for stickiness |
| Sharp Cheddar Cheese 🧀 | 8 oz | Freshly grated from block |
| All-Purpose Flour 🌾 | ½ cup | For binding the mixture |
| Large Eggs 🥚 | 2 whole | Beaten for cohesion |
| Green Onions 🧅 | 4 whole | Thinly sliced for garnish |
| Garlic Cloves 🧄 | 2 cloves | Minced for flavor depth |
| Vegetable Oil 🫒 | 2 cups | For deep frying |
| Salt 🧂 | 1 tsp | Kosher or sea salt preferred |
| Black Pepper 🌶️ | ½ tsp | Freshly ground for best results |
| Baking Powder 🧂 | ½ tsp | Helps create crisp texture |
| Sesame Oil 🫒 | 1 tsp | Optional for aromatic finish |
The cheddar must be sharp and freshly grated—pre-shredded cheese contains anti-caking agents that prevent proper melting. Cabot or Tillamook are excellent choices for bold flavor. Short-grain rice (like sushi rice) provides the necessary stickiness for binding, while all-purpose flour and eggs create the perfect cohesive base. Find these at any standard grocery store.
No sharp cheddar? Pepper Jack or Colby work in a pinch (though flavor will differ). For a gluten-free version, swap all-purpose flour for rice flour or cornstarch. The green onions can be substituted with chives if preferred. Sesame oil adds depth but can be omitted if unavailable.
Store uncooked rice cakes in the fridge for up to 2 days. Fried cakes are best served immediately but can be kept warm in a 200°F oven for 30 minutes. Leftovers reheat well in an air fryer for 3-4 minutes to restore crispness.
Why You’ll Love This Recipe
- One Bowl Wonder: I just mix cooked rice, shredded cheddar, eggs and flour in a single bowl—no fancy steps.
- That Cheesy Crisp: The sharp cheddar melts into gooey pockets while the edges get golden and crunchy with every bite.
- Freezer Friendly: I double the batch and freeze half for those nights I need a snack or side in minutes.
- Budget Stretcher: White rice and a block of cheddar feed my family for days without breaking the bank.
Step-by-Step Instructions for Cheddar Rice Cakes
This method ensures perfectly crispy cheese-infused bites with a golden exterior every time.
Step 1: Prepare the Rice Mixture
Combine the 2 cups White Rice with the 8 oz Sharp Cheddar Cheese, 0.5 cup All-Purpose Flour, 0.5 tsp Baking Powder, 1 tsp Salt, and 0.5 tsp Black Pepper in a large bowl. The flour and baking powder create structure, while the cheese adds rich, melty pockets throughout each bite.
Stir in the 2 whole Large Eggs until the mixture is fully combined and sticky. I use my hands for this—it gives me better control to ensure every grain of rice is coated. The eggs act as the binding agent, holding everything together during frying.
Step 2: Incorporate Aromatics for Depth
Fold in the 2 cloves Garlic Cloves, minced finely, and half of the 4 whole Green Onions, thinly sliced. The garlic adds a subtle sharpness that balances the richness of the cheese, while the green onions provide a fresh, mild bite.
The mixture should hold together when pressed but still feel slightly loose. If it seems too wet, add a touch more flour, but don’t overdo it—you want the texture to remain light, not dense. Let the mixture rest for 5 minutes to allow the flour to hydrate fully.
Step 3: Shape and Heat the Oil
Form the mixture into small, flat patties about 2 inches in diameter and ½ inch thick. Press firmly but gently—too much pressure will make them dense. The uniform shape ensures even cooking.
In a deep skillet, heat the 2 cups Vegetable Oil over medium-high heat until it reaches 350°F. Use a thermometer for accuracy; the oil is ready when a small piece of the mixture dropped in sizzles immediately and floats to the surface. This temperature is critical for achieving a crispy exterior without burning.
Step 4: Fry to Golden Perfection
Carefully slide 3-4 patties into the hot oil, working in batches to avoid crowding the pan. Fry for 3-4 minutes per side until they are deep golden brown and crispy. The edges should look slightly lacy—a sign that the cheese has melted beautifully inside.
Use a slotted spoon to transfer the fried cakes to a paper towel-lined plate to drain excess oil. Avoid stacking them immediately, as this can trap steam and make them soggy. If desired, finish with a drizzle of 1 tsp Sesame Oil for an aromatic touch.
Step 5: Garnish and Serve Immediately
Sprinkle the remaining sliced green onions over the top for a pop of color and freshness. These cakes are best served hot, while the exterior is still crispy and the cheese inside is gooey.
Pair with a dipping sauce like sriracha mayo or soy-ginger for extra flavor. The contrast of textures—crispy outside, tender inside—makes these bites irresistible. If you must hold them, keep them warm in a 200°F oven for up to 10 minutes.
Pro Tips For Making Cheddar Rice Cakes
- Chill the Mixture: After combining the rice, cheese, and eggs, refrigerate the batter for 30 minutes—it firms up the mixture so the cakes hold their shape when frying.
- Use Cold Cheese: Grate the sharp cheddar straight from the fridge; it melts slower and keeps the rice cakes from turning into a gooey blob in the pan.
- Press Out Moisture: Squeeze the cooked white rice in a clean towel to remove excess water before mixing, or you’ll end up with soggy cakes that won’t crisp.
- Skip the Crowding: Fry the cakes in batches with space between them—overcrowding the pan steams instead of fries, and your cheddar rice cakes will be greasy, not golden.
Perfect Pairings for This Dish
Dipping Sauces
I love pairing these with a simple sriracha mayo—mix ½ cup mayo with 1-2 tbsp sriracha for a creamy, spicy kick. The heat cuts through the richness beautifully. 🌶️
Fresh Pairings
A crisp green salad with a light vinaigrette balances the fried texture. I toss mixed greens with 1 tbsp lemon juice and 3 tbsp olive oil for brightness.
Beer Pairings
A cold IPA or pilsner cleanses your palate between bites. The carbonation and bitterness complement the cheesy, crispy flavors perfectly. 🍺
Asian-Inspired
For an umami twist, serve with a soy-ginger dipping sauce. Combine ¼ cup soy sauce, 1 tbsp grated ginger, and 1 tsp honey for a sweet-savory contrast.
Vegetable Sides
Steamed broccoli or snap peas add freshness. Toss with 1 tsp sesame oil and a pinch of salt to echo the cakes’ aromatic finish.
Extra Crunch
Add pickled jalapeños or radishes on the side. Their tangy bite cuts through the richness while adding vibrant color to your plate.
Nutrition Facts
Frequently Asked Questions
Can I use pre-shredded cheese?
Avoid it for best results. Pre-shredded contains anti-caking agents that prevent proper melting.
What if my mixture is too wet?
Add 1-2 tbsp more flour until it holds shape when pressed. Don’t overmix.
How do I keep them crispy?
Drain on a wire rack, not paper towels. Serve immediately or keep warm in a 200°F oven.
Can I bake instead of fry?
Yes, bake at 400°F for 15-20 minutes, flipping halfway. Texture will be different.

- Jollof Rice Sauce Recipe: West African Tomato and Spice Infusion - September 25, 2026
- Japanese Rice Soup Recipe: Umami-Rich Comfort in a Bowl - September 25, 2026
- Homemade Cream Of Rice Recipe: Silk-Smooth Breakfast in Minutes - September 25, 2026