
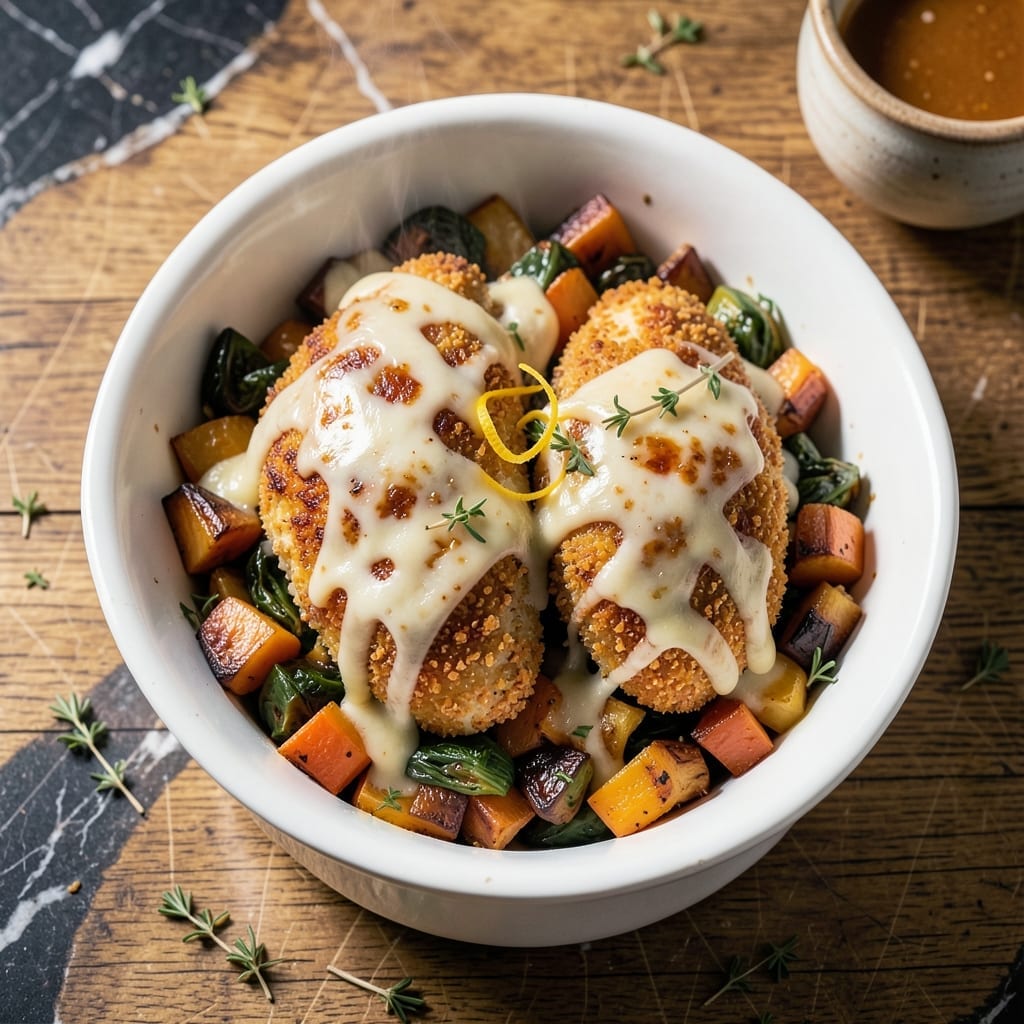
There’s nothing quite like pulling a dish of golden cheesy baked chicken from the oven, its crust perfectly crisp and the cheese bubbling. This method transforms simple ingredients into a meal that feels special without demanding complicated techniques.
The secret lies in a two-step process: first creating a crispy coating, then layering on plenty of sharp cheddar. The result is chicken that stays juicy inside while developing that irresistible textural contrast we all crave.
What emerges is a dish with a melty cheese blanket over tender meat, the edges turned a deep golden brown. It’s the kind of comforting main course that satisfies without being heavy.
Serve it straight from the oven for the best texture. Here’s how to make it perfectly every time.
Ingredients for Cheesy Baked Chicken
Simple ingredients transform into golden, melty perfection with this foolproof method.
| Ingredient | Amount | Notes |
|---|---|---|
| Chicken Breasts 🍗 | 1 ½ lb | Boneless, skinless, pounded even |
| All-Purpose Flour 🌾 | ¾ cup | For initial dredging layer |
| Large Eggs 🥚 | 2 whole | Beaten for binding coating |
| Panko Breadcrumbs 🍞 | 1 ½ cups | For crispy outer texture |
| Sharp Cheddar Cheese 🧀 | 8 oz | Shredded from block preferred |
| Parmesan Cheese 🧀 | ½ cup | Freshly grated for depth |
| Garlic Powder 🧄 | 1 tsp | For savory seasoning blend |
| Onion Powder 🧅 | 1 tsp | Enhances breading flavor |
| Paprika 🌶️ | 1 tsp | Sweet or smoked variety |
| Salt 🧂 | 1 tsp | Diamond Crystal kosher recommended |
| Black Pepper 🌶️ | ½ tsp | Freshly ground for best results |
| Buttermilk 🥛 | ½ cup | For tenderizing chicken |
| Olive Oil 🫒 | 2 tbsp | For greasing baking dish |
| Dijon Mustard 🟡 | 1 tbsp | Boosts cheese flavor layer |
The cheddar quality is non-negotiable here. Cabot or Tillamook sharp cheddar blocks (shredded fresh) melt beautifully and develop that golden-brown crust. Pre-shredded cheese contains anti-caking agents that prevent proper melting. For the breadcrumbs, Kikkoman panko (found at most Walmart locations) delivers superior crunch compared to standard breadcrumbs. The chicken breasts should be uniformly pounded to ensure even cooking.
No buttermilk? Whole milk with 1 tsp vinegar works in a pinch. Out of panko? Crushed cornflakes or saltines at a 1:1 ratio substitute well. For a gluten-free version, swap the flour for cornstarch and use gluten-free panko. The Dijon can be omitted, but it adds a subtle depth that balances the richness of the cheese.
Assemble the dish just before baking for optimal texture. Leftovers keep in an airtight container for 3-4 days in the refrigerator, though the crust softens upon storage. For best results, reheat in a 375°F oven for 10-12 minutes to restore crispness. This does not freeze well due to the cheese separation.
Why You’ll Love This Recipe
- One Pan Wonder: I just coat, bread, bake—no fancy steps, and the panko makes it extra crispy with almost zero effort.
- Cheesy Crunch: That sharp cheddar melts into the juicy chicken, and the panko gives it this irresistible crunch. Honestly, it’s the texture combo I didn’t know I needed.
- Feeds the Crew: Whether it’s a weeknight dinner or a last-minute potluck, this dish disappears fast—kids and adults alike go back for seconds.
- Leftovers? Yes Please: The chicken stays tender even reheated, so I pack it for lunch the next day. Between us, it tastes just as good cold straight from the fridge.
Step-by-Step Instructions for Cheesy Baked Chicken
Master this technique for a crispy, golden crust with gooey melted cheese every time.
Step 1: Prepare and Season the Chicken
Begin by preheating your oven to 400°F. Pound the 1.5 lb chicken breasts to an even ½-inch thickness between two sheets of plastic wrap. This ensures even cooking and prevents dry spots. Season both sides generously with the 1 tsp salt and 0.5 tsp black pepper.
The even thickness is crucial—it allows the chicken to cook uniformly while keeping the breading from burning before the meat is done. I always use a meat mallet for this step, working from the center outward for consistent results.
Step 2: Create the Breading Station
Set up three shallow bowls. In the first, combine the 0.75 cup all-purpose flour with the 1 tsp garlic powder, 1 tsp onion powder, and 1 tsp paprika. In the second, whisk together the 2 whole large eggs, 0.5 cup buttermilk, and 1 tbsp Dijon mustard until smooth. Place the 1.5 cups panko breadcrumbs in the third bowl.
This three-step breading process creates layers that adhere better and stay crispier. The Dijon mustard in the egg wash adds a subtle depth that complements the cheddar beautifully. Make sure each piece is fully coated at every stage—press the breadcrumbs firmly to ensure they stick.
Step 3: Bread and Cheese the Chicken
Dredge each chicken breast first in the seasoned flour, shaking off excess. Then dip in the egg mixture, allowing any excess to drip off. Finally, press into the panko breadcrumbs, coating completely. Place the breaded chicken on a plate and sprinkle evenly with half of the 8 oz sharp cheddar cheese and 0.5 cup Parmesan cheese.
I recommend shredding the cheddar from a block rather than using pre-shredded—it melts more smoothly and creates better coverage. Press the cheese lightly into the breading so it adheres during baking. The Parmesan adds a salty, umami depth that balances the sharpness of the cheddar.
Step 4: Bake to Perfection
Grease a baking dish with the 2 tbsp olive oil and arrange the chicken in a single layer. Bake on the middle rack for 20-25 minutes, or until the internal temperature reaches 165°F and the crust is deep golden brown. Halfway through baking, sprinkle the remaining cheese on top for maximum melt.
The high heat ensures the crust gets crispy while the chicken stays juicy. Don’t be tempted to cover the dish—this would steam the breading and prevent it from achieving that desired crunch. The cheese should be fully melted with some spots turning lightly browned when it’s ready.
Step 5: Rest and Serve
Remove from the oven and let rest for 5 minutes before serving. This allows the cheese to set slightly and the juices to redistribute through the meat. The crust should remain crisp even after resting if baked properly.
Serve immediately while the cheese is still gooey. Each piece should have a thick, golden crust with visible cheese pull when cut. The combination of crispy panko, melted cheddar, and tender chicken makes this dish irresistible. Pair with a simple green salad or roasted vegetables.
Pro Tips For Making Cheesy Baked Chicken
- Pound the Breasts: Chicken breasts are uneven—pound them to ½-inch thickness so they cook through without drying out. I learned this the hard way after pulling dry, rubbery chicken from the oven more times than I care to admit.
- Grate Cold Cheese: Skip the pre-shredded stuff and grate sharp cheddar straight from the fridge. It melts smoother and clings better to the breading—after burning a few batches with clumpy store-bought shreds, I finally wised up.
- Press the Crumbs: When coating the chicken, press the panko into the egg-washed surface hard so it sticks. Sounds tedious, but it’s the only way to guarantee that crispy, cheesy crust stays put.
- Bake on a Rack: Place a wire rack on your baking sheet so air circulates under the chicken. This keeps the bottom from getting soggy—I skip this when I’m lazy, but the dish is noticeably better when I don’t.
Make-Ahead Tips for This cheesy baked chicken
Prep the Chicken
Pound and season the chicken up to 24 hours ahead. Store covered in the fridge. The salt starts tenderizing the meat early. I often do this prep the night before—saves so much time on busy evenings. 💡
Breading Station Setup
Mix your dry ingredients and egg wash the morning of cooking. Keep them sealed in the fridge until ready to bread. The buttermilk in the egg wash keeps the chicken moist during its fridge stay.
Assemble Before Baking
Bread the chicken and add half the cheese up to 2 hours before baking. Cover and refrigerate. This prevents the breading from getting soggy. Add the remaining cheese just before baking for that perfect melt.
Oven Timing
Preheat your oven to 400°F while the chicken rests at room temperature for 15-20 minutes. This ensures even cooking from the start. Cold chicken straight from the fridge can lead to uneven doneness.
Make-Ahead Freezing
For longer storage, bread and cheese the chicken, then freeze on a tray before transferring to a bag. It keeps for up to 1 month. Bake from frozen, adding 5-10 minutes to the cooking time. ❄️
Reheating Tips
Leftover chicken reheats best in a 375°F oven for 10-12 minutes. This restores the crispiness better than a microwave. Cover with foil if the cheese starts to brown too quickly.
Nutrition Facts
Frequently Asked Questions
Can I use chicken thighs instead of breasts?
Yes, bone-in or boneless thighs work well. They stay juicier and may need 5-7 extra minutes at 400°F. Adjust cooking time based on thickness.
Why did my breading fall off?
Press firmly when coating and let each layer set for 1-2 minutes before moving to the next. Ensure the chicken is dry before dredging to help adhesion.
Can I make this gluten-free?
Swap the flour for cornstarch and use gluten-free panko. The texture will be slightly different but still crispy. Verify all spices are certified gluten-free.
How do I know when it’s done?
Use a meat thermometer—internal temp should reach 165°F. The crust will be deep golden and cheese fully melted with some browning.

- Jollof Rice Sauce Recipe: West African Tomato and Spice Infusion - September 25, 2026
- Japanese Rice Soup Recipe: Umami-Rich Comfort in a Bowl - September 25, 2026
- Homemade Cream Of Rice Recipe: Silk-Smooth Breakfast in Minutes - September 25, 2026