
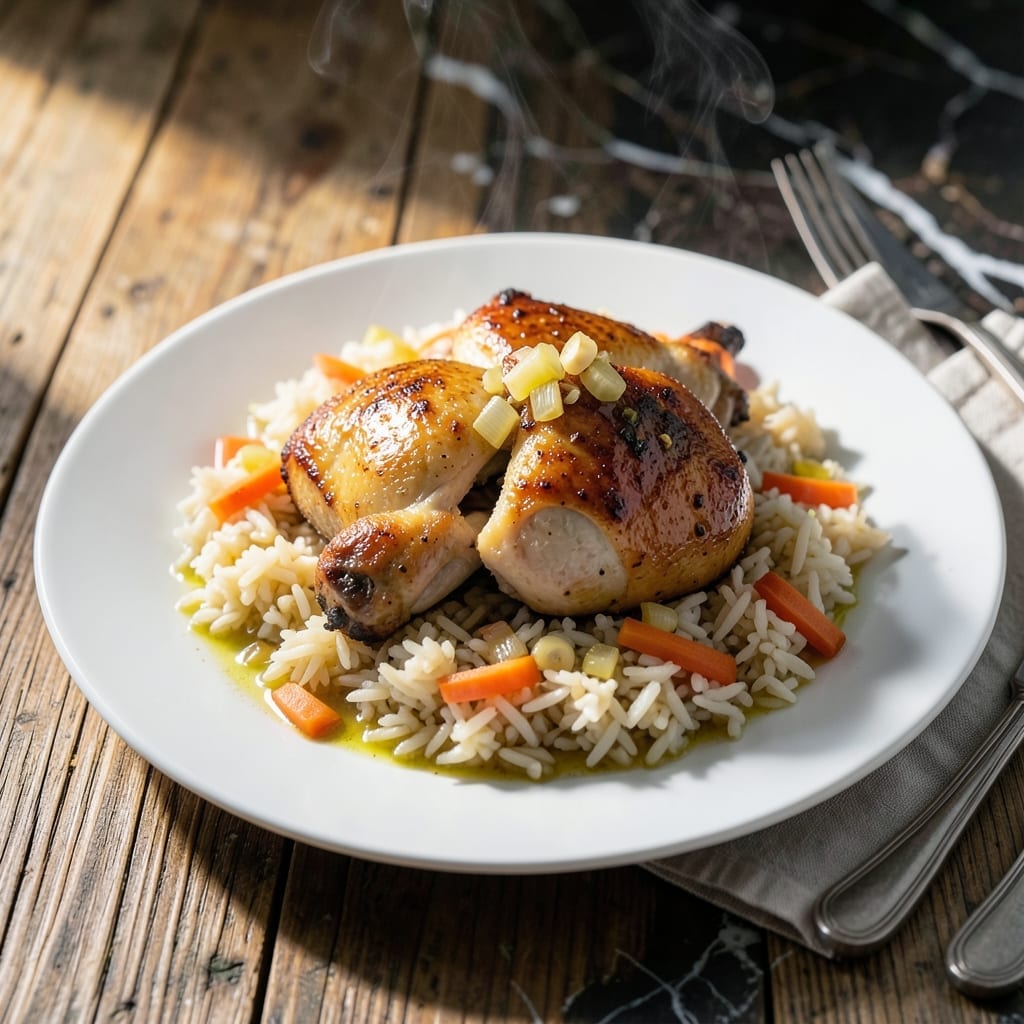
This one-pot creation simplifies dinner without sacrificing flavor. I developed this method for busy nights when cleanup needs to be as quick as cooking. The beauty lies in its versatility—adaptable to any pantry staples you have on hand.
The technique ensures tender chicken and perfectly cooked rice every time. By searing the chicken first, you build a flavor foundation that infuses the entire dish. The rice absorbs all the savory juices as it cooks, creating a meal that’s greater than the sum of its parts.
What emerges is a complete, balanced dinner with minimal effort. The chicken stays juicy while the rice becomes fluffy and aromatic. It’s the kind of dish that makes weeknight cooking feel effortless rather than exhausting.
From classic preparations to global variations, this approach works for all tastes and occasions. Here’s how to make it your go-to solution for satisfying meals.
Ingredients for Chicken and Rice Recipe Ideas
Pantry staples plus a quick stop at the produce aisle. Nothing fancy here.
| Ingredient | Amount | Notes |
|---|---|---|
| Boneless Skinless Chicken Thighs 🍗 | 1 ½ lb | Patted dry, trimmed of excess fat |
| Long-Grain White Rice 🍚 | 1 ½ cups | Uncooked, rinsed until clear |
| Chicken Broth 🥣 | 2 ½ cups | Low-sodium preferred for control |
| Yellow Onion 🧅 | 1 whole | Medium-sized, finely diced |
| Garlic Cloves 🧄 | 4 cloves | Minced for even flavor distribution |
| Carrots 🥕 | 2 whole | Medium, peeled and diced |
| Celery Stalks 🌿 | 2 whole | Diced for aromatic base |
| Olive Oil 🫒 | 2 tbsp | Divided for searing and sautéing |
| Salt 🧂 | 1 ½ tsp | Kosher or sea salt, divided |
| Black Pepper 🌶️ | ½ tsp | Freshly ground preferred |
| Dried Thyme 🍃 | 1 tsp | Or 1 tbsp fresh thyme leaves |
| Bay Leaf 🌿 | 1 whole | For depth while cooking |
| Frozen Peas 🌱 | ½ cup | Added at the end |
| Fresh Parsley 🌿 | ¼ cup | Chopped, for garnish |
The chicken thighs are key here—bone-in, skin-on works too (just adjust cooking time). I grab mine from Whole Foods or Costco when they’re on sale. The rice? Any long-grain works, but jasmine adds a nice fragrance (the good stuff, not instant). For the veggies, fresh is ideal, but frozen mirepoix blends work in a pinch—just thaw first.
No white rice? Brown rice at a 1:2 ratio (add 10 minutes cook time). Swap thyme for rosemary or oregano. Out of peas? Green beans or corn hold up well. Chicken broth can be vegetable—just boost the salt slightly. The onion can be red (sweeter) or white (sharper), depending on what you’ve got.
Leftovers keep 4-5 days in the fridge, freezes for 3 months. The flavor actually deepens overnight (worth the extra minute to portion for lunches).
Why You’ll Love This Recipe
- One Pot Magic: I toss everything in a single pan—chicken, rice, broth, onion, garlic—and let the oven do the work.
- Rich and Savory: The garlic and onion caramelize in the broth, turning the rice into this ridiculously good, flavor-packed dish.
- Meal Prep Hero: I make a big batch Sunday and portion it out for lunches all week—still tastes spot-on reheated.
- Budget Friendly: Boneless thighs and pantry staples keep this dish cheap, but it eats like a restaurant meal.
Step-by-Step Instructions for Chicken and Rice
This one-pot method keeps cleanup simple while delivering big, comforting flavors.
Step 1: Sear the Chicken Thighs
Pat the 1.5 lb boneless skinless chicken thighs dry with paper towels and season both sides with ½ tsp salt and ½ tsp black pepper. Heat 1 tbsp olive oil in a large pot or Dutch oven over medium-high heat until shimmering.
Add the chicken and sear for 4-5 minutes per side until golden brown and the internal temperature reaches 165°F. The skinless thighs won’t get as crispy as bone-in, but you’re looking for a deep, even brown color. Remove the chicken to a plate and set aside.
Step 2: Sauté the Aromatic Base
In the same pot, add the remaining 1 tbsp olive oil. Stir in the finely diced yellow onion, diced carrots, and diced celery stalks. Cook for 5-6 minutes until the vegetables soften and the onion becomes translucent.
Add the minced garlic cloves, 1 tsp dried thyme, and 1 whole bay leaf. Cook for 1 minute until the garlic is fragrant—don’t let it brown. This builds the flavor foundation that makes the rice so tasty.
Step 3: Toast the Rice and Add Liquids
Stir in the 1.5 cups long-grain white rice and cook for 1-2 minutes, stirring constantly, until the rice is lightly toasted and smells nutty. This step prevents the rice from turning mushy as it cooks.
Pour in the 2.5 cups chicken broth and the remaining 1 tsp salt. Stir well, scraping up any browned bits from the bottom of the pot. Bring the mixture to a boil, then reduce the heat to low.
Step 4: Simmer and Finish
Return the seared chicken thighs to the pot, nestling them into the rice. Cover and simmer for 20-25 minutes until the rice is tender and has absorbed most of the liquid. Avoid lifting the lid during cooking—steam is what cooks the rice evenly.
Once the rice is nearly done, stir in the ½ cup frozen peas. They only need 2-3 minutes to heat through. Remove from heat and let the dish rest, covered, for 5 minutes to allow the flavors to meld.
Step 5: Garnish and Serve
Discard the bay leaf and fluff the rice gently with a fork. Sprinkle with the ¼ cup chopped fresh parsley for a pop of color and freshness. The parsley adds brightness that cuts through the richness of the chicken.
Serve the chicken and rice hot, with extra parsley on top if desired. Each serving should have a generous portion of tender chicken, fluffy rice, and those sweet peas scattered throughout.
Pro Tips For Making Chicken And Rice Recipe Ideas
- Brown the Chicken First: Sear those boneless thighs in a hot pan until golden—about 4-5 minutes per side. I learned this the hard way: skipping this step leaves the chicken bland and the rice lacking depth.
- Use a 2:1 Ratio: For every cup of long-grain white rice, use 2 cups of chicken broth. Sounds simple, but I ruined a few batches by eyeballing it before I started measuring.
- Don’t Stir the Rice: Once the rice and broth are in the pot, resist the urge to stir. It releases starch and turns the dish mushy—I know, I couldn’t resist either until I saw the difference.
- Add Garlic Late: Toss the minced garlic in with the onions for the last minute of sautéing to keep it from burning. Burnt garlic tastes bitter, and after ruining a pot of rice with it once, I never make that mistake again.
Pro Cooking Tips for This Dish
Perfect Searing Technique
Pat the chicken completely dry with paper towels before seasoning—this is non-negotiable for achieving a good sear. I use kosher salt for even distribution. Heat your pan until the oil shimmers, then add the chicken without crowding the pan.
Rice Toasting Secret
Toasting the rice for 1-2 minutes in the aromatic base creates a nutty depth of flavor. Stir constantly to prevent burning. I use a wooden spoon to scrape up all the browned bits—they’re pure flavor bombs for your dish. 🌟
Liquid Ratio Control
For perfect rice every time, maintain a 1:1.5 rice-to-liquid ratio. If using brown rice, increase liquid to 2 cups per 1 cup rice and extend cooking time. Always bring to a boil before reducing to a simmer—this ensures even cooking.
Steam Management
Resist the urge to peek while the rice simmers. Every time you lift the lid, you release precious steam that’s cooking your rice. I set a timer for 20 minutes and only check if I smell burning. Trust the process!
Resting Time Matters
After cooking, let the dish rest covered for 5-10 minutes. This allows the rice to absorb any remaining liquid and the chicken to redistribute its juices. I use this time to set the table or toss a quick salad. 💡
Peas Timing
Add the peas only during the last 2-3 minutes of cooking to prevent them from turning mushy. If using fresh peas, blanch them separately first. Frozen works perfectly here—no need to thaw beforehand.
Nutrition Facts
Frequently Asked Questions
Can I use chicken breasts instead of thighs?
Yes, but reduce cooking time to 15-18 minutes to prevent dryness. Thighs stay juicier, but breasts work in a pinch.
What if my rice is still crunchy?
Add ¼ cup more broth, cover, and cook for 5 more minutes. Check liquid levels before adding more.
Can I make this in a slow cooker?
Sear chicken first, then cook on low for 4-5 hours. Use 20% less liquid to avoid mushiness.
How do I store leftovers?
Keep in an airtight container in the fridge for up to 4 days. Freeze for up to 3 months.

- Jollof Rice Sauce Recipe: West African Tomato and Spice Infusion - September 25, 2026
- Japanese Rice Soup Recipe: Umami-Rich Comfort in a Bowl - September 25, 2026
- Homemade Cream Of Rice Recipe: Silk-Smooth Breakfast in Minutes - September 25, 2026