
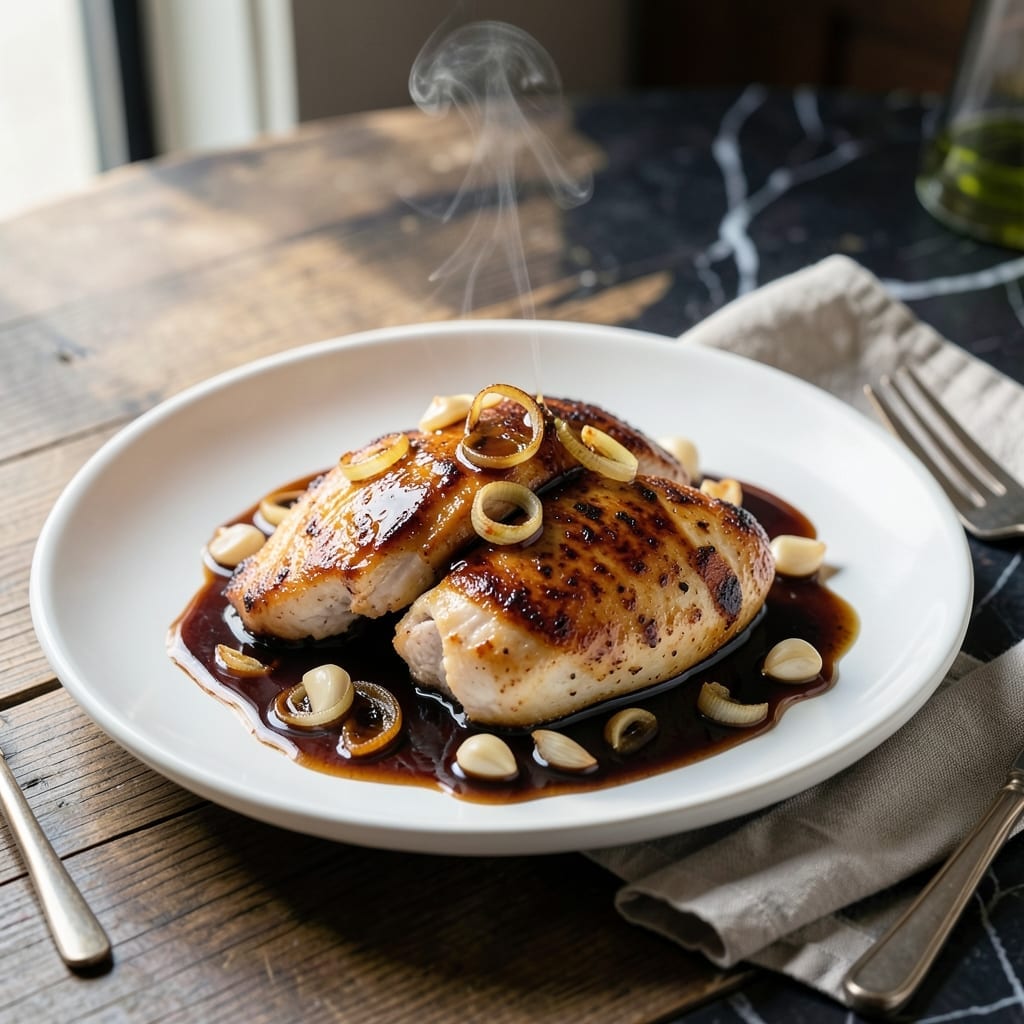
This dish transforms ordinary chicken into something extraordinary with a bold umami kick. The Worcestershire sauce adds depth that elevates the flavor profile beyond basic seasoning.
I developed this method after realizing how underused Worcestershire sauce is in home cooking. A few tablespoons create a savory glaze that coats each piece of chicken perfectly.
The process is simple yet precise: sear the chicken, build the sauce, then finish with a quick reduction. The result is juicy meat with a sticky, deeply flavored coating.
Serve hot over rice or with roasted vegetables to soak up every drop of that rich, tangy sauce.
Ingredients for Chicken and Worcester Sauce
Simple ingredients with bold umami depth for juicy, glaze-coated chicken every time.
| Ingredient | Amount | Notes |
|---|---|---|
| Boneless Skinless Chicken Breasts 🍗 | 1 ½ lb | Pounded to even thickness |
| Worcestershire Sauce 💧 | 3 tbsp | Full-flavor variety preferred |
| Olive Oil 🫒 | 2 tbsp | Divided for cooking and sauce |
| Unsalted Butter 🧈 | 2 tbsp | For rich glaze finish |
| Garlic Cloves 🧄 | 3 cloves | Minced for depth of flavor |
| Shallot 🧅 | 1 whole | Finely diced for sauce base |
| Dijon Mustard 🟡 | 1 tbsp | For tangy complexity |
| Honey 🍯 | 1 tbsp | Balances savory elements |
| Apple Cider Vinegar 🍏 | 1 tbsp | Adds bright acidity |
| Low-Sodium Chicken Broth 🥣 | ½ cup | For sauce reduction |
| Kosher Salt 🧂 | 1 tsp | Plus more to taste |
| Freshly Ground Black Pepper 🌶️ | ½ tsp | For seasoning chicken |
| Fresh Thyme Sprigs 🌿 | 3 pieces | Stems removed for garnish |
| All-Purpose Flour 🌾 | 2 tbsp | For light dredging |
The Worcestershire sauce is non-negotiable here—Lea & Perrins is the gold standard for that deep, fermented complexity. Chicken breasts should be uniform in thickness (pound them if needed) for even cooking. Costco has excellent boneless, skinless breasts in bulk, or ask your butcher to split whole breasts if you prefer. The butter matters too—European-style has higher fat content for richer sauce.
No Worcestershire? Soy sauce plus a dash of vinegar gets you 70% there. Substitute shallots with red onion at half the amount. Honey can be swapped for maple syrup, though the flavor profile shifts slightly. For the broth, Better Than Bouillon makes a solid low-sodium version. The thyme can be dried at one-third the amount if fresh isn’t available.
The sauce thickens as it cools—factor that in if prepping ahead. Store leftovers in an airtight container for up to 4 days. Freezes beautifully for 3 months, though the texture may separate slightly upon thawing. Always reheat gently to preserve the glaze consistency.
Why You’ll Love This Recipe
- 20-Minute Meal: Honestly, I can start this and have it on the table before the rice finishes cooking.
- Rich Umami Punch: The Worcestershire sauce and garlic create this deep, savory flavor that coats every bite of chicken.
- Weeknight Hero: Between us, this works for a quick dinner, meal prep, or even when I need to impress unexpected guests.
- Budget Stretcher: One pound of chicken breasts and a few pantry staples feed my family for two nights—no fancy ingredients required.
Step-by-Step Instructions for Chicken and Worcester Sauce
This method ensures a perfectly balanced sauce with tender chicken every time.
Step 1: Prepare and Season the Chicken
Pound the 1.5 lb boneless skinless chicken breasts to an even ½-inch thickness between sheets of plastic wrap. This ensures uniform cooking and prevents dryness. Season both sides generously with the 1 tsp kosher salt and ½ tsp freshly ground black pepper.
Lightly dredge the chicken in the 2 tbsp all-purpose flour, shaking off any excess. The flour creates a delicate crust and helps thicken the sauce later. Set aside while you prepare the sauce base—this brief rest allows the seasoning to penetrate the meat.
Step 2: Sear the Chicken to Golden Perfection
Heat 1 tbsp olive oil in a large skillet over medium-high heat until shimmering. Add the chicken and cook for 4-5 minutes per side until golden brown and just cooked through. The internal temperature should reach 160°F.
Transfer the chicken to a plate and tent with foil to keep warm. Don’t clean the skillet—those browned bits are essential for building the sauce’s depth of flavor. The residual heat will continue cooking the chicken to a safe 165°F as it rests.
Step 3: Build the Umami-Rich Sauce
In the same skillet, reduce heat to medium and add the remaining 1 tbsp olive oil. Sauté the finely diced 1 whole shallot for 2-3 minutes until translucent. Add the minced 3 cloves garlic cloves and cook for 30 seconds until fragrant.
Pour in the 3 tbsp Worcestershire sauce, 1 tbsp apple cider vinegar, 1 tbsp honey, and 1 tbsp Dijon mustard. Stir to combine, scraping up any browned bits from the pan. Let it simmer for 1 minute to meld the flavors.
Step 4: Finish with Broth and Butter
Add the ½ cup low-sodium chicken broth to the skillet and bring to a gentle simmer. Let it reduce by half, about 3-4 minutes. The liquid should coat the back of a spoon with a glossy sheen.
Remove the skillet from heat and whisk in the 2 tbsp unsalted butter until fully melted and emulsified. Return the chicken to the skillet, spooning the sauce over it to coat evenly. Simmer for 1-2 minutes to heat through.
Step 5: Garnish and Serve
Remove the leaves from the 3 pieces fresh thyme sprigs and sprinkle them over the chicken as a garnish. Serve immediately, ensuring each portion is generously napped with the sauce.
The sauce should be rich and glossy, with a perfect balance of savory, tangy, and slightly sweet notes. The chicken will be tender and juicy, with every bite enhanced by the umami depth of the Worcestershire.
Pro Tips For Making Chicken And Worcester Sauce
- Pound the Chicken: Even thickness means even cooking—I learned this the hard way after too many dry, chewy bites. Aim for ½-inch thick pieces so they cook through without drying out.
- Bloom the Garlic: Cook the minced garlic in the butter and oil for just 30 seconds until fragrant, not brown. Burnt garlic turns bitter and ruins the sauce’s depth.
- Skip the Overcrowding: If you’re doubling the recipe, resist the urge to cram all the chicken in one pan. Steer clear of this, or it’ll steam instead of sear, leaving you with pale, sad meat.
- Finish with Butter: After pulling the chicken out, swirl a pat of cold butter into the hot Worcestershire sauce. Sounds simple, but it adds a glossy richness that ties the whole dish together.
Dietary Considerations for This chicken and worcester sauce
Gluten-Free Option
Swap the 2 tbsp all-purpose flour for cornstarch or rice flour to make this dish gluten-free. The sauce will still thicken beautifully. I’ve tested both with great results.
Dairy-Free Adaptation
Replace the 2 tbsp unsalted butter with olive oil or vegan butter. The flavor stays rich, though the glossy finish may differ slightly. Miyoko’s brand works best for me.
Lower-Sodium Version
Use low-sodium Worcestershire sauce (like Annie’s) and reduce the kosher salt to ½ tsp. The dish remains flavorful without excess sodium. Taste and adjust as needed. 💪
Keto-Friendly Tweaks
Skip the flour dredge entirely—it’s not essential for flavor. The Worcestershire sauce adds 3g carbs per tbsp, so this fits well within keto macros. Serve over cauliflower rice instead of traditional rice.
Soy Allergy Note
Traditional Worcestershire contains soy. For allergies, use a soy-free version like Coconut Secret or make a substitute with vinegar, molasses, and spices. Always check labels carefully.
Low-Carb Serving
Pair with roasted broccoli or zucchini instead of rice. The sauce clings beautifully to vegetables, adding flavor without extra carbs. 🌱
Nutrition Facts
Frequently Asked Questions
Can I use chicken thighs instead of breasts?
Yes! Use bone-in, skin-on thighs for extra flavor. Cook them for 6-7 minutes per side to reach 165°F. The skin will crisp beautifully with the sauce.
What if my sauce is too thin?
Simmer uncovered for an extra 2-3 minutes to thicken. If needed, mix 1 tsp cornstarch with 1 tbsp water and stir in. The sauce should coat the back of a spoon.
Can I make this ahead?
Cook the chicken fully, then store in an airtight container for up to 4 days. Reheat gently on the stove with a splash of broth to restore the sauce.
What pairs well with this dish?
Serve with mashed potatoes or steamed green beans to soak up the rich sauce. A crisp green salad balances the umami flavors perfectly.

- Jollof Rice Sauce Recipe: West African Tomato and Spice Infusion - September 25, 2026
- Japanese Rice Soup Recipe: Umami-Rich Comfort in a Bowl - September 25, 2026
- Homemade Cream Of Rice Recipe: Silk-Smooth Breakfast in Minutes - September 25, 2026