
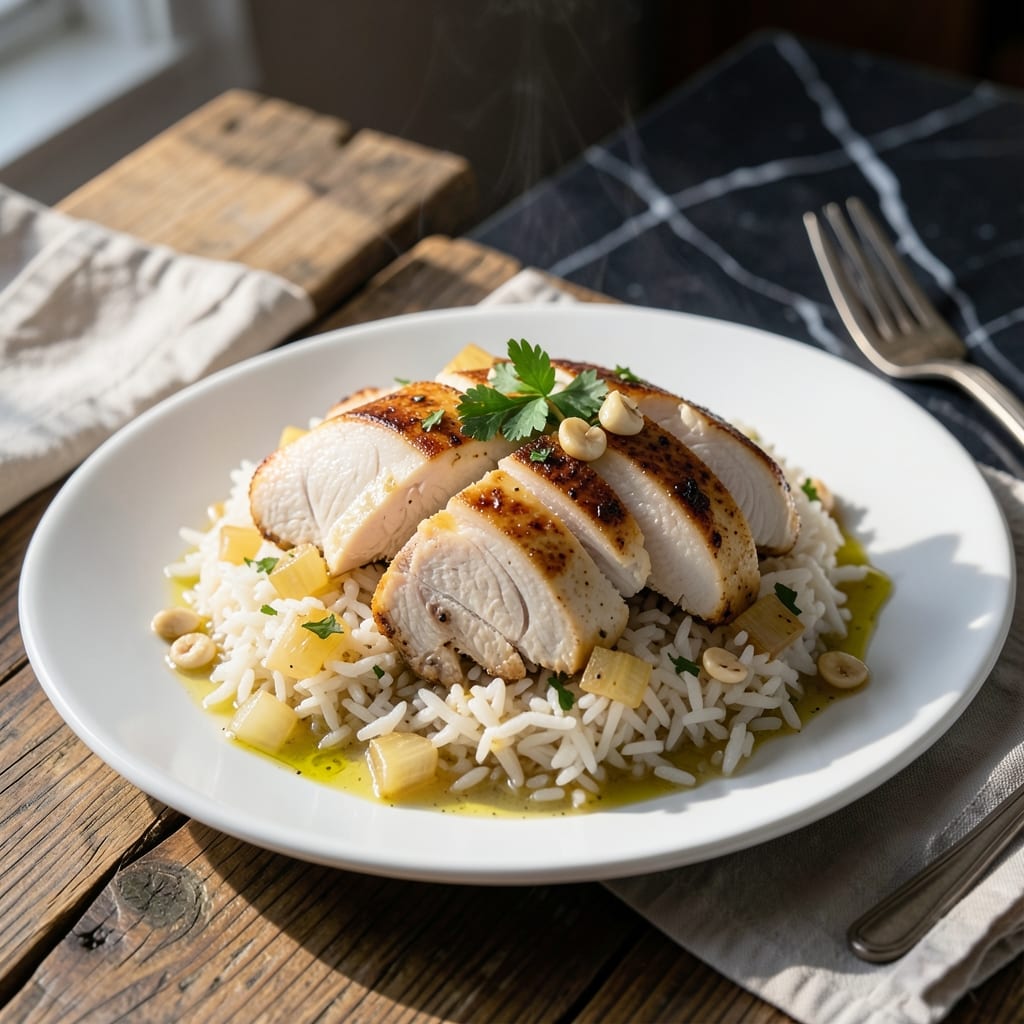
This pressure cooker method delivers tender chicken and fluffy rice with minimal effort. The sealed environment locks in moisture and flavor, ensuring perfect results every time.
In just 30 minutes, you’ll have a complete meal ready—juicy chicken nestled in seasoned rice, all cooked together in one pot. No babysitting, no stirring, just set it and forget it.
Ingredients for Chicken Breast and Rice Pressure Cooker
Tender chicken and fluffy rice require just eleven carefully chosen ingredients for this effortless one-pot meal.
| Ingredient | Amount | Notes |
|---|---|---|
| Boneless Skinless Chicken Breasts 🍗 | 1 ½ lb | Cut into 1-inch pieces |
| Long-Grain White Rice 🍚 | 1 ½ cups | Rinsed until water runs clear |
| Chicken Broth 🍲 | 1 ¾ cups | Low-sodium preferred for control |
| Olive Oil 🫒 | 2 tbsp | Divided for sautéing and finishing |
| Yellow Onion 🧅 | 1 whole | Finely diced for even distribution |
| Garlic Cloves 🧄 | 3 cloves | Minced for maximum flavor infusion |
| Dried Thyme 🍃 | 1 tsp | Rubbed between fingers to release oils |
| Dried Oregano 🌿 | 1 tsp | Mediterranean variety preferred |
| Bay Leaf 🍃 | 1 whole | Removed before serving |
| Kosher Salt 🧂 | 1 ½ tsp | Diamond Crystal brand recommended |
| Ground Black Pepper 🌶️ | ½ tsp | Freshly ground for best results |
| Frozen Peas 🌱 | 1 cup | Unthawed for texture retention |
| Lemon Juice 🍋 | 1 tbsp | Freshly squeezed for brightness |
Optimal quality requires bone-in, skin-on chicken breasts for superior flavor, though boneless works in a pinch. Jasmine or basmati rice yields the fluffiest texture. For broth, Swanson or Pacific Foods offer consistent low-sodium options. The aromatics—onion, garlic, herbs—should be fresh and vibrant (not pre-minced) for maximum impact in this sealed cooking environment.
Substitute chicken thighs for darker meat richness, adjusting cook time by 2-3 minutes. Brown rice may be used but requires 50% more liquid and 10 additional minutes. No fresh herbs? Dried at one-third the quantity works acceptably. Vegetable broth can replace chicken broth for a lighter profile, though depth of flavor will be slightly reduced.
Store uncooked chicken in the coldest part of the refrigerator for up to 2 days or freeze for 9 months. Rice keeps indefinitely in a cool, dry pantry. Prepared dish holds well in the refrigerator for 4-5 days and freezes beautifully for 3 months in airtight portions.
Why You’ll Love This Recipe
- Set It and Forget: I toss everything in the pressure cooker and walk away—no stirring, no watching, just perfect chicken and rice 20 minutes later.
- Rich in Every Bite: The chicken broth and onions infuse the rice with so much flavor I don’t even need extra seasoning.
- Meal Prep Magic: This makes enough for four lunches, and honestly, it tastes even better reheated the next day.
- Budget Hero: A pound of chicken breasts and a bag of rice feed my family for under ten bucks. Can’t argue with that.
Step-by-Step Instructions for Chicken Breast and Rice
Here’s the method. Straightforward, tested, works every time.
Step 1: Sauté Aromatics and Brown Chicken
Set your pressure cooker to the Sauté function on Normal/Medium heat. Add 1 tbsp Olive Oil and swirl to coat the bottom of the pot. When the oil shimmers, add the finely diced Yellow Onion and cook for 3-4 minutes until translucent and just beginning to soften.
Add the minced Garlic Cloves, 1 tsp Dried Thyme, and 1 tsp Dried Oregano, stirring constantly for 30 seconds until fragrant. Push the aromatics to one side, add the remaining 1 tbsp Olive Oil, then add the 1.5 lb Boneless Skinless Chicken Breasts cut into 1-inch pieces. Sear for 2 minutes per side until lightly browned.
Step 2: Add Rice and Seasonings
Stir the 1.5 cups Long-Grain White Rice into the pot, coating the grains in the rendered chicken juices and aromatics. This step ensures each grain absorbs maximum flavor. Cook for 1 minute, stirring constantly, until the rice becomes slightly translucent at the edges.
Add the 1.5 tsp Kosher Salt, 0.5 tsp Ground Black Pepper, 1 whole Bay Leaf, and 1.75 cups Chicken Broth. Stir well to combine, making sure to scrape up any browned bits from the bottom of the pot. These fond bits are pure flavor and essential for the final dish.
Step 3: Pressure Cook to Perfection
Secure the lid on your pressure cooker and set the valve to Sealing. Cook on High Pressure for 5 minutes. The cooker will take about 10 minutes to come to pressure before the timer begins. This timing ensures the chicken stays tender and the rice cooks evenly without turning mushy.
Once the cooking time is complete, let the pressure release naturally for 5 minutes, then quick-release any remaining pressure. The natural release allows the rice to continue steaming in its own moisture, preventing a gummy texture.
Step 4: Finish with Peas and Lemon
Open the lid and stir in the 1 cup Frozen Peas. The residual heat will thaw and warm them perfectly without overcooking. Replace the lid and let sit for 2 minutes to allow the peas to heat through. The peas should be bright green and tender when done.
Remove and discard the Bay Leaf, then stir in the 1 tbsp Lemon Juice. The lemon brightens all the flavors and cuts through the richness of the chicken and rice. Taste and adjust seasoning if needed, though the initial measurements should yield perfect balance.
Pro Tips For Making Chicken Breast And Rice Pressure Cooker
- Use Natural Release: I learned this the hard way—quick-releasing the pressure turns chicken breast into rubber. Let it sit for 10 minutes after cooking to keep it juicy.
- Brown the Chicken: Take 5 minutes to sear the chicken in olive oil before pressure cooking. Sounds like an extra step, but it adds depth the broth alone can’t.
- Rinse the Rice: Skip this and you’ll get gummy rice. A quick rinse removes excess starch so your grains stay separate in the pressure cooker.
- Double the Broth: After burning a batch, I figured out long-grain rice needs more liquid in a pressure cooker—use 2 cups broth per 1 cup rice, not the standard ratio.
Storing and Reheating Leftovers
Refrigerator Storage
Let this dish cool for no more than 2 hours before transferring to airtight containers. Store in the fridge at 40°F or below for up to 4-5 days. The flavors meld beautifully overnight, making leftovers taste even better. ❄️
Freezer Storage
Portion into freezer-safe containers or heavy-duty bags, leaving 1-inch headspace for expansion. Freeze for up to 3 months without texture loss. I use quart-sized Ziploc bags for space efficiency.
Stovetop Reheating
Add the desired portion to a saucepan with 2 tbsp water or broth. Heat over medium-low heat for 5-7 minutes, stirring occasionally. This method preserves moisture better than microwaving.
Microwave Reheating
Place a single serving in a microwave-safe dish, cover with a damp paper towel, and heat on 70% power for 2-3 minutes. Stir, then continue in 30-second bursts until reaching 165°F. 🔥
Peas Texture Tip
If reheating from frozen, avoid overcooking to prevent mushy peas. Thaw overnight in the fridge first for best results. The peas should retain their bright green color and slight bite.
Nutrition Facts
Frequently Asked Questions
Can I use brown rice instead of white?
Yes, but you’ll need 50% more liquid and 10 extra minutes of pressure cooking. Brown rice requires more time to soften in a sealed environment.
Why do I need to rinse the rice first?
Rinsing removes excess starch that could make your dish gummy. It also prevents the rice from becoming sticky during cooking.
What if my chicken comes out dry?
This usually means it was overcooked. Stick to exactly 5 minutes high pressure for breast pieces. The natural release helps retain moisture.
Can I add other vegetables?
Try diced carrots or bell peppers. Add them with the onions so they soften properly during cooking.

- Jollof Rice Sauce Recipe: West African Tomato and Spice Infusion - September 25, 2026
- Japanese Rice Soup Recipe: Umami-Rich Comfort in a Bowl - September 25, 2026
- Homemade Cream Of Rice Recipe: Silk-Smooth Breakfast in Minutes - September 25, 2026