
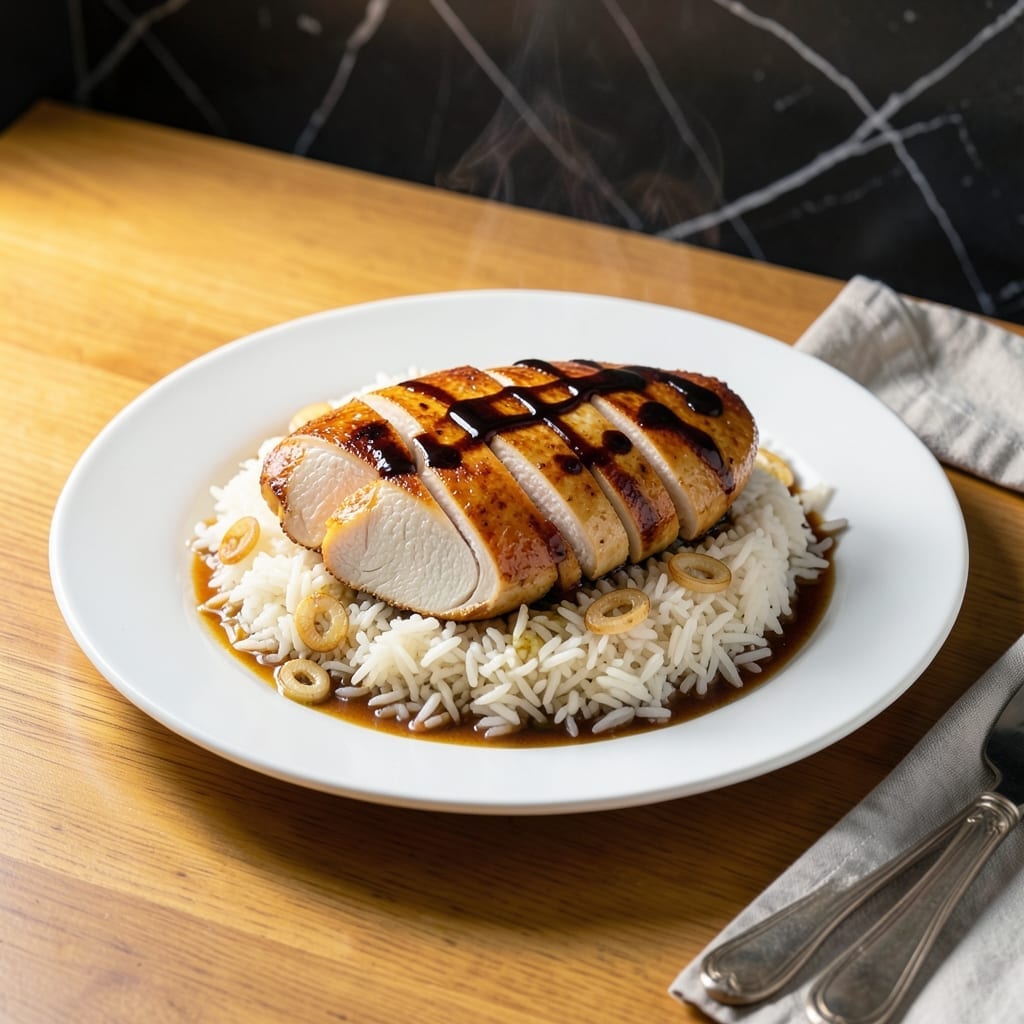
I’ve cooked thousands of proteins in my career, but this method still surprises me with its reliability. The rice cooker’s gentle, consistent heat ensures juicy results every time, without dry edges or uneven cooking.
Boneless chicken breasts cook perfectly when placed on top of rice with seasonings and broth. The steam circulates evenly, infusing flavor while keeping the meat tender. It’s a hands-free technique that delivers restaurant-quality results.
What emerges is moist, flavorful chicken that slices cleanly and pairs beautifully with the rice below. The broth enhances both components, creating a cohesive, satisfying meal with minimal effort.
No babysitting required—just set it and let the appliance do the work. This approach redefines convenience without compromising quality.
Ingredients for Chicken Breast in Rice Cooker
Pantry staples plus a quick stop at the deli counter. Nothing fancy, just good stuff.
| Ingredient | Amount | Notes |
|---|---|---|
| Boneless Chicken Breast 🍗 | 1 ½ lb | Pounded to even thickness |
| Jasmine Rice 🍚 | 2 cups | Rinsed until water runs clear |
| Low-Sodium Chicken Broth 💧 | 2 ½ cups | Divided for rice and chicken |
| Garlic Cloves 🧄 | 4 cloves | Minced finely |
| Soy Sauce 🫒 | 2 tbsp | Low-sodium preferred |
| Olive Oil 🫒 | 1 tbsp | For searing chicken |
| Fresh Ginger 🌿 | 1 tbsp | Peeled and grated |
| Green Onions 🧅 | 4 whole | Thinly sliced, white and green parts separated |
| Salt 🧂 | 1 tsp | Diamond Crystal kosher preferred |
| Black Pepper 🌶️ | ½ tsp | Freshly ground |
| Sesame Oil 🫒 | 1 tsp | Toasted, for finishing |
| Red Pepper Flakes 🌶️ | ¼ tsp | Optional for heat |
The chicken is the star here. Boneless, skinless breasts work best—thighs stay juicier but take longer. I grab mine from Whole Foods or Costco (their organic is reliable). Pounding to an even thickness ensures even cooking, no dry spots. Jasmine rice is my go-to for this (that fragrant, slightly sticky kind), but long-grain white works too. Rinse it well—starchy water makes gummy rice.
No jasmine rice? Basmati or any white rice is fine, just adjust the broth ratio slightly. Fresh ginger not on hand? Ground ginger at half the amount works in a pinch. The soy sauce can be swapped for tamari (gluten-free) or coconut aminos. Out of green onions? Yellow onion minced fine gives similar flavor. Sesame oil is worth the splurge at an Asian market—a little goes a long way.
Leftovers keep 4-5 days in the fridge, but the chicken is best fresh. Reheat gently with a splash of broth to keep it moist. The rice freezes well for up to 3 months, though the texture changes slightly. I portion extras into containers for easy lunches.
Why You’ll Love This Recipe
- Set It and Forget: I toss everything in the rice cooker, press a button, and walk away – no babysitting required.
- Garlic Soy Magic: The garlic cloves and soy sauce infuse the chicken and rice with a savory depth that’s honestly restaurant-worthy.
- Meal Prep Hero: I make a big batch on Sunday and it rehearses beautifully for lunches all week.
- One Pot Savings: Between us, it uses just five ingredients I always have on hand and costs pennies per serving.
Step-by-Step Instructions for Chicken Breast in Rice Cooker
Here’s the method. Straightforward, tested, works every time.
Step 1: Prepare and Season the Chicken
Pound the 1.5 lb boneless chicken breast to an even ¾-inch thickness using a meat mallet. This ensures even cooking throughout—no dry spots or underdone sections. I find placing the chicken between sheets of plastic wrap prevents tearing.
Season both sides generously with 1 tsp salt and 0.5 tsp black pepper. The salt will penetrate the meat during cooking, keeping it juicy and flavorful. Don’t skip this step; properly seasoned chicken makes all the difference.
Step 2: Sear for Flavor Foundation
Heat 1 tbsp olive oil in a skillet over medium-high heat until it shimmers. Add the chicken and sear for 2-3 minutes per side until golden brown. You’re not cooking it through—just building a flavor base that will carry through the rice cooker.
The chicken should release easily from the pan when it’s ready to flip. If it sticks, let it cook another 30 seconds before trying again. Transfer the seared chicken to a plate and set aside.
Step 3: Layer Ingredients in the Rice Cooker
Rinse the 2 cups jasmine rice until the water runs clear, then add it to the rice cooker pot. Pour in 2 cups low-sodium chicken broth (reserve the remaining ½ cup for later). Stir in the minced 4 cloves garlic, 1 tbsp grated fresh ginger, and 2 tbsp soy sauce.
Place the seared chicken on top of the rice mixture. Add the separated white parts of the 4 whole green onions around the chicken. This layering ensures the chicken steams perfectly while infusing the rice with flavor.
Step 4: Cook and Finish
Close the rice cooker lid and set it to the standard white rice setting. Let it cook undisturbed for the full cycle—about 20-25 minutes. The chicken will finish cooking as the rice absorbs the liquid.
Once the rice cooker switches to “keep warm,” let it rest for 10 minutes. This allows the chicken to reabsorb some of its juices. Open the lid, drizzle with 1 tsp sesame oil, and sprinkle the green onion tops and 0.25 tsp red pepper flakes for a fresh finish.
Step 5: Serve and Enjoy
Gently fluff the rice around the chicken. The chicken should be perfectly cooked to 165°F internally and juicy throughout. Slice the chicken against the grain and serve it over the fragrant rice.
Each bite should deliver tender chicken, flavorful rice, and a hint of garlic and ginger. The beauty of this method is that it’s completely hands-off once you press start—no stirring, no monitoring, just perfect results every time.
Pro Tips For Making Chicken Breast In Rice Cooker
- Pound the Chicken: Use a rolling pin to flatten the chicken breasts to an even 1-inch thickness. I learned the hard way that uneven pieces cook inconsistently in a rice cooker. —
- Rinse the Rice: Always rinse the jasmine rice until the water runs clear—this prevents a gummy texture that can ruin the dish. —
- Don’t Overfill: Keep the rice and liquid below the cooker’s max line, or you’ll end up with a soupy mess instead of perfectly cooked chicken and rice. —
- Add Soy Sauce Late: Stir in the soy sauce after the chicken is cooked to avoid over-salting the broth during the cooking process. Sounds weird, but it works.
Storing and Reheating chicken breast in rice cooker
Refrigerator Storage
Let the chicken and rice cool for no more than 2 hours before transferring to airtight containers. I use glass containers with snap-on lids—they keep odors out and let me see the contents. Store in the fridge at 40°F or below for up to 4 days. 💡
Freezer Storage
This dish freezes well for up to 3 months without losing quality. Portion into quart-size freezer bags, squeeze out excess air, and label with the date. The rice may firm up slightly after freezing, but it reheats beautifully with a splash of broth.
Microwave Reheating
For quick meals, microwave individual portions covered with a damp paper towel. Heat on 70% power for 2-3 minutes, stir, then continue in 1-minute intervals until reaching 165°F. Add a splash of chicken broth to keep the chicken moist.
Stovetop Reheating
My preferred method for best texture. Transfer the chicken and rice to a skillet with ¼ cup chicken broth. Heat over medium-low heat for 8-10 minutes, stirring occasionally. The broth revitalizes the rice and keeps the chicken juicy. ✨
Oven Reheating
Preheat oven to 300°F. Place the chicken and rice in an oven-safe dish, add 2 tbsp chicken broth, and cover with foil. Heat for 15-20 minutes until warmed through. This method works great for larger portions.
Nutrition Facts
Frequently Asked Questions
Can I use frozen chicken breast?
Thaw completely first for even cooking. Place frozen breasts in the fridge overnight or use the defrost setting on your microwave. Never cook from frozen in a rice cooker as it may not reach 165°F safely.
Should I flip the chicken during cooking?
No need! The steam circulates evenly, cooking all sides. Flipping could break the chicken or disturb the rice. Just place it on top and let the appliance work its magic.
What if my rice cooker doesn’t have a “white rice” setting?
Use the standard or regular setting. Most rice cookers default to this. Cook time will be similar (20-25 minutes), just monitor that the liquid is fully absorbed.
Can I add vegetables to this?
Add 1 cup of diced carrots or bell peppers with the rice. Broccoli or snap peas work too, but add them during the last 10 minutes to prevent mushiness.

- Jollof Rice Sauce Recipe: West African Tomato and Spice Infusion - September 25, 2026
- Japanese Rice Soup Recipe: Umami-Rich Comfort in a Bowl - September 25, 2026
- Homemade Cream Of Rice Recipe: Silk-Smooth Breakfast in Minutes - September 25, 2026