
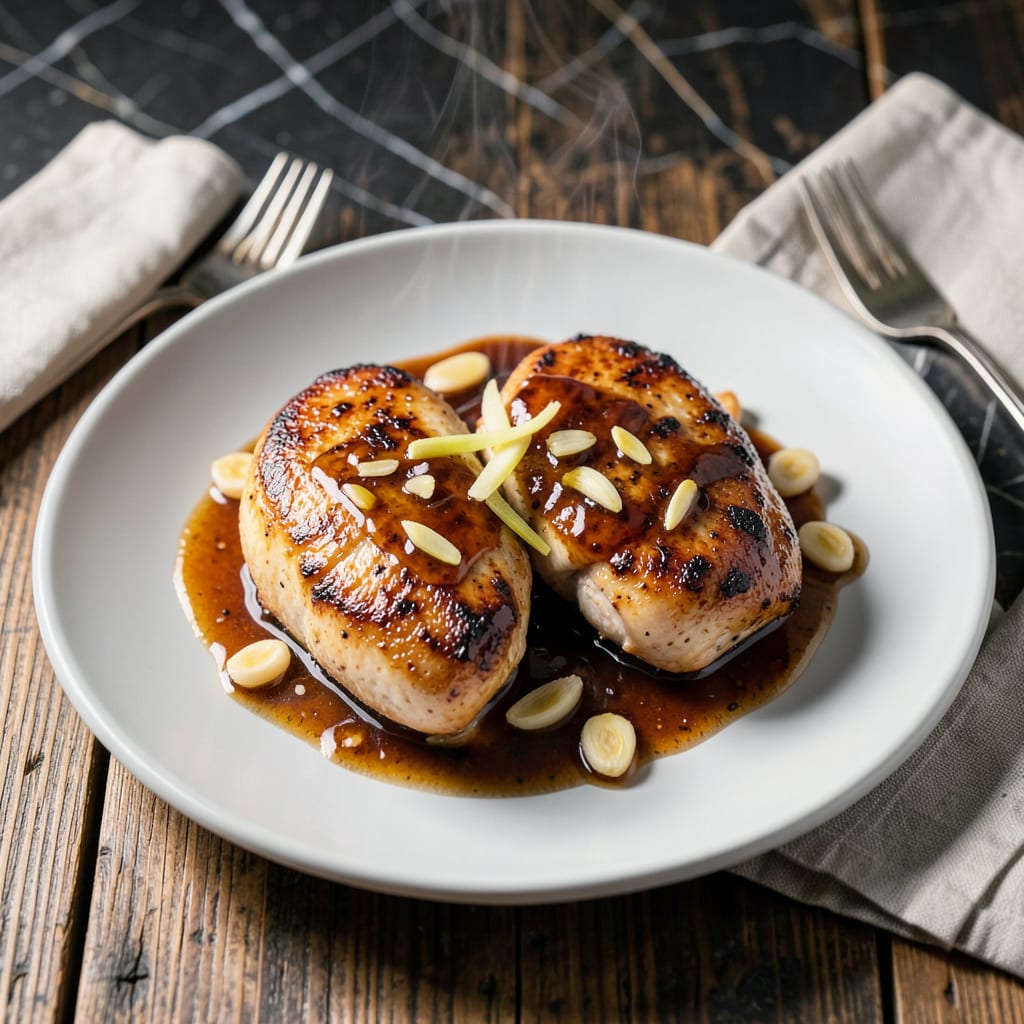
This recipe delivers perfectly cooked chicken with a glossy, sweet-savory glaze that caramelizes beautifully. The combination of soy sauce, honey, and vinegar creates a balanced flavor profile that enhances the natural taste of the chicken.
With just 25 minutes of cooking time, you can have tender, juicy chicken breast ready to serve. The simple marinade doubles as a glaze, making this dish both flavorful and efficient for weeknight dinners.
Ingredients for Chicken Breast Recipe with Soy Sauce Honey and Vinegar
Simple ingredients create a glossy sweet-savory glaze on tender chicken breasts quickly.
| Ingredient | Amount | Notes |
|---|---|---|
| Boneless Skinless Chicken Breasts 🍗 | 1 ½ lb | Pounded to even thickness |
| Soy Sauce 🥢 | ½ cup | Low-sodium preferred |
| Honey 🍯 | ⅓ cup | Pure, unfiltered variety |
| Rice Vinegar 🍚 | 3 tbsp | Unseasoned for balance |
| Garlic Cloves 🧄 | 4 cloves | Minced finely |
| Fresh Ginger Root 🌿 | 1 tbsp | Peeled and grated |
| Olive Oil 🫒 | 2 tbsp | Divided for cooking |
| Kosher Salt 🧂 | ½ tsp | Diamond Crystal preferred |
| Freshly Ground Black Pepper 🌶️ | ½ tsp | Coarse grind ideal |
| Sesame Seeds 🌰 | 1 tbsp | Toasted for garnish |
| Green Onions 🧅 | 3 whole | Thinly sliced for garnish |
| Red Pepper Flakes 🔥 | ¼ tsp | Optional for heat |
[recipeingredientscaler]
The chicken breasts must be uniform in thickness for even cooking. Whole Foods or Costco offer high-quality options—look for air-chilled for better texture. Pounding to an even ¾-inch thickness ensures consistent doneness. The soy sauce forms the base of the glaze, so use a reputable brand like Kikkoman or Pearl River Bridge for optimal flavor.
No rice vinegar? Apple cider vinegar at the same quantity works well. Honey can be replaced with maple syrup or agave for similar sweetness. For a gluten-free version, use tamari instead of soy sauce. The ginger adds depth—fresh is ideal, but ground ginger at one-quarter the amount is acceptable in a pinch.
Store raw chicken in the coldest part of the fridge and use within 2 days. The glaze keeps for 1 week refrigerated in an airtight container. Cooked chicken stays fresh for 4 days and reheats well for meal prep.
Why You’ll Love This Recipe
- One Pan Dinner: I toss everything together in a single skillet—chicken, soy sauce, honey, and vinegar—then let it work its magic.
- Sweet-Savory Balance: The honey caramelizes while the soy and vinegar keep it tangy, and the garlic ties it all together.
- Meal Prep Hero: I make a big batch on Sunday and it stays juicy for days, whether in salads or wrapped in a tortilla.
- Budget Stretcher: Boneless chicken breasts are affordable, and this sauce turns them into something crave-worthy without extra cost.
Step-by-Step Instructions for Chicken Breast With Soy Sauce Honey and Vinegar
Master the technique for perfectly glazed chicken with balanced sweet and savory flavors.
Step 1: Pound and Season the Chicken Breasts
Place the 1.5 lb boneless skinless chicken breasts between two sheets of plastic wrap. Using a meat mallet, pound them to an even ½-inch thickness—this ensures uniform cooking and prevents dry spots.
Pat the chicken dry with paper towels, then season both sides with 0.5 tsp kosher salt and 0.5 tsp freshly ground black pepper. The dry surface guarantees a good sear, while the seasoning enhances the natural flavor of the meat.
Step 2: Sear the Chicken in Olive Oil
Heat 1 tbsp olive oil in a large skillet over medium-high heat until shimmering. Add the chicken breasts and cook for 5-6 minutes per side until golden brown and the internal temperature reaches 160°F.
Resist the urge to move the chicken—let it develop a deep sear before flipping. This creates a flavorful crust and locks in juices. Transfer the chicken to a plate and tent with foil to keep warm.
Step 3: Create the Soy-Honey Glaze
In the same skillet, reduce heat to medium and add the remaining 1 tbsp olive oil. Sauté the 4 cloves minced garlic cloves and 1 tbsp grated fresh ginger root for 30-45 seconds until fragrant.
Pour in 0.5 cup soy sauce, 0.33 cup honey, and 3 tbsp rice vinegar. Stir to combine and simmer for 3-4 minutes until the mixture thickens slightly and coats the back of a spoon. For heat, add 0.25 tsp red pepper flakes.
Step 4: Glaze and Finish the Chicken
Return the chicken to the skillet, spooning the glaze over each piece. Cook for an additional 1-2 minutes per side, allowing the sauce to caramelize and adhere to the chicken.
The glaze should form a glossy, sticky coating. If it thickens too much, add a splash of water to loosen it. The chicken is done when the internal temperature reaches 165°F.
Step 5: Garnish and Serve
Transfer the chicken to a serving platter and drizzle with any remaining glaze. Sprinkle with 1 tbsp toasted sesame seeds and 3 whole thinly sliced green onions for a fresh, aromatic finish.
Let the chicken rest for 5 minutes before serving to allow the juices to redistribute. The result is tender, juicy chicken with a vibrant, balanced glaze that’s both sweet and savory.
Pro Tips For Making Chicken Breast Recipe With Soy Sauce Honey And Vinegar
- Pound the Chicken: Even thickness means even cooking—pound the breasts to about ¾ inch so they don’t dry out while the thicker parts finish.
- Bloom the Garlic: Cook the minced garlic in a little oil for 30 seconds before adding liquids—raw garlic can taste harsh in the glaze.
- Reduce the Sauce: Simmer the soy-honey-vinegar mix for 2-3 minutes before adding chicken, or you’ll end up with a watery, weak coating.
- Rest Before Serving: Give the chicken 5 minutes off the heat before slicing, or all those flavorful juices will end up on the cutting board.
Essential Equipment for Perfect Results
Quality Skillet
A heavy-bottomed stainless steel skillet is my go-to for this recipe. It distributes heat evenly and develops a perfect sear on the chicken. I love my All-Clad 12-inch skillet—it’s a workhorse that lasts forever. 🔥
Meat Mallet
To achieve even thickness, a meat mallet is essential. Pounding the chicken to ½-inch thickness ensures it cooks uniformly. Look for one with both flat and tenderizing sides for versatility.
Instant-Read Thermometer
Precision matters for chicken, so I never skip my ThermoWorks ThermoPop. It gives accurate readings in 2-3 seconds, ensuring the chicken hits 165°F without overcooking. This is my secret to juicy, never-dry results.
Mixing Bowls
A set of nested mixing bowls keeps your prep organized. I use glass or stainless steel for the glaze—non-reactive materials prevent any metallic taste. A 2-cup bowl is perfect for mixing the soy-honey-vinegar blend.
Tongs and Spatula
Use locking tongs for flipping chicken—they provide a secure grip without piercing the meat. A heat-resistant silicone spatula helps coat the chicken evenly with the glaze. These tools make the process smoother and more precise.
Optional Garlic Press
For the 4 minced garlic cloves, a garlic press saves time and effort. I’ve had my OXO Good Grips press for years—it crushes cloves quickly and efficiently, releasing maximum flavor into the glaze.
Nutrition Facts
Frequently Asked Questions
Can I use chicken thighs instead of breasts?
Chicken thighs stay juicier and can handle the glaze even better. Reduce cooking time to 4-5 minutes per side since they cook faster. The flavor will be richer with a slightly different texture.
Why does the glaze sometimes burn?
This happens when the heat is too high. Keep the flame at medium when simmering the sauce, and stir frequently. If it starts darkening too quickly, remove the pan from heat for 30 seconds to cool slightly.
How can I make this dish ahead?
Mix the glaze up to 2 days in advance and store it refrigerated. Cook the chicken fresh, but you can reheat leftovers gently in a pan with a splash of water for 2-3 minutes.
Is there a substitute for rice vinegar?
Apple cider vinegar works perfectly at the same ratio. Avoid balsamic—it’s too strong and will overpower the honey. For a milder taste, try white wine vinegar.

- Rice Bagel Recipe: Chewy Pillows With a Twist - September 25, 2026
- Rice Cheela Recipe: Savory Indian Pancakes With Fresh Herbs - September 25, 2026
- Liver and Rice Recipe: Iron-Rich Comfort With Bold Flavor - September 25, 2026