
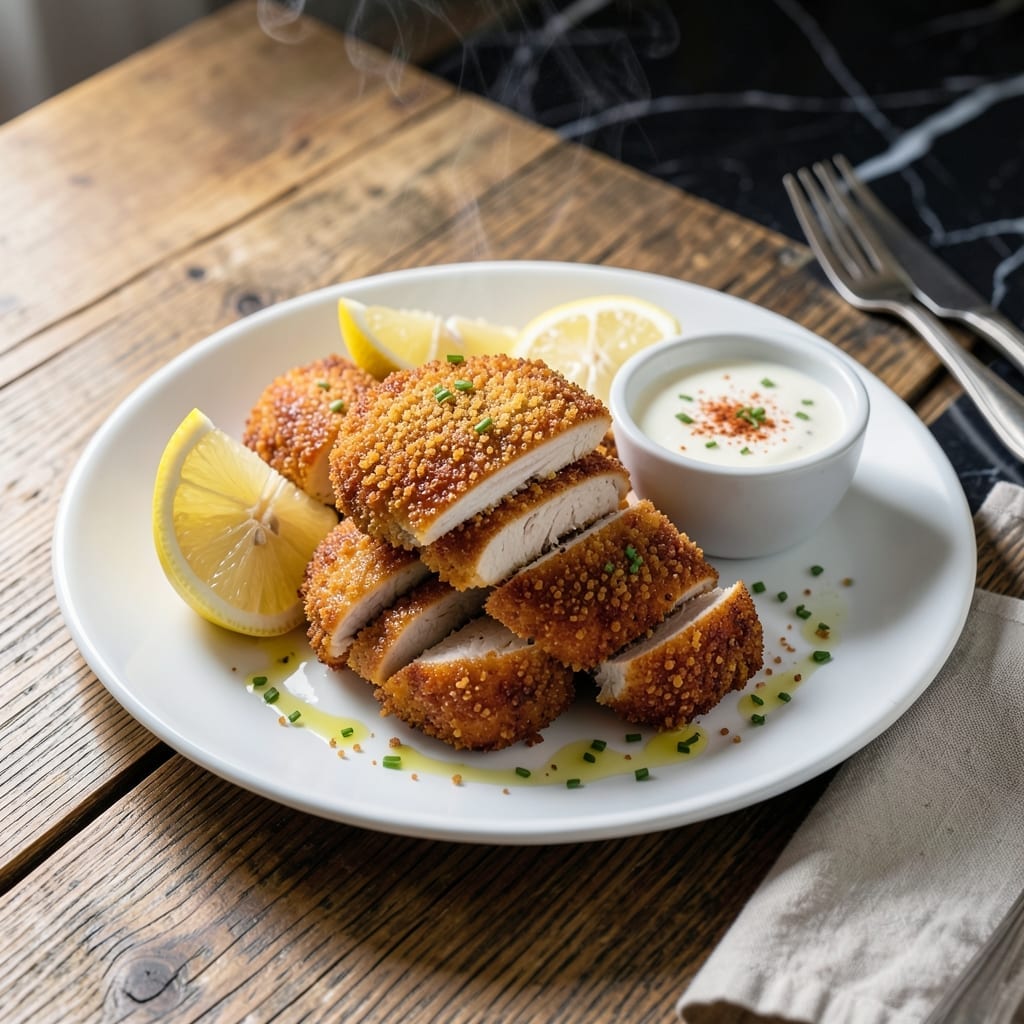
Achieving perfectly crispy chicken strips at home is easier than you think with this proven method. The secret lies in a double-coating technique that ensures every bite delivers that satisfying crunch we all crave.
I developed this recipe after years of testing different breading approaches. The herb-infused coating adds layers of flavor while maintaining that golden, shatteringly crispy exterior. It works every time without fail.
These strips cook up quickly at high heat, locking in moisture while creating that signature texture. The result is tender chicken inside with a coating that stays crispy even after baking.
Serve them hot with your favorite dipping sauces. Here’s how to make these restaurant-quality strips in your own kitchen.
Ingredients for Chicken Breast Strips
Pantry staples plus chicken make these crispy, herb-infused strips a breeze to prepare.
| Ingredient | Amount | Notes |
|---|---|---|
| Boneless Skinless Chicken Breasts 🍗 | 1 ½ lb | Cut into 1-inch strips |
| All-Purpose Flour 🌾 | 1 cup | For initial dredging |
| Large Eggs 🥚 | 2 whole | Beaten for egg wash |
| Buttermilk 🥛 | ½ cup | For tenderizing chicken |
| Panko Breadcrumbs 🍞 | 2 cups | For crispy coating |
| Grated Parmesan Cheese 🧀 | ½ cup | Freshly grated preferred |
| Dried Oregano 🌿 | 1 tbsp | For herb infusion |
| Dried Thyme 🌿 | 1 tbsp | For herb infusion |
| Garlic Powder 🧄 | 1 tsp | For seasoning coating |
| Onion Powder 🧅 | 1 tsp | For seasoning coating |
| Paprika 🌶️ | 1 tsp | Sweet or smoked variety |
| Salt 🧂 | 1 tsp | Kosher or sea salt |
| Black Pepper 🌶️ | ½ tsp | Freshly ground preferred |
| Vegetable Oil 🫒 | ½ cup | For frying, high smoke point |
The chicken is the star here. Boneless, skinless breasts cut into even strips cook more uniformly—avoid the pre-cut tenderloins (they dry out faster). For the best crunch, Panko breadcrumbs are non-negotiable; regular breadcrumbs just won’t deliver that shattering texture. I grab mine from Kroger or Walmart—both carry reliable brands. The buttermilk isn’t just for flavor; it’s the secret to keeping the meat juicy through the double-coating process.
No buttermilk? Whole milk with a splash of vinegar or lemon juice works in a pinch (let it sit 5 minutes). Swap the Panko for crushed cornflakes if you’re desperate, though the flavor won’t be as neutral. For a gluten-free version, gluten-free Panko or crushed rice cereal does the trick. The Parmesan can be omitted, but it adds a savory depth that’s hard to replicate—nutritional yeast is a solid vegan alternative.
Prep the chicken and coating just before frying—Panko loses its crispness if it sits too long. Store leftovers in an airtight container for up to 3 days. Reheat in the oven or air fryer to revive the crunch (microwaving makes them soggy).
Why You’ll Love This Recipe
- Minimal Chopping Required: I just slice the chicken breasts into strips and go—no fancy prep work here.
- Crispy Outside, Juicy Inside: The buttermilk and panko combo gives that perfect crunch, while the chicken stays tender.
- Feeds a Crowd: Honestly, I make a double batch for game nights—everyone always wants seconds.
- Budget-Friendly Protein: Panko makes these taste gourmet, but chicken breast keeps it affordable for weeknights.
Step-by-Step Instructions for Chicken Breast Strips
These simple steps guarantee maximum crunch and juicy perfection every time.
Step 1: Prep and Season the Chicken Strips
Cut the 1.5 lb Boneless Skinless Chicken Breasts into 1-inch strips. This uniform size ensures even cooking and consistent crispiness. Pat them completely dry with paper towels—moisture is the enemy of a good sear.
Season both sides generously with the 1 tsp Salt and 0.5 tsp Black Pepper. I always use freshly ground black pepper for the best flavor. This simple seasoning enhances the chicken’s natural taste without overpowering the herb coating.
Step 2: Create the Breading Station
Set up three shallow dishes. In the first, place the 1 cup All-Purpose Flour. In the second, whisk together the 2 whole Large Eggs and 0.5 cup Buttermilk until smooth. This egg wash will help the coating adhere beautifully.
In the third dish, combine the 2 cups Panko Breadcrumbs, 0.5 cup Grated Parmesan Cheese, 1 tbsp Dried Oregano, 1 tbsp Dried Thyme, 1 tsp Garlic Powder, 1 tsp Onion Powder, and 1 tsp Paprika. Mix thoroughly so every bite gets that herb-infused crunch you’re after.
Step 3: Coat the Chicken for Maximum Crispiness
Working with one piece at a time, dredge each strip in the flour, shaking off any excess. Then dip it into the egg wash, allowing any excess to drip off. Finally, press it firmly into the panko mixture, turning to coat completely.
Place the breaded strips on a plate and let them rest for 10 minutes. This resting period helps the coating set, preventing it from falling off during cooking. The panko’s coarse texture is what gives you that extra-crispy finish.
Step 4: Fry to Golden Perfection
Heat the 0.5 cup Vegetable Oil in a large skillet over medium-high heat until shimmering. To test if it’s ready, drop in a pinch of panko—it should sizzle immediately. Work in batches to avoid crowding the pan, which would lower the oil temperature and result in soggy coating.
Fry the strips for 3-4 minutes per side until they’re deep golden brown and the internal temperature reaches 165°F. The panko should be crisp and the chicken juicy. Transfer to a paper towel-lined plate to drain excess oil.
Serve immediately while hot and crispy. The combination of the herb-infused panko and tender chicken makes these strips irresistible. Real talk: the first bite is always the best, so don’t wait too long to dig in.
Pro Tips For Making Chicken Breast Strips
- Pound the Chicken: Use a rolling pin or meat mallet to pound the chicken breasts to an even 1/2-inch thickness—I learned this the hard way after too many dry, overcooked strips from uneven pieces.
- Chill the Coating: After breading, let the strips rest in the fridge for 15 minutes so the panko sticks better and doesn’t fall off during frying.
- Skip the Overcrowding: Fry in batches with at least an inch of space between strips, or the oil temp drops and you’ll end up with soggy, greasy breading.
- Use Buttermilk Overnight: Soak the chicken in buttermilk for 4-12 hours before cooking—sounds like extra work, but it actually changes the outcome by keeping the meat juicy and tender.
Pro Cooking Tips for Great chicken breast strips
Oil Temperature Control
Use a deep-fry thermometer to maintain 350-375°F oil temperature. If it drops below 325°F, your coating will absorb oil and turn greasy. I keep my Taylor Classic thermometer in the oil at all times for accuracy. 🌡️
Double-Fry Method
For extra crispiness, try a two-stage fry. First cook at 325°F for 2 minutes to set the coating, then finish at 375°F for 1-2 minutes for that perfect golden crunch. This restaurant trick works wonders for home cooks too.
Rest Between Batches
Let the oil recover to 375°F between batches. Crowding the pan lowers temperature and creates steam, which makes the coating soggy. I usually wait about 2-3 minutes between each set of strips.
Drain Properly
Place cooked strips on a wire rack set over a baking sheet instead of paper towels. This allows air circulation on all sides, maintaining that crispy texture while excess oil drips away. The difference is noticeable.
Oven Alternative
For a lighter version, bake at 425°F on a wire rack for 12-15 minutes, flipping halfway. Spray strips with olive oil before baking for extra crispiness. It’s not as good as frying but still delivers great results. 🔥
Seasoning Boost
Add ½ tsp cayenne to your panko mix for subtle heat, or swap regular paprika for smoked paprika for deeper flavor. I often add 1 tsp lemon zest to brighten the herb notes in the coating.
Nutrition Facts
Frequently Asked Questions
Can I use chicken tenders instead of breasts?
Yes, but they cook faster and may dry out. Reduce frying time to 2-3 minutes per side and check internal temp reaches 165°F to prevent overcooking.
Why did my coating fall off?
Likely the egg wash didn’t adhere properly. Pat chicken completely dry before dredging, and let breaded strips rest 10 minutes before frying for best adhesion.
Can I bake these instead of frying?
Bake at 425°F on a wire rack for 12-15 minutes, flipping halfway. Spray with oil first for extra crispiness.
How do I keep them crispy for a party?
Hold in a 200°F oven on a wire rack for up to 30 minutes. Avoid stacking—they’ll steam and lose that perfect crunch.

- Jollof Rice Sauce Recipe: West African Tomato and Spice Infusion - September 25, 2026
- Japanese Rice Soup Recipe: Umami-Rich Comfort in a Bowl - September 25, 2026
- Homemade Cream Of Rice Recipe: Silk-Smooth Breakfast in Minutes - September 25, 2026