
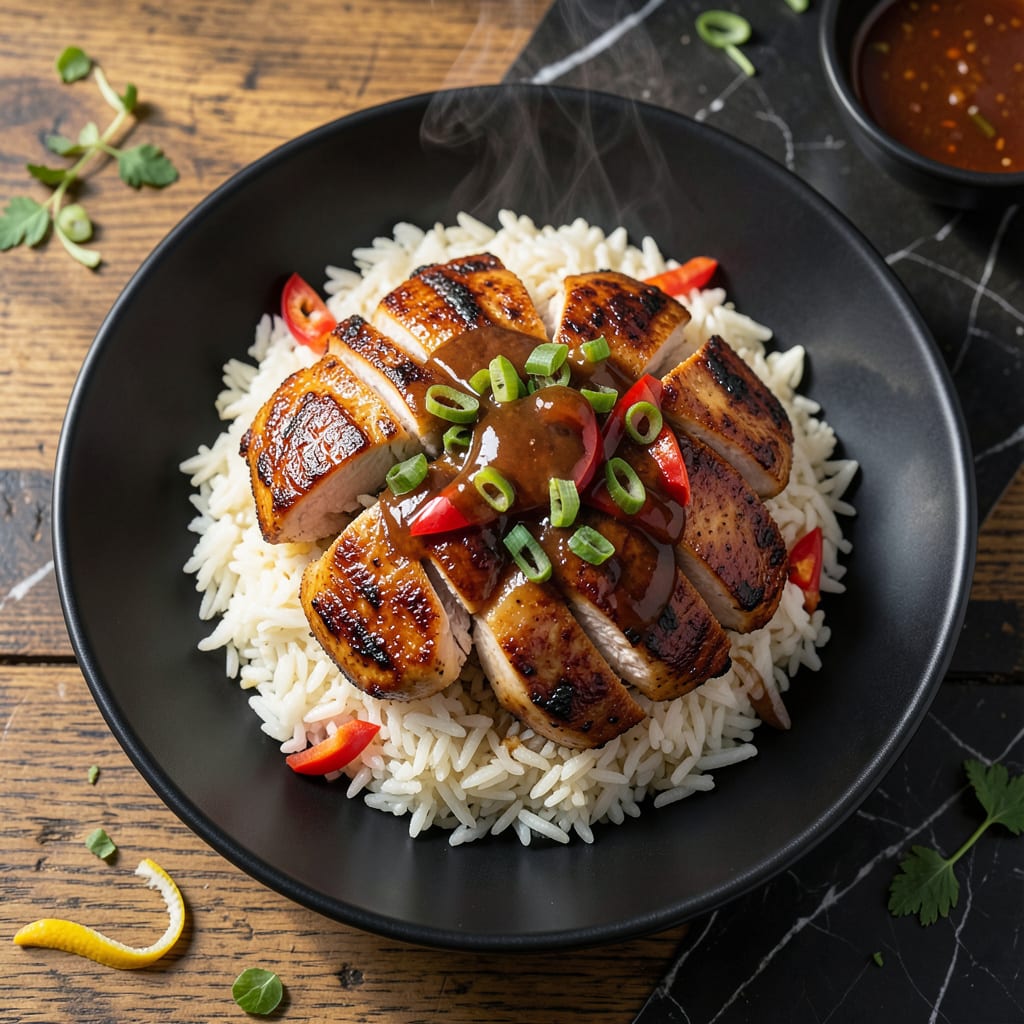
This chicken breast teriyaki delivers restaurant-quality results with a perfect balance of sweet and savory flavors. The sauce caramelizes beautifully, creating a glazed finish that clings to every bite.
Simple ingredients and a straightforward method ensure tender, juicy chicken every time. The key is reducing the sauce to achieve that signature sticky consistency that makes this dish irresistible.
Ingredients for Chicken Breast Teriyaki Sauce
Simple pantry staples combine to create this restaurant-quality glazed chicken dish with sticky-sweet sauce.
| Ingredient | Amount | Notes |
|---|---|---|
| Boneless Skinless Chicken Breasts 🍗 | 1 ½ lb | Pounded to even thickness |
| Soy Sauce 🫒 | ½ cup | Low-sodium preferred for balance |
| Brown Sugar 🍚 | ⅓ cup | Packed for sweetness depth |
| Honey 🍯 | ¼ cup | Pure for natural gloss |
| Rice Vinegar 💧 | 2 tbsp | For tangy brightness |
| Fresh Ginger 🌿 | 1 tbsp | Minced for zesty punch |
| Garlic Cloves 🧄 | 3 cloves | Minced for aromatic base |
| Cornstarch 🌾 | 1 tbsp | For sauce thickening |
| Water 💧 | 2 tbsp | To dissolve cornstarch |
| Sesame Oil 🫒 | 1 tsp | Toasted for nutty aroma |
| Vegetable Oil 🫒 | 2 tbsp | High smoke point for searing |
| Green Onions 🧅 | 3 whole | Thinly sliced for garnish |
| Sesame Seeds 🌾 | 1 tsp | Toasted for crunch |
[recipeingredientscaler]
The chicken quality matters here. Boneless, skinless breasts should be uniform in thickness—pound them to ½-inch for even cooking. Costco or Whole Foods carry reliable options. For soy sauce, Kikkoman low-sodium is a professional standard, but any quality brand works. The ginger and garlic must be fresh—no powdered substitutes for that authentic teriyaki depth.
Need to swap honey? Maple syrup or agave at a 1:1 ratio works well. No rice vinegar? Apple cider vinegar in a pinch, though the flavor profile shifts slightly. For gluten-free, tamari replaces soy sauce seamlessly. The cornstarch slurry is non-negotiable for that signature glossy finish—don’t skip it (or use arrowroot as a backup).
Sauce keeps in the fridge for 5 days—reheat gently to restore gloss. Chicken is best served fresh but holds for 3 days refrigerated. Freeze cooked chicken in sauce for up to 3 months (texture changes slightly but flavor holds).
Why You’ll Love This Recipe
- One Pan Dinner: I toss everything in a skillet and let the soy sauce, honey, and brown sugar work their magic while I set the table.
- Sweet-Savory Balance: That first bite where the caramelized edges meet the tangy rice vinegar glaze? Pure addiction.
- Meal Prep Hero: I make a double batch on Sunday—chicken stays tender in the fridge for days, ready for salads or rice bowls.
- Budget Stretcher: A pound of chicken breasts and pantry staples feed my family for two nights without breaking the bank.
Step-by-Step Instructions for Chicken Breast Teriyaki Sauce
Master the technique for perfectly glazed chicken with a rich, sticky sauce that clings beautifully.
Step 1: Pound and Season the Chicken Breasts
Place the 1.5 lb boneless skinless chicken breasts between two sheets of plastic wrap. Using a meat mallet, pound them to an even ½-inch thickness—this ensures uniform cooking and prevents dry, overdone edges.
Season both sides generously with salt and pepper. I like to press the seasoning into the meat slightly so it adheres well during cooking. Set the prepared chicken aside while you build the teriyaki sauce.
Step 2: Create the Teriyaki Sauce Base
In a medium bowl, whisk together the 0.5 cup soy sauce, 0.33 cup brown sugar, 0.25 cup honey, 2 tbsp rice vinegar, minced 1 tbsp fresh ginger, and minced 3 cloves garlic cloves. Stir until the brown sugar fully dissolves and the mixture is smooth.
This balance of sweet, salty, and tangy creates the signature teriyaki flavor. The honey adds natural gloss to the finished sauce, while the rice vinegar brightens the richness. Taste and adjust sweetness if needed, but remember the sauce will reduce and intensify in flavor.
Step 3: Cook the Chicken and Prepare the Slurry
Heat the 2 tbsp vegetable oil in a large skillet over medium-high heat until shimmering. Add the chicken and cook for 5-6 minutes per side until golden brown and the internal temperature reaches 165°F. Transfer the chicken to a plate and tent with foil to keep warm.
While the chicken rests, combine the 1 tbsp cornstarch with the 2 tbsp water in a small bowl, whisking until smooth. This slurry will thicken the sauce to that perfect glazed consistency. Pour the teriyaki sauce mixture into the same skillet and bring to a gentle simmer.
Step 4: Thicken the Sauce and Finish the Dish
Once the sauce is simmering, slowly whisk in the cornstarch slurry. Continue cooking for 2-3 minutes until the sauce thickens enough to coat the back of a spoon. Stir in the 1 tsp sesame oil—this adds a toasted depth that complements the sweetness.
Return the chicken to the skillet, spooning the thickened sauce over each piece. Cook for an additional 1-2 minutes to allow the flavors to meld and the sauce to adhere fully to the chicken. The sauce should glaze the chicken with a glossy, sticky sheen.
Step 5: Garnish and Serve
Transfer the glazed chicken to a serving platter. Sprinkle with the thinly sliced 3 whole green onions and toasted 1 tsp sesame seeds for a fresh contrast and nutty crunch. Serve immediately with steamed rice or vegetables to soak up the extra sauce.
The chicken should be tender and juicy, with a deep mahogany glaze that pools slightly on the plate. Each bite delivers the perfect balance of sweet, salty, and umami richness that defines teriyaki.
Pro Tips For Making Chicken Breast Teriyaki Sauce
- Pound the Chicken: Use a meat mallet or rolling pin to even out the thickness of the chicken breasts to ½ inch—this guarantees even cooking and prevents dry, chewy edges.
- Bloom the Sauce: Simmer the soy sauce, brown sugar, honey, and rice vinegar for 3-4 minutes before adding the chicken; this deepens the flavor and thickens it just enough to cling to the meat.
- Skip the Overcrowding: Cook the chicken in a single layer with space between pieces, or it’ll steam instead of sear—I learned this the hard way after serving sad, pale chicken more than once.
- Rest Before Slicing: Let the chicken rest for 5 minutes after cooking so the juices redistribute, then slice against the grain for tender, saucy bites.
Perfect Pairings for chicken breast teriyaki sauce
Rice Pairings
Steamed jasmine rice is my go-to—its fragrant aroma and slightly sticky texture soak up the teriyaki sauce perfectly. For a nutty twist, try brown rice or basmati with a 1:1.5 rice-to-water ratio. 🥗
Vegetable Sides
Light, crisp vegetables balance the richness. I love steamed broccoli with a quick sesame-garlic toss. For color contrast, sautéed bell peppers in 1 tbsp sesame oil add crunch. Roasted snap peas work beautifully too.
Salad Options
A simple cucumber salad with rice vinegar dressing cuts through the sweetness. Thinly slice 1 English cucumber and toss with 1 tbsp rice vinegar, 1 tsp sugar, and a pinch of salt. Alternatively, edamame beans add protein and texture.
Beverage Matches
Cold green tea (jasmine or sencha) refreshes your palate between bites. For beer lovers, a crisp Asian lager like Sapporo or Asahi complements the umami. A chilled Riesling with its fruity acidity also pairs wonderfully. 🍺
Nutrition Facts
Frequently Asked Questions
Can I use chicken thighs instead?
Yes! Bone-in or boneless thighs work beautifully and stay extra juicy. Cook them to 175°F instead of 165°F for the best texture.
Why is my sauce too thin?
Your cornstarch slurry may need more time. Simmer for an extra 1-2 minutes after adding it. If still thin, mix another 1 tsp cornstarch with 1 tbsp water and whisk in.
How long can I store leftovers?
Keep in an airtight container in the fridge for up to 4 days. Reheat gently on the stove with a splash of water to restore the glaze.

- Jollof Rice Sauce Recipe: West African Tomato and Spice Infusion - September 25, 2026
- Japanese Rice Soup Recipe: Umami-Rich Comfort in a Bowl - September 25, 2026
- Homemade Cream Of Rice Recipe: Silk-Smooth Breakfast in Minutes - September 25, 2026