
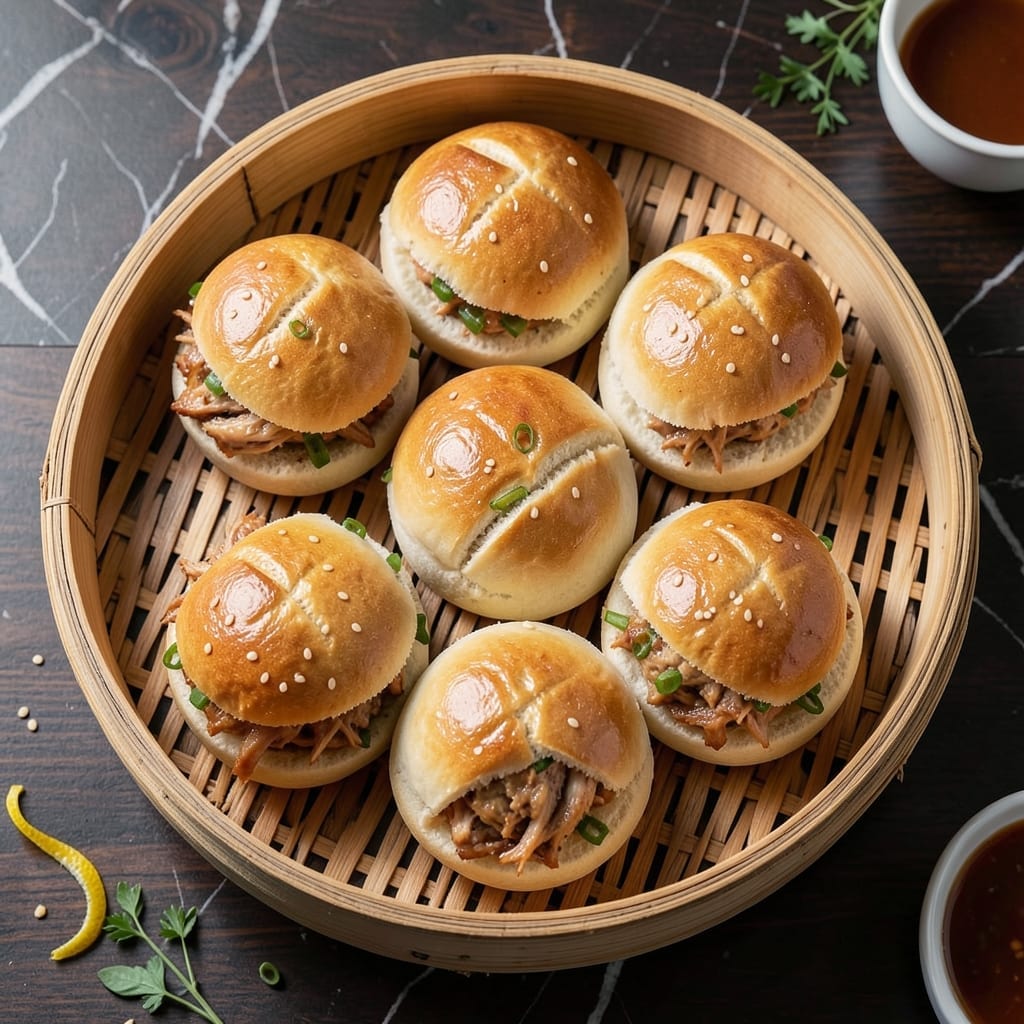
This chicken bun recipe delivers a perfect balance of soft, pillowy bread and a savory, well-seasoned filling that satisfies every bite. The dough is light yet sturdy enough to hold the hearty chicken mixture without falling apart.
I’ve refined this method to ensure the bread stays tender while the filling remains juicy and flavorful. The key is in the precise dough hydration and a filling that’s cooked just right—never dry or overpowering.
You’ll end up with golden buns that are as pleasing to the eye as they are to the palate. The texture contrast between the fluffy exterior and the rich, savory center makes these irresistible.
Whether served warm for dinner or packed for lunch, these buns hold up beautifully and taste even better the next day.
Ingredients for Chicken Bun
Soft pillowy dough meets a rich chicken filling with these quality ingredients.
| Ingredient | Amount | Notes |
|---|---|---|
| All-Purpose Flour 🌾 | 4 cups | Plus extra for dusting |
| Active Dry Yeast 🍞 | 2 ¼ tsp | One packet, proofed in warm water |
| Granulated Sugar 🍚 | 1 tbsp | To activate yeast |
| Warm Water 💧 | 1 ¼ cups | 110°F, for yeast mixture |
| Unsalted Butter 🧈 | ¼ cup | Melted, for dough softness |
| Large Egg 🥚 | 1 whole | Room temperature, for binding |
| Salt 🧂 | 1 tsp | Fine sea salt preferred |
| Cooked Chicken Breast 🍗 | 1 ½ cups | Shredded or finely diced |
| Mayonnaise 🥛 | ½ cup | For creamy filling base |
| Celery 🌿 | ½ cup | Finely chopped for texture |
| Red Onion 🧅 | ¼ cup | Finely diced for bite |
| Dijon Mustard 🟡 | 1 tbsp | For tangy depth |
| Fresh Parsley 🌿 | 2 tbsp | Chopped, for freshness |
| Garlic Powder 🧄 | 1 tsp | For savory enhancement |
| Black Pepper 🌶️ | ½ tsp | Freshly ground preferred |
The flour is the foundation here. King Arthur or Gold Medal all-purpose are reliable choices for consistency. For the yeast, Fleischmann’s or Red Star work perfectly—just ensure it’s fresh (check the expiration date). The butter should be unsalted to control seasoning. Warm water at precisely 110°F activates the yeast without killing it.
No all-purpose flour? Bread flour works too but yields a slightly denser texture. Out of buttermilk? Whole milk plus a splash of vinegar mimics the tang. For the chicken, rotisserie chicken from Whole Foods or your local grocery store saves time. The celery and onion can be swapped for finely diced bell peppers if preferred.
Dough can be made ahead and refrigerated overnight—it’ll develop more flavor. Baked buns stay fresh wrapped in plastic for 2-3 days or freeze for up to 1 month. Reheat in a warm oven to restore the soft texture.
Why You’ll Love This Recipe
- One Bowl Wonder: I just dump flour, yeast, sugar, warm water, and butter in a bowl—no fancy steps, just mix and let the dough rise.
- Buttery Clouds: The butter in the dough makes these buns so tender, they practically melt in your mouth.
- Meal Prep Magic: I bake a batch on Sunday and pack them with chicken all week—lunches done in minutes.
- Penny Wise: Flour, yeast, sugar, water, butter—that’s it. Feeds my family for less than takeout.
Step-by-Step Instructions for Chicken Buns
Here is the method for creating pillowy buns with a rich, savory chicken filling.
Step 1: Activate the Yeast and Begin the Dough
In a small bowl, combine the 1.25 cups warm water, 1 tbsp granulated sugar, and 2.25 tsp active dry yeast. Stir gently and let it sit for 5-7 minutes until the mixture becomes frothy and slightly expanded. This confirms the yeast is active and ready to work.
In a large mixing bowl, add 4 cups all-purpose flour, 1 tsp salt, 0.25 cup melted unsalted butter, and the 1 whole large egg. Pour in the yeast mixture and stir until a shaggy dough forms. The dough will be sticky at this stage, but that’s normal.
Step 2: Knead the Dough Until Smooth
Turn the dough out onto a lightly floured surface and knead by hand for 8-10 minutes until it becomes smooth and elastic. If the dough sticks, add small amounts of flour, but avoid over-flouring—this can make the buns dense.
You’ll know it’s ready when it springs back slightly when pressed with a finger and no longer feels tacky. Place the dough in a greased bowl, cover with a damp towel, and let it rise in a warm, draft-free place for 1-1.5 hours or until doubled in size.
Step 3: Prepare the Chicken Filling
In a medium bowl, combine the 1.5 cups cooked chicken breast (shredded or finely diced), 0.5 cup mayonnaise, 0.5 cup finely chopped celery, and 0.25 cup finely diced red onion. Stir in the 1 tbsp Dijon mustard, 1 tsp garlic powder, 0.5 tsp black pepper, and 2 tbsp chopped fresh parsley.
Mix until everything is uniformly combined. The filling should be creamy but still hold its shape when scooped. Cover and refrigerate until ready to use.
Step 4: Shape, Fill, and Bake the Buns
Punch down the risen dough and divide it into 8 equal portions. Roll each portion into a ball, then flatten into a 4-inch circle on a lightly floured surface. Spoon 2-3 tablespoons of the chicken filling into the center of each circle.
Gather the edges of the dough around the filling, pinching them together to seal completely. Place each filled bun seam-side down on a parchment-lined baking sheet. Cover and let rise for 30-45 minutes until puffy.
Step 5: Bake to Golden Perfection
Preheat the oven to 375°F. Bake the buns for 18-22 minutes until they are golden brown on top. The internal temperature of the buns should reach 190°F to ensure the dough is fully cooked through.
Remove from the oven and let cool on the baking sheet for 5 minutes before transferring to a wire rack. Serve warm, with the filling fully enclosed in the soft, pillowy bread. The contrast of the tender bun and creamy chicken makes each bite satisfying.
Pro Tips For Making Chicken Bun
- Test Your Yeast: I learned this the hard way—always proof your active dry yeast in warm water with a pinch of sugar first. If it doesn’t bubble within 5-10 minutes, your buns won’t rise, no matter how long you wait.
- Use Room-Temp Butter: Sounds weird, but it works: take your unsalted butter out of the fridge 30 minutes before mixing. Cold butter tears the dough, while room-temp butter blends in smooth and even.
- Skip Cold Water: After burning three batches, I finally figured out that warm water (around 110°F) is non-negotiable for activating yeast. Too hot kills it, too cold leaves your buns dense.
- Rest the Dough: Give your dough a solid 1-2 hours to double in size—I know, I know, but trust the process. Rushing this step means tough, flat buns instead of soft, fluffy ones.
Essential Equipment for This Recipe
Dough Preparation Tools
I always start with a large stainless steel mixing bowl—my go-to is the Cuisinart 5.5-quart—for the dough. It’s durable and gives plenty of room for the yeast to activate and the dough to rise. A digital kitchen scale helps me measure flour precisely, ensuring consistent results every time.
Kneading Essentials
A clean, flat surface like a wooden cutting board or marble slab is perfect for kneading. I dust it with ½ cup all-purpose flour before turning out the dough. For less mess, a dough scraper helps lift and turn the dough without sticking. 💪
Rising and Proofing
My proofing basket (or banneton) keeps the dough shaped during its rise. If you don’t have one, a greased bowl with a damp towel works just as well. I place it in my oven with the light on to maintain a warm, draft-free environment at 80-85°F.
Filling and Assembly
A cookie scoop or ice cream scoop ensures even portions of filling—about 2-3 tbsp per bun. I use a pastry brush to lightly coat the dough circles with melted butter before adding the filling, which adds extra richness and helps prevent drying.
Baking Equipment
For baking, a half-sheet pan with a parchment paper liner prevents sticking and ensures even browning. I rotate the pan halfway through baking for consistent color. A digital meat thermometer ensures the buns reach 190°F internally for perfect doneness. 🔥
Cooling and Serving
Once baked, a wire cooling rack lets air circulate underneath, preventing soggy bottoms. I transfer the buns after 5 minutes to maintain their structure. A serrated knife works best for clean cuts if you’re serving halves.
Nutrition Facts
Frequently Asked Questions
Can I use rotisserie chicken for the filling?
Yes, rotisserie chicken works perfectly and saves time. Shred 1.5 cups of cooked meat and mix with the other filling ingredients. It adds great flavor without extra prep.
How do I prevent the buns from opening while baking?
Seal the dough tightly around the filling and place them seam-side down. Press gently to secure. This keeps the filling enclosed during baking.
Can I make the dough ahead of time?
Prepare the dough, let it rise once, then refrigerate overnight. This enhances flavor and texture. Bring to room temperature before shaping.
Why is my dough not rising properly?
Check your yeast freshness and water temperature (110°F). If the environment is too cold, place the bowl in a warm oven with the light on.

- Jollof Rice Sauce Recipe: West African Tomato and Spice Infusion - September 25, 2026
- Japanese Rice Soup Recipe: Umami-Rich Comfort in a Bowl - September 25, 2026
- Homemade Cream Of Rice Recipe: Silk-Smooth Breakfast in Minutes - September 25, 2026