
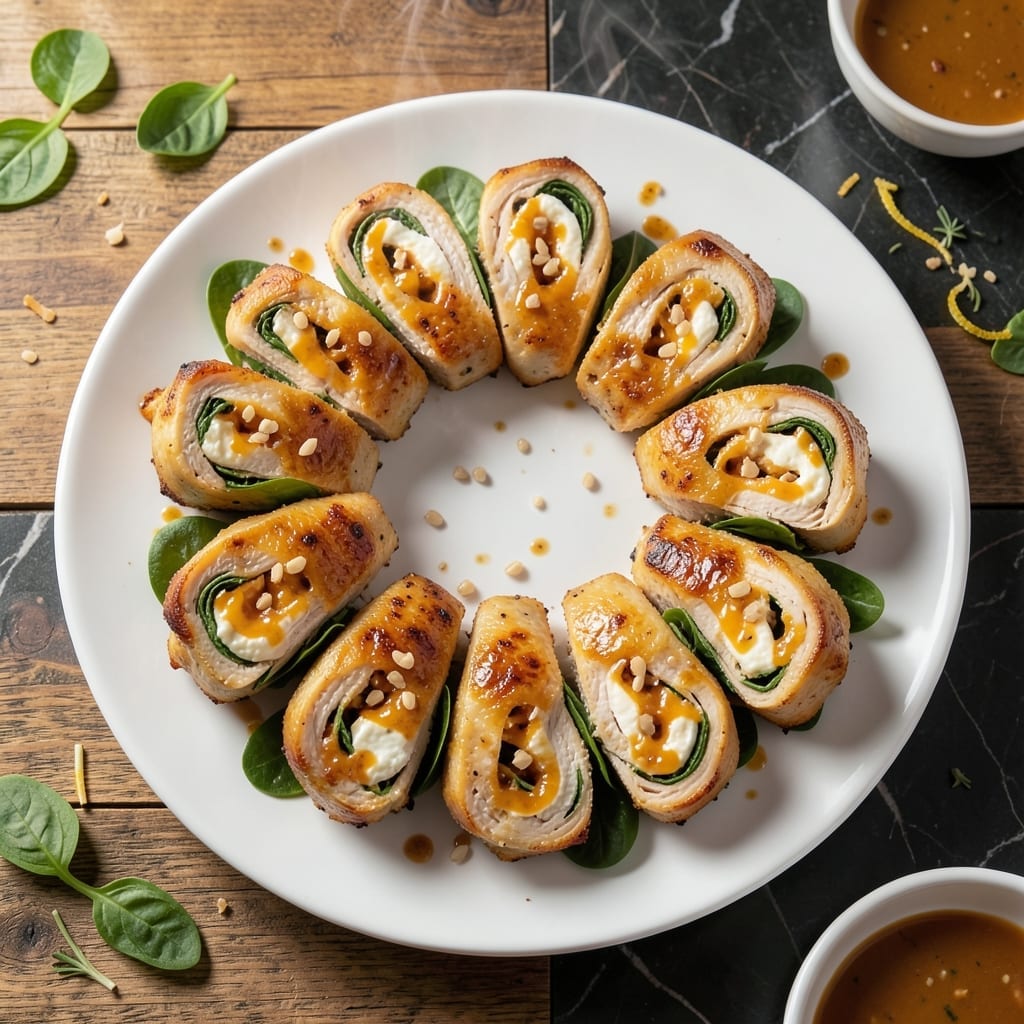
This recipe transforms simple ingredients into an impressive cheesy stuffed chicken that looks as good as it tastes. I developed this method to create a dish that feels special without requiring advanced skills.
The bundles stay moist and tender while baking, with melted cheese oozing out of each bite. A light breadcrumb coating adds a subtle crunch that contrasts beautifully with the creamy filling inside.
You’ll achieve a restaurant-quality presentation with minimal effort. The secret lies in proper sealing and even baking to maintain the surprise filling until served.
Perfect for family dinners or entertaining, this dish delivers consistent results every time.
Ingredients for Chicken Bundles
Transform simple groceries into restaurant-worthy cheesy stuffed chicken bundles with these ingredients.
| Ingredient | Amount | Notes |
|---|---|---|
| Chicken Breast 🍗 | 1 ½ lb | Boneless, skinless, pounded to 1/4-inch thickness |
| Cream Cheese 🧀 | 8 oz | Full-fat, softened to room temperature |
| Shredded Cheddar Cheese 🧀 | 1 cup | Sharp or mild, your preference |
| Dijon Mustard 🟡 | 2 tbsp | Smooth, not whole-grain |
| Fresh Spinach 🥬 | 1 cup | Chopped, excess moisture squeezed out |
| Garlic Cloves 🧄 | 2 cloves | Minced finely for even distribution |
| All-Purpose Flour 🌾 | ½ cup | For dredging chicken |
| Large Eggs 🥚 | 2 whole | Beaten for egg wash |
| Panko Breadcrumbs 🍞 | 1 cup | Japanese-style for extra crunch |
| Olive Oil 🫒 | ½ cup | Divided for cooking and coating |
| Kosher Salt 🧂 | 1 tsp | Diamond Crystal preferred |
| Black Pepper 🌶️ | ½ tsp | Freshly ground for best flavor |
| Dried Oregano 🌿 | 1 tsp | Mediterranean variety recommended |
| Toothpicks 🧵 | 20 pieces | For securing bundles during baking |
The chicken breast quality is paramount. Opt for air-chilled, free-range from Whole Foods or Trader Joe’s for superior texture and flavor. Pounding to an even thickness ensures consistent cooking—use a meat mallet or rolling pin. The cream cheese must be full-fat; low-fat versions don’t melt properly and can cause the filling to separate. For the cheddar, block cheese shredded at home melts more smoothly than pre-shredded.
No cream cheese? Goat cheese or ricotta at a 1:1 ratio works well, though the flavor profile changes slightly. Fresh spinach can be swapped for frozen thawed spinach (be sure to squeeze out all moisture). If Dijon mustard is unavailable, whole-grain mustard at half the quantity adds a similar tang without overpowering. Panko breadcrumbs are ideal, but regular breadcrumbs will suffice in a pinch.
Assemble the bundles just before baking for best results. Store raw chicken in the coldest part of the refrigerator for up to 2 days. Leftovers keep well for 3-4 days and reheat beautifully in a 350°F oven for 15-20 minutes. Freeze unbaked bundles on a tray before transferring to a bag for up to 2 months.
Why You’ll Love This Recipe
- One Pan Magic: I love how everything bakes together—no extra dishes, just juicy chicken stuffed with creamy cheese and spinach.
- Creamy Cheese Bomb: That first bite with melted cheddar and tangy Dijon oozing out? Ridiculously good.
- My Weeknight Hero: Honestly, I make these on Sundays and reheat all week—still tastes fresh.
- Budget-Friendly Feast: Chicken breasts stretch far with this filling, and it feels fancy without the price tag.
Step-by-Step Instructions for Chicken Bundles
Master the technique and create these elegant, cheesy bundles with consistent results every time.
Step 1: Prepare and Pound the Chicken Breast
Begin by slicing the 1.5 lb Chicken Breast horizontally into 4 equal portions. Place each piece between plastic wrap and pound to an even 1/4-inch thickness using a meat mallet. This ensures uniform cooking and proper rolling.
Season both sides of each piece with 1 tsp Kosher Salt, 0.5 tsp Black Pepper, and 1 tsp Dried Oregano. The seasoning should be visible but not overpowering. Set aside while you prepare the filling.
Step 2: Create the Creamy Spinach and Cheese Filling
In a bowl, combine the 8 oz Cream Cheese, 1 cup Shredded Cheddar Cheese, 2 tbsp Dijon Mustard, 1 cup Fresh Spinach, and 2 cloves Garlic Cloves (minced). Mix until fully incorporated—there should be no visible streaks of cream cheese.
Divide this mixture evenly among the pounded chicken pieces, spreading it in a thin layer that leaves a 1/2-inch border on all sides. This prevents the filling from oozing out during cooking.
Step 3: Roll, Secure, and Bread the Bundles
Roll each piece tightly into a bundle, tucking in the sides as you go to encapsulate the filling completely. Secure each roll with 2-3 Toothpicks from the 20 pieces Toothpicks to maintain shape during cooking.
Set up a breading station with three shallow dishes. Place the 0.5 cup All-Purpose Flour in the first, the 2 whole Large Eggs (beaten) in the second, and the 1 cup Panko Breadcrumbs in the third. Dredge each bundle in flour, dip in egg, then coat thoroughly in panko, pressing gently to adhere.
Step 4: Pan-Sear and Bake to Golden Perfection
Heat 1/4 cup of the 0.5 cup Olive Oil in a large oven-safe skillet over medium-high heat. When the oil shimmers, add the bundles seam-side down. Sear for 2-3 minutes per side until the panko turns a deep golden brown.
Transfer the skillet to a preheated 375°F oven and bake for 15-18 minutes until the chicken reaches an internal temperature of 165°F. The panko should be crisp and the filling should be bubbly at the seams.
Step 5: Rest and Serve
Remove the bundles from the oven and let them rest for 5 minutes in the skillet. This allows the filling to set slightly and makes them easier to handle. Carefully remove the toothpicks before serving.
Drizzle each bundle with the remaining 1/4 cup Olive Oil for added richness. The exterior should be crisp and golden, while the interior reveals a creamy, cheesy filling oozing slightly with each cut. Serve immediately.
Pro Tips For Making Chicken Bundles
- Pound the Chicken: Use a meat mallet to flatten the chicken breasts to an even ¼-inch thickness—this guarantees even cooking and prevents dry, chewy edges.
- Drain the Spinach: After wilting the spinach, squeeze out every last drop of water with a clean towel, or your bundles will turn soggy instead of crisp.
- Seal Tightly: Fold the edges of the chicken over the filling and secure with toothpicks at 1-inch intervals, otherwise the cheese will leak out during baking.
- Chill Before Baking: Let the assembled bundles rest in the fridge for 15 minutes before baking—this helps them hold their shape and keeps the filling intact.
Essential Equipment for This Dish
Oven-Safe Skillet
An oven-safe skillet is non-negotiable for this recipe. I use my 12-inch Lodge cast iron because it transitions seamlessly from stovetop searing to oven baking without transferring to another dish. The heavy bottom prevents hot spots and ensures even cooking. 🔥
Meat Mallet
Pounding chicken to an even 1/4-inch thickness requires a proper meat mallet. I prefer a flat-faced mallet over the spiked variety for this application. Place chicken between plastic wrap to prevent tearing. A rolling pin works in a pinch but lacks precision.
Instant-Read Thermometer
Don’t guess when the chicken is done—use an instant-read thermometer. I swear by my ThermoWorks ThermoPop for its accuracy and speed. Insert into the thickest part of a bundle to verify 165°F internal temperature. This prevents overcooking while ensuring safety.
Toothpicks
Use flat toothpicks (not round) to secure your bundles during cooking. They’re less likely to poke through the chicken. I find 6-inch toothpicks work best for these portions.
Breading Station
Set up three shallow dishes for efficient breading. I use 9×13-inch glass baking dishes because they’re wide enough for the bundles and easy to clean. Arrange them in order: flour, beaten eggs, then panko breadcrumbs. Keep one hand for wet ingredients and one for dry to avoid clumping.
Tongs
Long-handled locking tongs are essential for turning the bundles safely during searing. I recommend 12-inch tongs to keep your hands away from the heat. They also help transfer the bundles to the oven without puncturing the coating. The locking feature makes storage easier in my crowded kitchen drawers.
Nutrition Facts
Frequently Asked Questions
What can I use instead of cream cheese?
Try goat cheese or ricotta at a 1:1 ratio. Both melt well and pair nicely with the spinach and cheddar. Avoid soft cheeses like brie as they won’t hold the filling together properly.
How do I keep the filling from leaking out?
Leave a 1/2-inch border when spreading the filling, and roll tightly. Secure with 2-3 toothpicks per bundle. Searing seam-side down first helps seal the edges.
Can I make these ahead of time?
Assemble unbaked bundles and refrigerate for up to 2 days or freeze for 2 months. Bake directly from frozen, adding 5-10 minutes to the cooking time.
Why is my breading falling off?
Press the panko firmly onto each bundle during breading. Use one hand for wet ingredients and one for dry to prevent clumping. Ensure the oil is hot before searing to create a crisp bond.

- Jollof Rice Sauce Recipe: West African Tomato and Spice Infusion - September 25, 2026
- Japanese Rice Soup Recipe: Umami-Rich Comfort in a Bowl - September 25, 2026
- Homemade Cream Of Rice Recipe: Silk-Smooth Breakfast in Minutes - September 25, 2026