
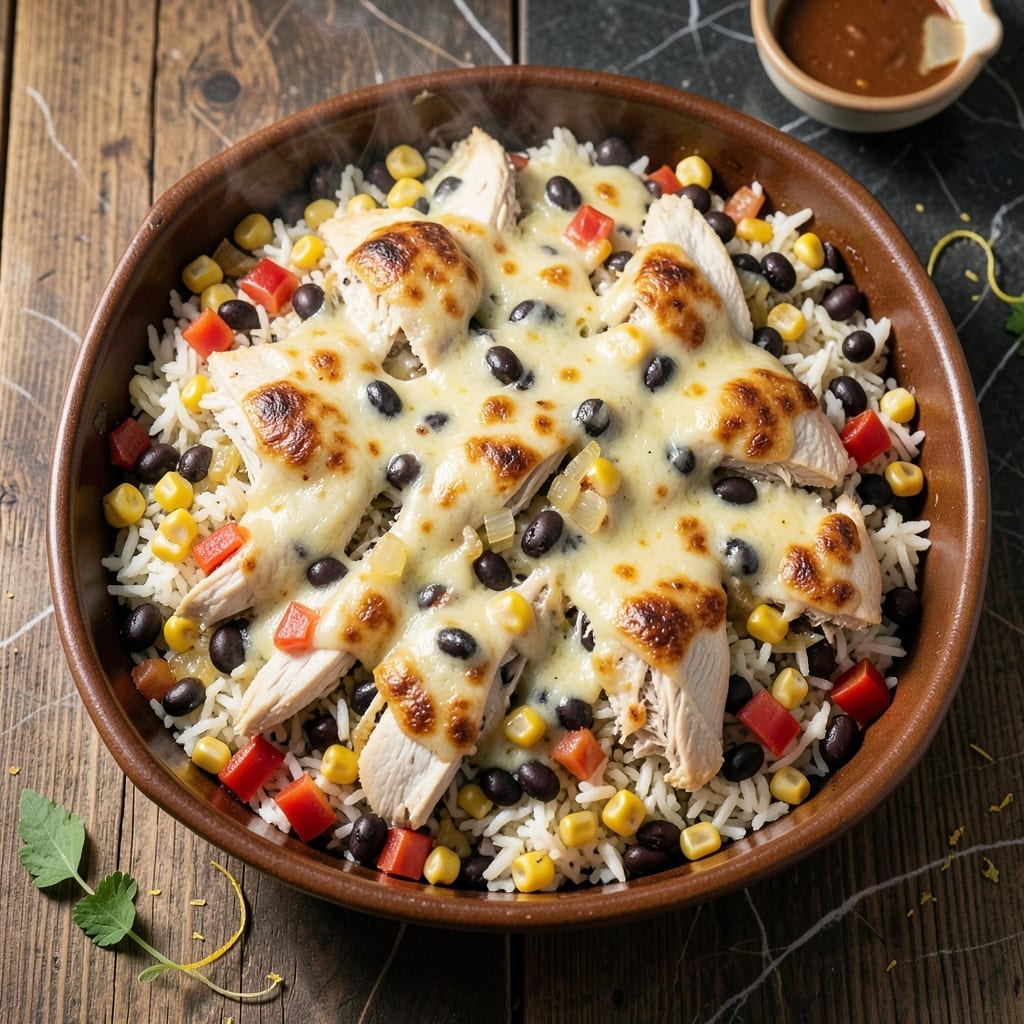
This layered casserole brings all the flavors of a chicken burrito into a family-friendly baked dish. The combination of seasoned chicken, beans, and rice creates a hearty base that’s both satisfying and simple to prepare.
Each layer builds on the last, with melted cheese binding everything together. The result is a golden top with tender fillings underneath, perfect for serving a crowd or meal prepping for the week.
The beauty of this dish lies in its versatility. Use leftover chicken, swap in different beans, or adjust the spice level to suit your taste. It’s a foolproof way to bring Tex-Mex flavors to your table.
Bake until bubbly and serve with your favorite toppings for a meal that’s sure to become a regular in your rotation.
Ingredients for Chicken Burrito Casserole
Pantry staples plus a few fresh items come together for this crowd-pleasing dish.
| Ingredient | Amount | Notes |
|---|---|---|
| Cooked Chicken Breast 🍗 | 2 cups | Shredded or diced |
| Long-Grain White Rice 🍚 | 1 ½ cups | Cooked and cooled |
| Black Beans 🫘 | 1 can | Drained and rinsed |
| Corn Kernels 🌽 | 1 cup | Fresh, frozen, or canned |
| Red Bell Pepper 🌶️ | 1 whole | Diced into small pieces |
| Yellow Onion 🧅 | 1 whole | Finely diced |
| Garlic Cloves 🧄 | 3 cloves | Minced for seasoning |
| Taco Seasoning 🌿 | 2 tbsp | Or homemade blend |
| Shredded Cheddar Cheese 🧀 | 2 cups | Divided for layering |
| Shredded Monterey Jack Cheese 🧀 | 1 cup | For topping blend |
| Sour Cream 🥛 | ½ cup | Full-fat for creaminess |
| Salsa 🍅 | 1 cup | Mild or medium heat |
| Olive Oil 🫒 | 2 tbsp | For sautéing vegetables |
| Salt 🧂 | ½ tsp | Adjust to taste |
The chicken can be rotisserie for convenience (the good stuff, not the sad dry kind) or leftover from last night. Costco rotisserie is a great shortcut—just shred and you’re halfway there. For the beans, Bush’s or Goya are reliable. The cheese? Tillamook or Cheddar’s shred their own blocks—pre-shredded gets clumpy. Look for good melt on the label.
No black beans? Pinto beans work just as well. Swap corn for diced green chiles if you want more heat. Fresh onions not on hand? Frozen diced at half the amount saves time (worth the extra minute to thaw). The taco seasoning can be homemade at one-third the cost—just mix chili powder, cumin, and paprika.
Assemble and refrigerate overnight (the flavors meld beautifully). Bakes 45 minutes straight from the fridge. Leftovers keep 4-5 days—portion into containers for easy lunches (don’t skip this part).
Why You’ll Love This Recipe
- One Pan Wonder: I just dump the chicken, rice, beans, and corn into a dish, bake it, and call it dinner.
- Flavor Bomb: The bell peppers add this sweet crunch that makes every bite ridiculously good.
- Feeds a Crowd: I made it for my daughter’s sleepover and the whole tray vanished in minutes.
- Leftovers for Days: Honestly, it tastes even better the next day for lunch.
Step-by-Step Instructions for Chicken Burrito Casserole
Here’s how I layer all those bold flavors together for maximum cheesy satisfaction.
Step 1: Sauté the Vegetables with Spices
Heat the 2 tbsp Olive Oil in a large skillet over medium-high heat. Add the diced Red Bell Pepper and finely diced Yellow Onion, cooking for 5-6 minutes until they soften and the onion turns translucent.
Stir in the minced Garlic Cloves and 2 tbsp Taco Seasoning, toasting for 30 seconds until fragrant. This builds the flavor base for the entire dish. Sprinkle with 0.5 tsp Salt to enhance the spices. Remove from heat and let cool slightly.
Step 2: Mix the Filling Components
In a large bowl, combine the 2 cups Cooked Chicken Breast, 1.5 cups Long-Grain White Rice, 1 can Black Beans (drained and rinsed), and 1 cup Corn Kernels. The chicken should be shredded or diced for even distribution.
Add the sautéed vegetable mixture, 1 cup Salsa, and 0.5 cup Sour Cream to the bowl. Stir until everything is evenly coated. The salsa adds moisture while the sour cream creates a creamy texture that ties all the ingredients together.
Step 3: Layer the Casserole with Cheese
Spread half of the chicken and rice mixture into a greased 9×13-inch baking dish. Sprinkle 1 cup Shredded Cheddar Cheese evenly over the top. This first layer of cheese will melt into the filling, creating gooey pockets throughout.
Add the remaining chicken mixture, pressing it down gently. Top with the remaining 1 cup Shredded Cheddar Cheese and all of the 1 cup Shredded Monterey Jack Cheese. The combination of cheeses gives you the perfect melt and flavor.
Step 4: Bake Until Bubbly and Golden
Bake in a preheated 375°F oven for 20-25 minutes until the cheese is fully melted and the edges are golden brown. You’ll see the casserole bubbling around the edges when it’s ready.
Let it rest for 5-10 minutes after removing from the oven. This allows the layers to set so you can serve neat squares without everything sliding apart. The top should be slightly crispy while the inside stays creamy and cheesy.
Pro Tips For Making Chicken Burrito Casserole
- Pre-cook the rice: Use day-old or fully cooled rice—fresh rice turns to mush when baked in the casserole. I learned this the hard way after pulling out a gummy pan.
- Shred chicken fine: Tear the cooked chicken into small, even pieces so every bite gets the filling. Sounds tedious, but it actually changes the outcome.
- Drain the beans: Rinse and drain the black beans well, or you’ll end up with a watery casserole. My grandmother swore by this, and she was right.
- Layer evenly: Spread rice, chicken, and veggies in uniform layers so flavors distribute. Skip dumping everything in one spot—it bakes unevenly.
Essential Equipment for This Dish
Baking Dish Essentials
I always reach for my 9×13-inch glass baking dish for this recipe—it’s the perfect size for even cooking and easy serving. Look for one with a lid for convenient storage of leftovers. Pyrex is my trusted brand. 💛
Mixing Bowls Matter
A large stainless steel mixing bowl (at least 5-quart capacity) gives you plenty of room to combine all the filling ingredients without spills. I use Cuisinox bowls—they’re lightweight but sturdy.
Skillet Choice
For sautéing the veggies, a 12-inch nonstick skillet with deep sides works best. The extra surface area lets you spread out the onions and peppers for even browning. Calphalon or All-Clad are my go-to brands.
Cheese Grater Option
If you’re shredding your own cheese (which I recommend for best melt), a box grater with multiple hole sizes gives you control. For speed, a rotary grater like the Microplane saves time and effort.
Serving Tools
A metal spatula helps lift perfect squares from the dish without sticking. I also keep a large serving spoon handy for scooping up any loose fillings that might escape.
Optional Gadgets
For extra convenience, a rice cooker takes the guesswork out of cooking the rice base. And a mandoline makes quick work of dicing the onions and peppers uniformly. 🔥
Nutrition Facts
Frequently Asked Questions
Can I use rotisserie chicken instead?
Rotisserie chicken works perfectly and saves time. Shred 2 cups of cooked meat (skin removed) and proceed with the recipe as written.
How do I prevent a soggy bottom layer?
Pat cooked rice dry before mixing and ensure your baking dish is properly greased. Baking at 375°F for 20-25 minutes helps create that perfect texture.
Can I make this ahead of time?
Yes! Assemble the casserole, cover tightly, and refrigerate for up to 24 hours. Add 5-10 minutes to the baking time if cooking straight from the fridge.
What can I serve with this dish?
Try it with tortilla chips, a fresh green salad, or guacamole. The casserole is hearty enough to stand alone but pairs well with simple sides.

- Jollof Rice Sauce Recipe: West African Tomato and Spice Infusion - September 25, 2026
- Japanese Rice Soup Recipe: Umami-Rich Comfort in a Bowl - September 25, 2026
- Homemade Cream Of Rice Recipe: Silk-Smooth Breakfast in Minutes - September 25, 2026