
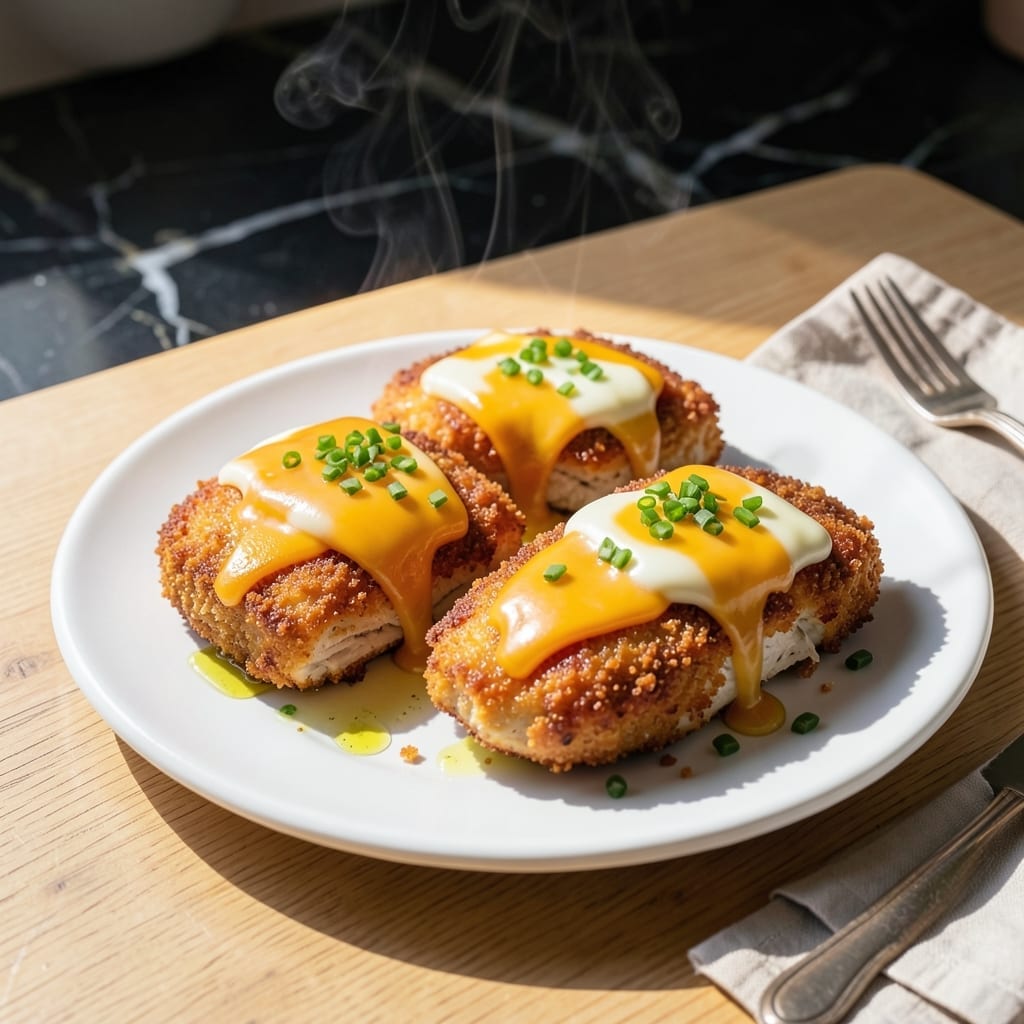
This chicken and cheese recipe delivers a perfect harmony of tender poultry and rich, melted goodness that will satisfy any comfort food craving.
The secret lies in the precise combination of juicy chicken and gooey cheese, baked together until golden and bubbling. It’s a proven method that guarantees restaurant-quality results without complicated techniques.
What emerges from the oven is a dish with tender chicken pieces enveloped in a blanket of perfectly melted cheese. Every bite offers a balance of savory depth and creamy indulgence.
Serve it as a main course with a side of roasted vegetables or fresh salad. Here’s how to achieve this foolproof creation at home.
Ingredients for Chicken Cheese
Restaurant-quality comfort starts with these juicy, cheesy, and perfectly seasoned essentials for the dish.
| Ingredient | Amount | Notes |
|---|---|---|
| Boneless Skinless Chicken Breasts 🍗 | 1 ½ lb | Pounded to even thickness |
| Sharp Cheddar Cheese 🧀 | 2 cups | Shredded from block |
| Monterey Jack Cheese 🧀 | 1 ½ cups | Shredded for melty texture |
| All-Purpose Flour 🌾 | ½ cup | For light breading |
| Large Eggs 🥚 | 2 whole | Beaten for binding |
| Panko Breadcrumbs 🍞 | 1 cup | For crispy topping |
| Butter 🧈 | 4 tbsp | Unsalted, melted |
| Garlic Cloves 🧄 | 3 cloves | Minced for flavor |
| Dijon Mustard 🟡 | 2 tbsp | For tangy depth |
| Worcestershire Sauce 💧 | 1 tbsp | Adds umami richness |
| Salt 🧂 | 1 tsp | Kosher or sea salt |
| Black Pepper 🌶️ | ½ tsp | Freshly ground preferred |
| Dried Thyme 🌿 | 1 tsp | For herbal notes |
| Paprika 🌶️ | ½ tsp | Smoked or sweet variety |
The chicken is the foundation. Boneless, skinless breasts stay juicy when pounded to even thickness—Costco or Whole Foods have great options. For the cheese, block cheddar and Monterey Jack shredded fresh melt better than pre-shredded (which has anti-caking agents). The butter should be unsalted so you control the seasoning. Look for organic or grass-fed if quality matters to you.
No Monterey Jack? Pepper Jack adds a nice kick. Out of panko? Regular breadcrumbs work in a pinch but won’t be as crispy. The Dijon mustard is key for that tangy depth, but yellow mustard at half the amount can substitute. For a lighter version, chicken tenders cook faster. If you’re skipping the breading entirely, add an extra 1/2 cup of cheese on top.
Assemble and bake right away, or prep the chicken and cheese mixture 1 day ahead—just keep it refrigerated. Leftovers reheat well and stay good for 3-4 days in the fridge. For freezing, wrap portions tightly in foil and plastic; they’ll keep for 2-3 months.
Why You’ll Love This Recipe
- One Pan Magic: I mix flour, eggs, and cheese, then bake—no stove-top flipping, no extra dishes.
- Cheesy Indulgence: Sharp cheddar and Monterey Jack melt into every bite, that gooey pull is irresistible.
- Weeknight Hero: It’s my go-to for busy evenings, ready before the kids finish homework.
- Leftovers Win: Honestly, it tastes even better the next day, and it reheats like a dream.
Step-by-Step Instructions for Chicken Cheese
This method ensures perfectly crispy, cheesy chicken with minimal effort and maximum flavor.
Step 1: Prepare and Season the Chicken
Begin by pounding the 1.5 lb boneless skinless chicken breasts to an even ½-inch thickness using a meat mallet. This guarantees even cooking and prevents dry spots. Pat the chicken dry with paper towels to remove any moisture—this helps the breading adhere properly.
Season both sides generously with 1 tsp salt, 0.5 tsp black pepper, 1 tsp dried thyme, and 0.5 tsp paprika. The spices should create a visible, even coating. Let the chicken rest for 5 minutes to allow the seasoning to penetrate.
Step 2: Create the Breading Station and Coat
Set up a breading station with three shallow dishes. Place the 0.5 cup all-purpose flour in the first dish. In the second, whisk the 2 whole large eggs until smooth. In the third, combine the 1 cup panko breadcrumbs with the remaining 0.5 tsp black pepper for extra flavor.
Dredge each piece of chicken in the flour, shaking off any excess. Dip it into the beaten eggs, letting any extra drip off. Finally, press the chicken into the panko mixture, ensuring a thick, even coating on all sides. The panko should cling tightly without falling off.
Step 3: Sear the Chicken to Golden Perfection
Heat a large oven-safe skillet over medium-high heat and add 2 tbsp of the 4 tbsp butter. Once the butter melts and begins to foam, add the breaded chicken. Cook for 4-5 minutes per side until the coating is golden brown and crispy. Avoid moving the chicken too soon—it should release easily when ready to flip.
While the chicken cooks, melt the remaining 2 tbsp butter in a small bowl and stir in 3 cloves minced garlic cloves, 2 tbsp Dijon mustard, and 1 tbsp Worcestershire sauce. This mixture will add depth of flavor to the final dish.
Step 4: Add Cheese and Finish in the Oven
Preheat your oven to 375°F. Once the chicken is golden, pour the garlic-butter mixture over the top. Sprinkle evenly with 2 cups sharp cheddar cheese and 1.5 cups Monterey Jack cheese, ensuring full coverage. The cheeses should begin to melt from the heat of the pan.
Transfer the skillet to the preheated oven and bake for 8-10 minutes until the cheese is fully melted and bubbly with light golden spots. The internal temperature of the chicken should reach 165°F—use a meat thermometer to confirm.
Step 5: Rest and Serve
Remove the skillet from the oven and let the chicken rest for 5 minutes. This allows the cheese to set slightly and the juices to redistribute, ensuring every bite is moist and flavorful. The cheese should pull away from the edges of the pan in strings when ready to serve.
Serve immediately while hot, garnished with any remaining pan juices. Each portion should feature a crispy panko crust, tender chicken, and a generous layer of gooey, melted cheese. The dish is best enjoyed fresh, with the contrast of textures at its peak.
Pro Tips For Making Chicken Cheese
- Pound the Chicken: Use a rolling pin to flatten the breasts to an even ½-inch thickness—this guarantees they cook through without drying out, and the cheese melts perfectly every time.
- Shred Your own Cheese: Skip the pre-shredded bags; freshly grated sharp cheddar and Monterey Jack melt smoother and don’t have that weird anti-caking powder aftertaste. I learned this the hard way after one too many grainy bites.
- Rest Before Slicing: Let the stuffed chicken rest 5 minutes after cooking—it keeps the cheese from oozing out the second you cut into it. Sounds simple, but I used to rush this and ruin the presentation.
- Chill Before Coating: Pop the cheese-stuffed chicken in the fridge for 10 minutes before dredging in flour and egg—it helps the coating stick and prevents the filling from leaking during cooking.
Pro Cooking Tips for This Recipe
Even Pounding Matters
Pound the chicken to an exact ½-inch thickness using a meat mallet. This ensures even cooking so no piece dries out while waiting for thicker parts. I place plastic wrap over the chicken first to prevent tearing. 💡
Double Dredge Technique
For extra-crispy coating, double-dredge the chicken in flour and egg before the panko. Let the first egg coating set for 2 minutes before the second dip. This creates layers that brown beautifully in the skillet.
Butter Temperature Control
Heat the butter until it just stops foaming—this is the ideal moment to add chicken. If it browns, wipe the pan and start fresh. Medium-high heat gives that perfect golden crust without burning the panko.
Cheese Layering Trick
Sprinkle 1 cup of cheese directly on the seared chicken, then add the remaining cheese on top. This creates a molten center while ensuring the top gets those desirable bubbly, golden spots.
Resting for Maximum Juiciness
Let the dish rest 5 full minutes after baking. This allows the cheese to thicken slightly and the juices to redistribute throughout the chicken. Skipping this step risks a dry, stringy texture. ❤️
Thermometer Precision
Always use a meat thermometer to check for 165°F internal temperature. Insert it into the thickest part, avoiding the pan. I recommend the ThermoPro TP03 for instant, accurate readings.
Nutrition Facts
Frequently Asked Questions
Can I use chicken thighs instead of breasts?
Use bone-in, skin-on thighs and increase baking time to 12-15 minutes. The darker meat stays juicier and pairs beautifully with the melted cheese topping.
Why did my cheese turn rubbery?
This happens when cheese is overcooked or pre-shredded. Always shred from a block and remove from oven immediately when bubbly. Shredded cheese contains anti-caking agents that prevent smooth melting.
What can I serve as a side dish?
Try roasted asparagus, garlic mashed potatoes, or a crisp green salad. The acidity of a balsamic vinaigrette cuts through the richness perfectly. For heartier meals, add steamed broccoli.
Can I make this ahead of time?
Assemble the breaded chicken and cheese mixture up to 1 day ahead. Cover and refrigerate, then bake as directed adding 2-3 minutes to the cooking time.

- Jollof Rice Sauce Recipe: West African Tomato and Spice Infusion - September 25, 2026
- Japanese Rice Soup Recipe: Umami-Rich Comfort in a Bowl - September 25, 2026
- Homemade Cream Of Rice Recipe: Silk-Smooth Breakfast in Minutes - September 25, 2026