
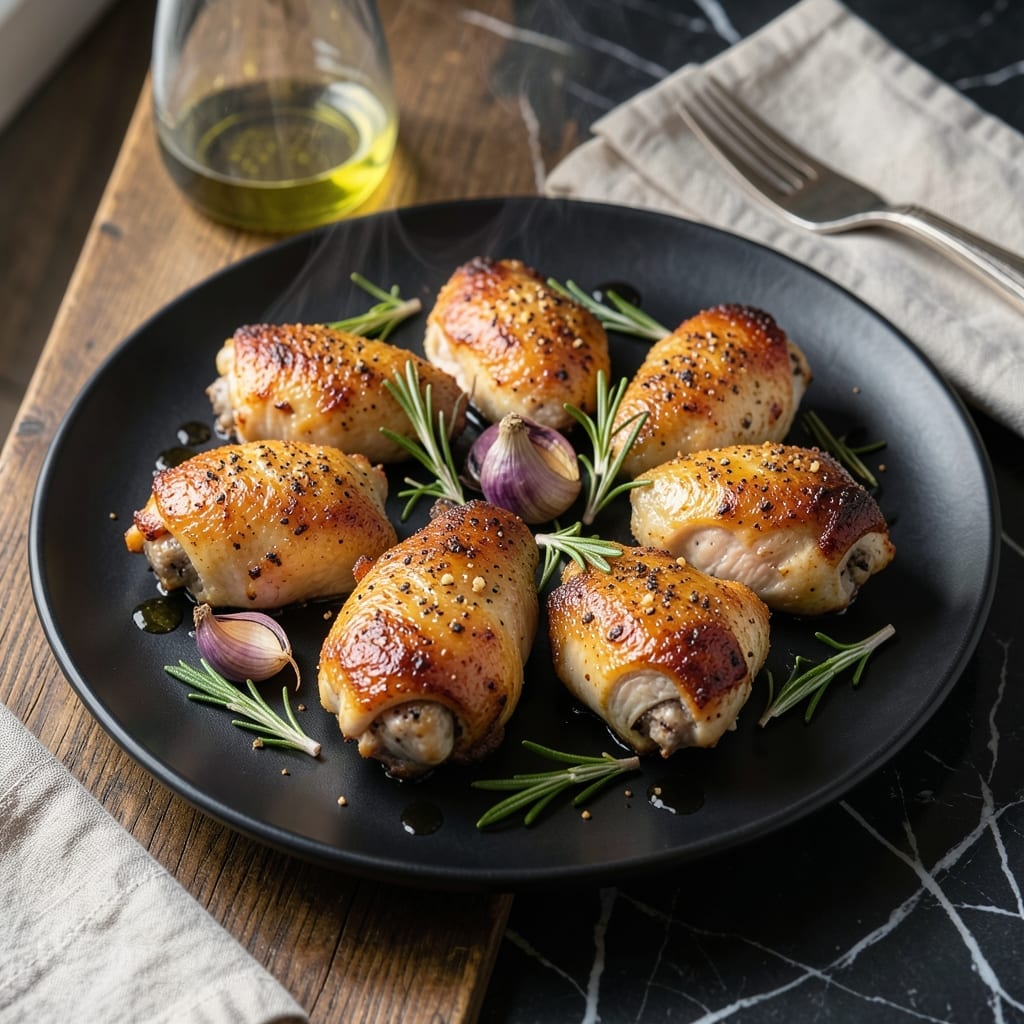
There’s a reason chicken drumettes are a crowd favorite—they pack big flavor in every bite. This recipe transforms them into crispy, golden morsels with a sticky, savory glaze that clings perfectly to each piece.
The secret lies in a two-step cooking process: first baking to render the fat and ensure even cooking, then finishing with a high-heat broil for that crispy texture. A simple glaze ties everything together with minimal effort.
You’ll end up with tender meat inside and a caramelized exterior that’s impossible to resist. The glaze adds just the right balance of sweetness and depth, making these drumettes a standout dish for any occasion.
Serve them as an appetizer or main course with your favorite dipping sauce. This method delivers consistent results every time.
Ingredients for Chicken Drumettes
These bold flavors turn humble drumettes into irresistible, golden bites with a glossy finish.
| Ingredient | Amount | Notes |
|---|---|---|
| Chicken Drumettes 🍗 | 2 ½ lb | Pat dry before cooking |
| Olive Oil 🫒 | 2 tbsp | Divided for baking and brushing |
| Salt 🧂 | 1 ½ tsp | Kosher or sea salt preferred |
| Black Pepper 🌶️ | 1 tsp | Freshly ground for best flavor |
| Garlic Powder 🧄 | 1 tsp | Not garlic salt |
| Smoked Paprika 🌶️ | 1 tsp | For depth and color |
| Honey 🍯 | ½ cup | For sticky glaze base |
| Soy Sauce 💧 | ¼ cup | Low-sodium preferred |
| Rice Vinegar 🍚 | 2 tbsp | Balances sweetness |
| Minced Garlic 🧄 | 4 cloves | Fresh for maximum flavor |
| Ginger 🌿 | 1 tbsp | Freshly grated root |
| Red Pepper Flakes 🌶️ | ½ tsp | Adjust for heat preference |
| Sesame Seeds 🌾 | 1 tbsp | For garnish, toasted |
| Green Onions 🧅 | 3 whole | Thinly sliced for garnish |
The chicken is the star here. Drumettes (the meatiest part of the wing) give you that perfect ratio of crispy skin to juicy meat. I grab mine from Costco for bulk savings, but any supermarket works—just look for even sizing so they cook uniformly. Pat them very dry (paper towels, a little elbow grease) to ensure maximum crispiness.
No honey? Maple syrup or agave at a 1:1 swap works great. Soy sauce can be tamari for gluten-free. Out of fresh ginger? Ground ginger at one-quarter the amount gets you close. The rice vinegar is key though—don’t sub white vinegar (too harsh). If you’re missing smoked paprika, regular paprika plus a pinch of cayenne mimics the depth.
Leftovers reheat in the oven at 375°F for 10-12 minutes to recapture the crisp. Glaze thickens as it cools, so thin with a splash of water if needed. Best eaten within 3 days—freezing isn’t ideal (texture suffers).
Why You’ll Love This Recipe
- One Pan Wonder: I toss the drumettes with olive oil, salt, pepper, and garlic powder, then roast—no messy marinades or extra bowls.
- Garlic Lovers’ Dream: That garlic powder crust gets crispy in the oven while the meat stays juicy. Honestly, I could eat these every day.
- Weeknight Hero: Between us, this is my go-to for busy evenings when I need something fast and filling.
- Budget Stretcher: A big batch costs less than takeout and still feels like a treat. I’ll be real: the leftovers disappear faster than the first serving.
Step-by-Step Instructions for Chicken Drumettes
Here’s the method I use to get crispy, sticky perfection every single time.
Step 1: Prep and Season the Drumettes
Start by patting the 2.5 lb chicken drumettes completely dry with paper towels. Any moisture will prevent crispiness, so be thorough. I always check between the folds and crevices where water tends to hide.
Place the drumettes in a large bowl and toss with 1 tbsp olive oil, 1.5 tsp salt, 1 tsp black pepper, 1 tsp garlic powder, and 1 tsp smoked paprika until evenly coated. The spices should cling to the skin, creating a flavorful crust as they cook.
Step 2: Bake Until Golden and Crispy
Preheat your oven to 425°F and line a baking sheet with parchment paper. Arrange the drumettes in a single layer, making sure they don’t touch—this ensures maximum crispiness. Drizzle with the remaining 1 tbsp olive oil.
Bake for 25-30 minutes, flipping halfway through, until the skin is golden brown and the internal temperature reaches 165°F. The edges should look crispy and the fat should have rendered, leaving the skin blistered in spots. Don’t skip the flip—it guarantees even browning on all sides.
Step 3: Create the Sticky Glaze
While the drumettes bake, combine 0.5 cup honey, 0.25 cup soy sauce, 2 tbsp rice vinegar, 4 cloves minced garlic, 1 tbsp ginger, and 0.5 tsp red pepper flakes in a small saucepan. Bring to a gentle simmer over medium heat.
Let it cook for 3-4 minutes until the mixture thickens slightly and becomes syrupy. You’ll notice it coats the back of a spoon and drips slowly. This is your cue that the glaze is ready to cling beautifully to the crispy drumettes.
Step 4: Glaze and Garnish for Serving
Transfer the baked drumettes to a large bowl and pour the warm glaze over them. Toss gently but thoroughly until every piece is evenly coated. The glaze should be glossy and cling to the crispy skin, creating that signature sticky finish.
Sprinkle with 1 tbsp sesame seeds and thinly sliced 3 whole green onions for a fresh, vibrant garnish. Serve immediately while the glaze is still warm and gooey—the contrast of crispy skin and sticky sauce is what makes these drumettes irresistible.
Pro Tips For Making Chicken Drumettes
- Pat Them Dry: Use a paper towel to thoroughly dry the drumettes before seasoning—this guarantees a crispier skin and helps the salt and garlic powder stick better.
- Hot Pan, Cold Oil: Heat the pan first, then add the olive oil right before the chicken. This prevents the drumettes from steaming and ensures they sear properly.
- Don’t Overcrowd: Leave space between pieces in the pan, or they’ll steam instead of brown. I learned this the hard way—now I cook in batches if needed.
- Double Season: Hit the drumettes with salt, pepper, and garlic powder before cooking, then give them another light dusting after flipping. Sounds excessive, but it actually changes the outcome.
Storing and Reheating This Dish
Refrigerator Storage
Let your drumettes cool completely before storing—this prevents condensation and soggy skin. I use airtight glass containers to keep them fresh for up to 3 days. The glaze will thicken as it chills, but don’t worry, it reheats beautifully. ❄️
Freezer Storage
While I don’t recommend freezing (the texture suffers), if you must, place cooled drumettes in a single layer on a tray to freeze first. Then transfer to a freezer bag with parchment between layers. They’ll keep for 1 month, but quality declines after that.
Oven Reheating
Preheat to 375°F and spread drumettes on a wire rack over a baking sheet. Heat for 10-12 minutes, flipping halfway. This method restores crispiness better than any other—trust me, I’ve tested them all. 🔥
Air Fryer Method
For a quicker option, reheat in your air fryer at 375°F for 4-5 minutes, shaking once. The circulating air revives the crisp almost magically. Just watch closely to avoid burning the glaze.
Sauce Refresh Tip
If the glaze thickens too much during storage, thin it with 1-2 tsp water or a splash of rice vinegar before reheating. This brings back that perfect sticky consistency without diluting flavor.
Nutrition Facts
Frequently Asked Questions
What’s the best way to get extra crispy skin?
Pat the drumettes completely dry before seasoning, and arrange them in a single layer on the baking sheet. Bake at 425°F and flip halfway for even crispiness.
Can I make these ahead of time?
Yes! Bake and glaze the drumettes, then store in an airtight container for up to 3 days. Reheat in the oven or air fryer to restore crispiness.
What can I substitute for honey in the glaze?
Maple syrup or agave work perfectly in a 1:1 ratio. Both add sweetness and help create that sticky texture.
How do I know when they’re fully cooked?
Use a meat thermometer to check for an internal temperature of 165°F. The skin should be golden brown and crispy.

- Jollof Rice Sauce Recipe: West African Tomato and Spice Infusion - September 25, 2026
- Japanese Rice Soup Recipe: Umami-Rich Comfort in a Bowl - September 25, 2026
- Homemade Cream Of Rice Recipe: Silk-Smooth Breakfast in Minutes - September 25, 2026