
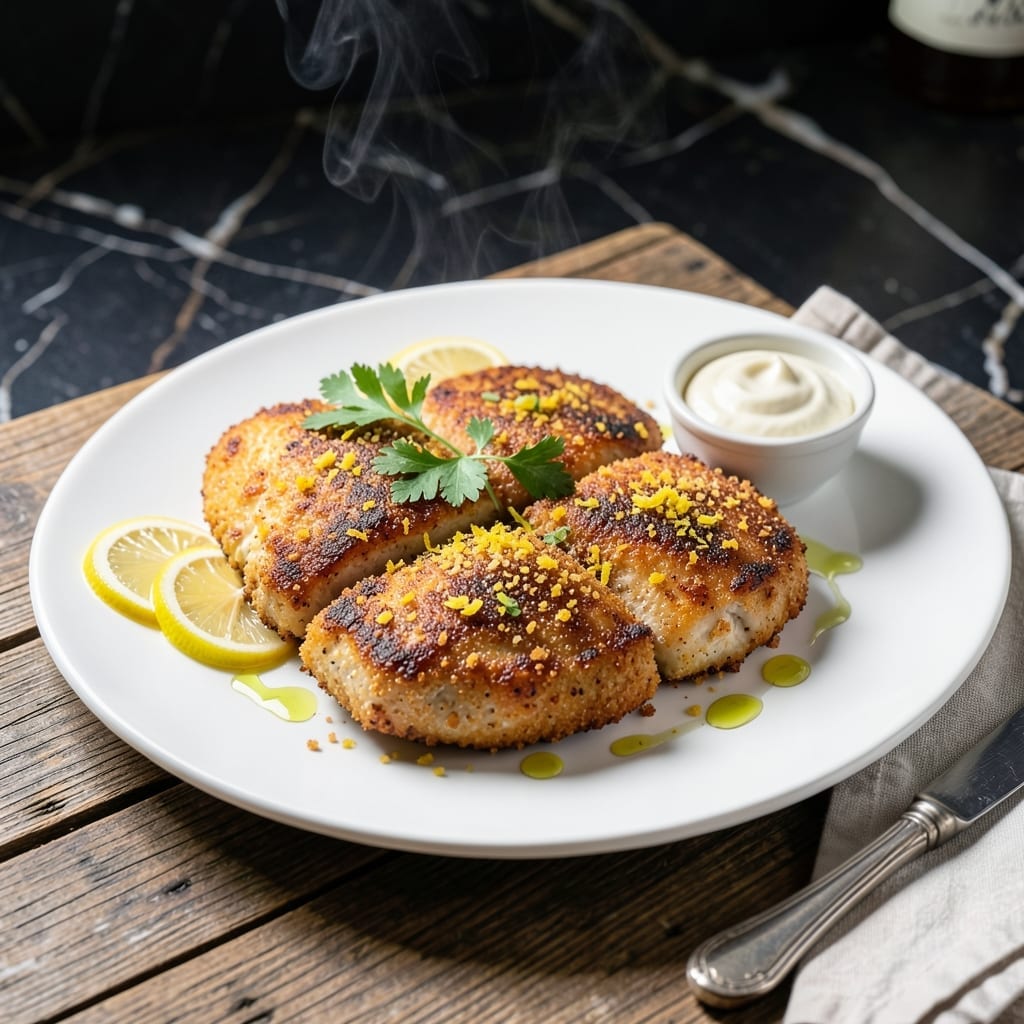
This chicken escalope delivers crispy, golden-brown cutlets with a tender interior and bright citrus notes.
The key is pounding the chicken thin for even cooking, then breading with a light, airy crust that stays crispy without being greasy. A touch of lemon zest elevates the flavor, balancing the richness of the breading.
Pan-frying in hot oil ensures a perfect sear, while a quick finish in the oven guarantees the chicken cooks through without drying out. The result is a cutlet that’s tender on the inside with a shatteringly crispy exterior.
Serve with a squeeze of lemon or a side of fresh greens for a light yet satisfying meal.
Ingredients for Chicken Escalope
Fourteen ingredients create ultra-crispy, lemon-kissed chicken escalope with perfect texture contrast.
| Ingredient | Amount | Notes |
|---|---|---|
| Chicken Breast 🍗 | 1 ½ lb | Boneless, skinless, pounded to 1/4-inch thickness |
| All-Purpose Flour 🌾 | ½ cup | For initial breading layer |
| Large Eggs 🥚 | 2 whole | Beaten for egg wash |
| Panko Breadcrumbs 🍞 | 1 ½ cups | For light, crispy crust |
| Parmesan Cheese 🧀 | ½ cup | Freshly grated from wedge |
| Lemon Zest 🍋 | 1 tbsp | From 1-2 fresh lemons |
| Lemon Juice 🍋 | 2 tbsp | Freshly squeezed for brightness |
| Olive Oil 🫒 | ¾ cup | For pan-frying, divided |
| Unsalted Butter 🧈 | 2 tbsp | For richness in breading |
| Garlic Powder 🧄 | ½ tsp | For seasoning breading |
| Onion Powder 🧅 | ½ tsp | For depth in breading |
| Salt 🧂 | 1 tsp | Kosher or sea salt |
| Black Pepper 🌶️ | ½ tsp | Freshly ground preferred |
| Paprika 🌶️ | ½ tsp | For color in breading |
| Fresh Parsley 🌿 | ¼ cup | Chopped, for garnish |
The chicken breast quality is paramount. Opt for air-chilled, organic from Whole Foods or Trader Joe’s—they retain moisture better during pounding. Pounding to an even 1/4-inch thickness ensures even cooking (use a rolling pin or meat mallet). The Panko breadcrumbs are non-negotiable for that shatteringly crispy texture; standard breadcrumbs won’t deliver the same result.
For gluten-free adaptations, panko-style gluten-free breadcrumbs work well. No lemon zest? Lime zest at equal volume makes a fine substitute. The Parmesan can be omitted for a dairy-free version (add 1/4 tsp salt to compensate). Fresh parsley is ideal, but dried parsley at one-third the amount works in a pinch—just rehydrate in the egg wash.
Breaded cutlets are best cooked immediately, but can be prepped 2 hours ahead (refrigerate uncovered). Leftover escalope keeps 3-4 days in the fridge—reheat in a 375°F oven for 10-12 minutes to restore crispiness. Freezing not recommended as it compromises the breading texture.
Why You’ll Love This Recipe
- One Pan Wonder: I bread and cook everything in stages using the same pan—no mountain of dishes, just crispy chicken.
- Crispy Parmesan Crust: That panko and parmesan combo gives it a golden, crunchy coating with a melt-in-your-mouth center.
- Weeknight Hero: I serve this with a simple salad or pasta, and it feels fancy without the fuss.
- Budget Stretcher: Chicken breast and pantry staples make this a reliable, cost-effective dinner that never gets old.
Step-by-Step Instructions for Chicken Escalope
Here’s the method for achieving perfectly crispy, golden breaded cutlets with bright lemon notes.
Step 1: Prepare and Bread the Chicken
Pat the 1.5 lb chicken breast dry and season both sides with the 1 tsp salt, 0.5 tsp black pepper, 0.5 tsp garlic powder, 0.5 tsp onion powder, and 0.5 tsp paprika. This seasoning ensures flavor in every bite of the finished dish.
Set up a breading station with three shallow dishes. Place the 0.5 cup all-purpose flour in the first, beat the 2 whole large eggs with the 1 tbsp lemon zest and 2 tbsp lemon juice in the second, and mix the 1.5 cups panko breadcrumbs with the 0.5 cup parmesan cheese in the third. The parmesan adds a savory depth to the crispy coating.
Dredge each piece of chicken in the flour, shaking off excess, then dip in the egg mixture, and finally press into the panko-parmesan mixture, ensuring full coverage. Let the breaded cutlets rest for 5 minutes to help the coating adhere.
Step 2: Pan-Fry to Golden Perfection
Heat 0.75 cup olive oil and 2 tbsp unsalted butter in a large skillet over medium-high heat until the butter melts and the oil shimmers. The butter adds richness, while the oil ensures even browning without burning.
Carefully place the breaded chicken in the skillet, working in batches if needed to avoid crowding. Cook for 3-4 minutes per side until the coating is deep golden brown and crispy. Resist the urge to move the cutlets too soon—this ensures a proper sear.
Drain the cooked chicken on a paper towel-lined plate to remove excess oil, keeping the cutlets warm as you finish the batch.
Step 3: Rest and Garnish for Serving
Let the chicken escalope rest for 2-3 minutes before serving. This brief rest allows the juices to redistribute, keeping the meat tender and flavorful. The breading will stay crispy if kept warm in a 200°F oven while you finish cooking.
Garnish with the 0.25 cup fresh parsley just before serving. The parsley adds a touch of color and freshness that complements the zesty lemon in the breading. Serve immediately while the coating is at its crispest.
Pro Tips For Making Chicken Escalope
- Pound Evenly: Use a meat mallet to pound the chicken breasts to an even 1/4-inch thickness—this guarantees they cook through at the same rate and stay tender. I learned this the hard way after pulling half-raw, half-dry escalopes from the pan more times than I’d like to admit.
- Mix Parmesan In: Fold finely grated Parmesan directly into the panko breadcrumbs before coating. About 1/4 cup per cup of panko is the sweet spot—it adds a salty depth that plain breadcrumbs just can’t match.
- Skip Cold Chicken: Let the pounded chicken sit at room temperature for 10 minutes before dredging. Cold meat lowers the oil temp too fast, and suddenly you’re left with a greasy, sad crust instead of a crisp one.
- Double Dredge: After the flour and egg, dip the chicken back into the egg wash, then into the panko-Parmesan mix again. Sounds like overkill, but it creates that extra-crispy crust that actually stays put when you cut into it.
Make-Ahead Tips for This chicken escalope
Prep Ahead Strategy
You can bread the chicken up to 2 hours before cooking—just arrange the cutlets on a wire rack set over a baking sheet and refrigerate uncovered. This prevents the breading from getting soggy while keeping everything cold for safe handling.
Breading Station Setup
I like to prep my three dishes the night before: flour with seasonings in one, beaten eggs with lemon in another, and panko-parmesan mix in the third. Cover and refrigerate the egg mixture, but leave the flour and panko at room temperature. This saves 10 minutes on cooking day. 💡
Oven Finishing Option
For larger batches, pan-fry just until golden, then transfer to a 375°F oven for 8-10 minutes to finish cooking through. This method keeps the first batch warm while you cook the rest, and the breading stays crispy.
Reheating for Leftovers
Store cooked escalope on a paper towel-lined plate in the fridge for up to 3 days. Reheat in a 375°F oven on a wire rack for 10-12 minutes—this revives the crispiness better than a microwave.
Freezing Not Recommended
The breading texture suffers when frozen and reheated, becoming soft and losing its shatter. If you must freeze, do so before breading. Thaw overnight in the fridge, then bread and cook fresh.
Make-Ahead Pro Tip
Pound and season the chicken the night before, storing it in an airtight container with parchment between pieces. This cuts your prep time in half on cooking day while ensuring even thickness for perfect results. ✨
Nutrition Facts
Frequently Asked Questions
Why do we pound the chicken so thin?
Pounding to 1/4-inch thickness ensures even cooking and prevents dryness. It also creates a larger surface area for maximum crispiness, giving you that perfect golden crust in just 3-4 minutes per side.
Can I use regular breadcrumbs instead of panko?
Panko is ideal for its light, airy texture, but regular breadcrumbs work in a pinch. The crust won’t be as crispy, so press firmly when breading to help it adhere better.
How do I keep the breading from falling off?
Let breaded cutlets rest for 5 minutes before frying. Also, ensure the oil is hot (medium-high heat) before adding chicken—this creates a seal that holds the coating in place.
What’s the best way to reheat leftovers?
Place on a wire rack in a 375°F oven for 10-12 minutes. This restores crispiness better than a microwave, which makes the breading soggy.

- Jollof Rice Sauce Recipe: West African Tomato and Spice Infusion - September 25, 2026
- Japanese Rice Soup Recipe: Umami-Rich Comfort in a Bowl - September 25, 2026
- Homemade Cream Of Rice Recipe: Silk-Smooth Breakfast in Minutes - September 25, 2026