
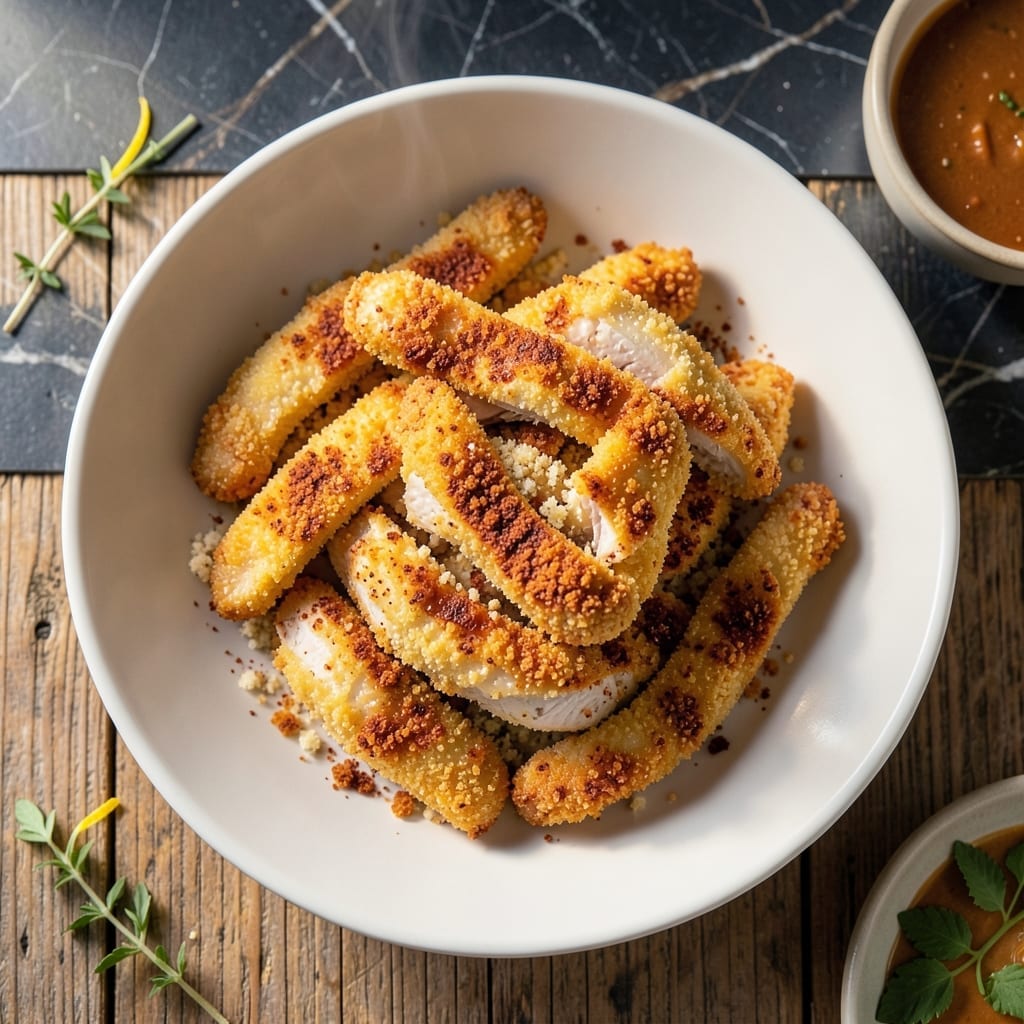
This oven-baked chicken fingers recipe delivers crispy results without the mess of frying. The secret is a two-step coating process that ensures a golden, crunchy exterior while keeping the meat juicy inside.
Using simple pantry staples and a hot oven, this method produces chicken fingers that rival any restaurant version. The high heat creates the perfect texture without submerging the food in oil.
Each bite offers tender meat inside with a shatteringly crispy coating outside. The technique proves you don’t need a deep fryer to achieve that satisfying crunch.
Serve with your favorite dipping sauces for a meal the whole family will love. The oven does most of the work while you enjoy the aroma of dinner cooking.
Ingredients for Chicken Fingers Recipe Oven
Simple pantry staples plus chicken for that crispy, oven-baked perfection.
| Ingredient | Amount | Notes |
|---|---|---|
| Chicken Breast 🍗 | 1 ½ lb | Boneless, skinless, cut into strips |
| All-Purpose Flour 🌾 | 1 cup | For initial dredging |
| Large Eggs 🥚 | 2 whole | Beaten for binding |
| Panko Breadcrumbs 🍞 | 2 cups | For extra crispy coating |
| Grated Parmesan Cheese 🧀 | ½ cup | Freshly grated preferred |
| Paprika 🌶️ | 1 tsp | For seasoning breading |
| Garlic Powder 🧄 | 1 tsp | Adds savory depth |
| Onion Powder 🧅 | 1 tsp | Balances the seasoning |
| Salt 🧂 | 1 tsp | Kosher or sea salt |
| Black Pepper 🌶️ | ½ tsp | Freshly ground preferred |
| Olive Oil 🫒 | 2 tbsp | For light brushing |
| Cooking Spray 💨 | 1 can | For greasing baking sheet |
The chicken is the foundation here. Boneless, skinless breasts cut into even strips cook more uniformly than tenders (which can dry out). I grab mine from Costco in bulk—cheaper and easier to portion. The Panko is non-negotiable for that shatteringly crisp coating; regular breadcrumbs just won’t give you the same crunch (trust me, I’ve tried).
No Panko? Crush cornflakes or dry bread for a similar texture. Fresh out of Parmesan? Pecorino Romano works too, though it’s saltier. The spices can all be eyeballed—this isn’t baking. Want extra flavor? Add a pinch of cayenne to the breading mix. The olive oil can be any neutral oil if that’s what you’ve got.
Bread the chicken right before baking—keeps the coating crisp. Leftovers? They reheat surprisingly well in a 400°F oven for 8-10 minutes. Store in the fridge for up to 3 days, but honestly, they’re best fresh out of the oven.
Why You’ll Love This Recipe
- One Pan Magic: I toss the chicken in flour, egg, then panko-parmesan mix, pop it on a sheet pan, and the oven does the rest.
- Crunch in Every Bite: That panko-parmesan crust gets golden and crispy while the chicken stays juicy inside.
- Kid-Approved Dinner: Even my picky nephew cleans his plate when these show up with a side of ketchup.
- Meal Prep Hero: I make a double batch and freeze half—they reheat in the oven just as crispy as day one.
Step-by-Step Instructions for Oven-Baked Chicken Fingers
Here’s the method I use to get that perfect crunch without a deep fryer.
Step 1: Prep and Season the Chicken
Start by cutting the 1.5 lb chicken breast into 1-inch thick strips. I like to keep them uniform so they cook evenly. Pat them dry with paper towels—this helps the coating stick better.
Season both sides lightly with a pinch of the salt and black pepper. Don’t overdo it here since the breading already has seasoning. This step ensures every bite has flavor from the inside out.
Step 2: Set Up Your Breading Station
Grab three shallow bowls. In the first, add the 1 cup all-purpose flour. In the second, beat the 2 whole large eggs until smooth. In the third, combine the 2 cups panko breadcrumbs, 0.5 cup grated parmesan cheese, 1 tsp paprika, 1 tsp garlic powder, 1 tsp onion powder, and remaining salt and black pepper.
Mix the breadcrumb mixture well so the spices distribute evenly. The parmesan adds a subtle sharpness that pairs perfectly with the crispy panko. I’ve found this combo gives the best texture and flavor.
Step 3: Coat the Chicken Thoroughly
Dredge each chicken strip in the flour, shaking off any excess. Then dip it into the beaten eggs, letting any extra drip off. Finally, press it firmly into the panko mixture, turning to coat completely. I like to press down gently to ensure the coating adheres well.
Place the breaded strips on a plate or wire rack. If you stack them, use parchment paper between layers to prevent sticking. Let them rest for 5 minutes—this helps the coating set so it doesn’t fall off during baking.
Step 4: Bake to Golden Perfection
Preheat your oven to 400°F and line a baking sheet with parchment paper. Lightly coat the parchment with the cooking spray to prevent sticking. Arrange the chicken strips in a single layer, leaving a little space between each piece so air can circulate.
Lightly brush or spray the tops with the 2 tbsp olive oil—this helps them brown and crisp up. Bake for 12-15 minutes, then flip each strip and bake for another 10-12 minutes until they’re golden brown and the internal temperature reaches 165°F.
Step 5: Serve Immediately While Crispy
Transfer the chicken fingers to a wire rack or paper towel-lined plate to drain any excess oil. The rack keeps them from getting soggy on the bottom. Serve right away while they’re hot and crispy.
These are best fresh out of the oven, but if you need to hold them, keep them warm in a 200°F oven on a wire rack. Pair with your favorite dipping sauce and enjoy that perfect crunch without the fryer mess.
Pro Tips For Making Chicken Fingers Recipe Oven
- Preheat the Oven: Set it to 400°F and give it a full 15 minutes to heat—this guarantees the panko gets crispy without drying out the chicken.
- Pound the Breasts: Slice the chicken into even 1-inch thick strips, or pound them flat first. I learned this the hard way—uneven pieces cook unevenly, and nobody wants dry tips.
- Press the Crumbs: After dredging in flour and egg, press the panko-parmesan mix into the chicken hard. It sticks better and creates that craggy, crunchy texture we all love.
- Use a Wire Rack: Place the fingers on a wire rack over a baking sheet so air circulates underneath. After burning three batches on the pan, I finally figured out this prevents soggy bottoms.
Troubleshooting chicken fingers recipe oven
Coating Not Sticking
Pat the chicken strips completely dry before dredging in flour. Any moisture prevents the flour from adhering properly. I use paper towels and press firmly to remove all juices. Also ensure your egg wash is well-beaten—thin spots won’t grab the breadcrumbs effectively. 💡
Soggy Bottoms
Place strips on a wire rack set over a baking sheet, not directly on the pan. This allows air to circulate underneath. Avoid overcrowding the pan—leave at least ½ inch between pieces. The 400°F heat needs room to work its magic.
Uneven Browning
Brush or spray the tops with olive oil before baking and again after flipping. This creates that golden finish. If some pieces brown faster, rotate the pan halfway through cooking. Every oven has hot spots I’ve learned to work around.
Dry Chicken
Don’t overbake—pull them at 165°F internal temperature. Use a meat thermometer for accuracy. Also, cut the chicken into even 1-inch strips so they cook uniformly. Thicker pieces dry out while thinner ones finish perfectly.
Breading Falls Off
Let the breaded strips rest for 5 minutes before baking. This sets the coating. Press firmly when dredging in the panko mixture—don’t just sprinkle it on. I’ve found resting makes all the difference for that crispy finish. ✨
Not Crispy Enough
Increase oven temp to 425°F for the last 5 minutes if needed. Ensure you’re using panko breadcrumbs—regular ones won’t give that shatter. The high heat at the end creates that final crunch we all love.
Nutrition Facts
Frequently Asked Questions
Do I need to use panko breadcrumbs?
Panko gives the best crunch, but you can substitute crushed cornflakes or dry breadcrumbs. The texture won’t be quite as crispy, but it’ll still be delicious.
How do I know when they’re done?
Use a meat thermometer to check for an internal temperature of 165°F. They should also be golden brown and crispy to the touch. This usually takes 22-27 minutes total at 400°F.
Can I make these ahead of time?
Bread the chicken and refrigerate uncooked for up to 4 hours. Bake just before serving for best texture. Leftovers reheat well in a 400°F oven for 8-10 minutes.
Why did my coating fall off?
This usually happens if the chicken wasn’t dry before breading or if you skipped the resting step. Press firmly when coating and let them rest for 5 minutes before baking.

- Jollof Rice Sauce Recipe: West African Tomato and Spice Infusion - September 25, 2026
- Japanese Rice Soup Recipe: Umami-Rich Comfort in a Bowl - September 25, 2026
- Homemade Cream Of Rice Recipe: Silk-Smooth Breakfast in Minutes - September 25, 2026