
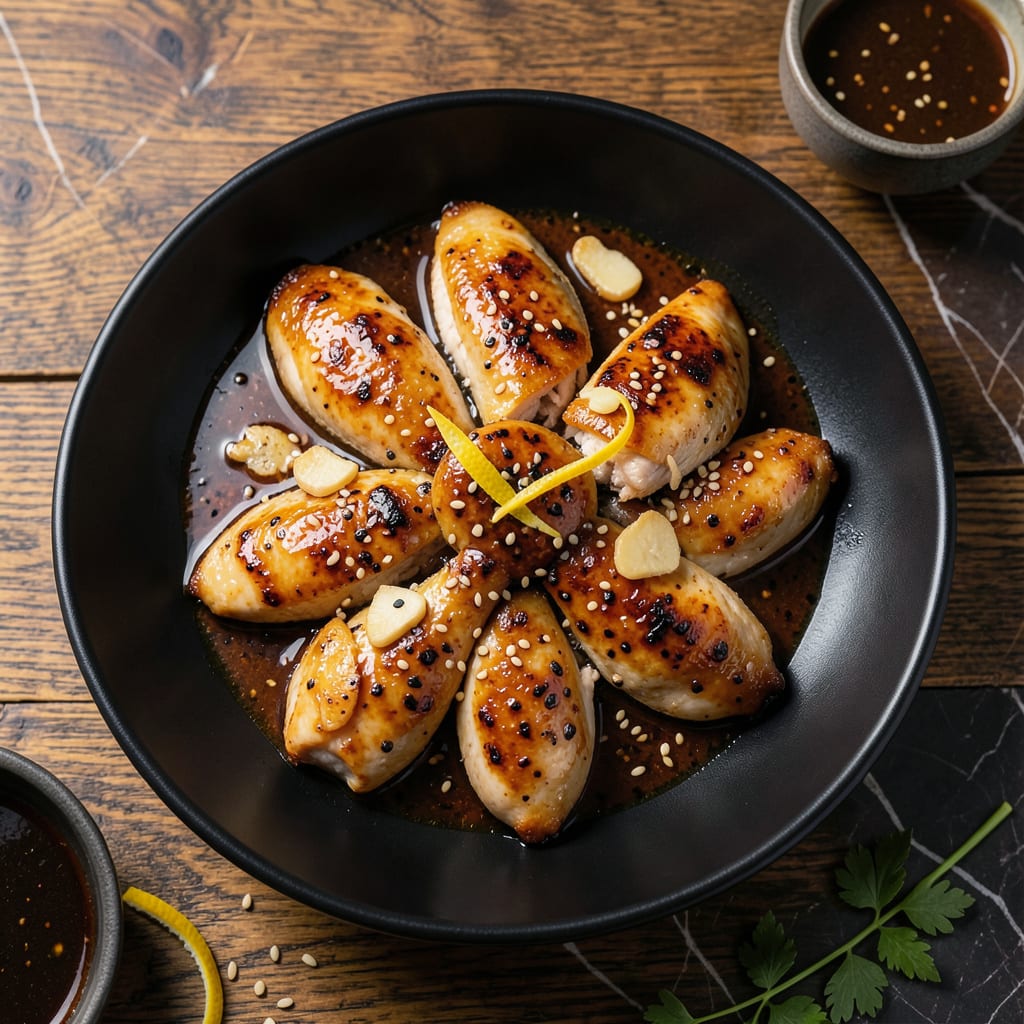
This wok-tossed dish brings bold Asian flavors to your home kitchen with minimal effort. The combination of fresh ginger and rich soy sauce creates a savory depth that elevates simple chicken into something extraordinary.
With just a few ingredients and 15 minutes of cooking, you’ll achieve tender chicken pieces coated in a glossy, aromatic sauce. It’s a foolproof way to deliver restaurant-quality results any night of the week.
Ingredients for Chicken Ginger Soy Sauce
Simple ingredients for bold Asian-inspired wok-tossed chicken with savory depth.
| Ingredient | Amount | Notes |
|---|---|---|
| Boneless Skinless Chicken Thighs 🍗 | 1 ½ lb | Cut into bite-sized pieces |
| Soy Sauce 🫒 | ½ cup | Low-sodium preferred for control |
| Fresh Ginger Root 🌿 | 2 tbsp | Peeled and finely grated |
| Garlic Cloves 🧄 | 4 cloves | Minced for maximum flavor |
| Brown Sugar 🍚 | 2 tbsp | Light or dark both work |
| Rice Vinegar 💧 | 2 tbsp | Unseasoned variety for balance |
| Cornstarch 🌾 | 1 tbsp | For thickening the sauce |
| Sesame Oil 🫒 | 1 tbsp | Toasted for aromatic depth |
| Canola Oil 🫒 | 2 tbsp | High smoke point for wok cooking |
| Green Onions 🧅 | 4 whole | Thinly sliced for garnish |
| Red Pepper Flakes 🌶️ | ½ tsp | Adjust for heat preference |
| Sesame Seeds 🌾 | 1 tbsp | Toasted for garnish |
[recipeingredientscaler]
The chicken thighs are key here—boneless, skinless for quick cooking and maximum flavor absorption. Costco has great quality in bulk, but any supermarket works. Look for fresh ginger root that’s firm with smooth skin (avoid the shriveled stuff). The soy sauce should be low-sodium so you can control the salt level. I always keep a bottle of Kikkoman in the pantry.
No rice vinegar? Apple cider vinegar at equal amount works in a pinch. Fresh ginger is non-negotiable, but ground ginger at one-fourth the amount saves time. Short on brown sugar? Honey or maple syrup adds sweetness too. The cornstarch can be swapped with arrowroot powder if that’s what you’ve got. For extra heat, add sriracha or chili garlic sauce to the mix.
This tastes even better the next day once flavors meld. Keeps 3-4 days in the fridge, but the chicken is best fresh. Freeze the sauce separately for up to 3 months—just thaw and reheat with new chicken. Always toast the sesame seeds last second (they burn fast).
Why You’ll Love This Recipe
- One Pan Magic: I throw everything in a skillet and let the soy sauce and brown sugar do the work while I set the table.
- Addictive Flavor: The ginger and garlic create this deep, savory-sweet sauce that coats the chicken so well I lick my fingers.
- Meal Prep MVP: It reheats beautifully—honestly, the flavors taste even better the next day over rice or noodles.
- Budget Stretcher: Boneless thighs stay juicy and cost half what breasts do, so I make this when I’m feeding a crowd without breaking the bank.
Step-by-Step Instructions for Chicken Ginger Soy Sauce
Here’s the method. Straightforward, tested, works every time.
Step 1: Marinate the Chicken for Maximum Flavor
In a large bowl, whisk together the 0.5 cup soy sauce, 2 tbsp finely grated fresh ginger root, 4 minced garlic cloves, 2 tbsp brown sugar, 2 tbsp rice vinegar, 1 tbsp sesame oil, and 0.5 tsp red pepper flakes. The sugar should dissolve completely as you stir.
Add the 1.5 lb boneless skinless chicken thighs cut into bite-sized pieces and toss to coat evenly. I like to let this sit for 15-20 minutes while I prep the rest—this gives the flavors time to penetrate the meat deeply.
Step 2: Create the Velvet Coating for Tender Chicken
After marinating, sprinkle the 1 tbsp cornstarch over the chicken and toss gently. The cornstarch creates a light coating that protects the meat and helps it develop a silky texture during cooking. Don’t skip this step—it’s what gives these bites their signature tenderness.
Let the coated chicken rest for 5 minutes while the cornstarch hydrates. You’ll notice the pieces become slightly opaque as the starch absorbs some of the marinade. This is exactly what you want.
Step 3: Wok-Sear the Chicken to Perfection
Heat the 2 tbsp canola oil in a wok or large skillet over medium-high heat until it shimmers but doesn’t smoke. Add the chicken in a single layer, working in batches if needed to avoid crowding. Let it sear undisturbed for 2-3 minutes until the edges turn golden brown.
Flip the pieces and cook for another 2-3 minutes until cooked through and the coating becomes crisp. The chicken should reach an internal temperature of 165°F and the sauce should begin to thicken from the cornstarch.
Step 4: Finish with Aromatic Garnishes
Return all the chicken to the wok if you cooked it in batches. Toss everything together, scraping up any browned bits from the bottom. The sauce should now be glossy and coat the chicken beautifully.
Transfer to a serving dish and immediately sprinkle with the 4 thinly sliced green onions and 1 tbsp toasted sesame seeds. These fresh garnishes add color and a final layer of flavor that makes the dish pop.
Pro Tips For Making Chicken Ginger Soy Sauce
- Sear the Thighs First: I learned this the hard way—browning the chicken thighs in a hot pan for 3-4 minutes per side before adding the sauce locks in juices and adds depth to the ginger-soy glaze.
- Grate the Ginger: Skip the chunks and finely grate the ginger root so it melts into the sauce, giving you that warm, aromatic flavor in every bite without chewy bits.
- Reduce the Sauce: After adding the soy sauce and brown sugar, let it simmer for at least 5 minutes until it thickens slightly—this keeps the sauce from being watery and helps it cling to the chicken.
- Use Dark Soy Sauce: Sounds weird, but it works: swapping half the regular soy sauce for dark soy sauce adds a richer color and deeper flavor to the dish without extra effort.
Make-Ahead Tips for This chicken ginger soy sauce
Prep Ahead Strategy
You can prep all ingredients the night before. Mix the soy sauce, ginger, garlic, and other sauce components in a sealed container. Store the 1.5 lb chicken thighs separately in the fridge. 💡
Marinate Overnight
For deeper flavor, combine the chicken and sauce mixture in a resealable bag and refrigerate for up to 12 hours. The acids in the rice vinegar will tenderize the meat while the flavors meld beautifully.
Sauce Storage
Make the sauce up to 3 days ahead and keep it in an airtight container. When ready to cook, just add the chicken and cornstarch. This saves time and ensures consistent flavor.
Partial Cooking
Cook the chicken through step 2 (velvet coating) and refrigerate it uncooked for up to 24 hours. Finish cooking just before serving—this cuts active prep time to 5 minutes.
Garnish Prep
Slice the green onions and toast the sesame seeds a day ahead. Store them in separate containers at room temperature. This keeps garnishes fresh and ready to use.
Reheating Tips
Reheat leftovers in a skillet over medium heat with a splash of water for 3-4 minutes. The sauce will re-emulsify, and the chicken will stay tender and flavorful. ❄️
Nutrition Facts
Frequently Asked Questions
Can I use chicken breast instead of thighs?
Yes, but thighs stay juicier. If using breast, reduce cooking to 2 minutes per side to prevent dryness. The velvet coating helps maintain moisture regardless.
What if I don’t have a wok?
A large skillet works fine. Use medium-high heat and avoid crowding the pan so the chicken browns properly. The key is quick cooking at high temperature.
How can I make this dish gluten-free?
Swap regular soy sauce for tamari or coconut aminos. Also, ensure your cornstarch is certified gluten-free. The rest of the ingredients are naturally gluten-free.
Why is my sauce too thin?
You may need more cornstarch. Mix 1 tsp with 1 tbsp cold water, then stir into the simmering sauce until thickened. Let it cook for 1-2 minutes to activate.

- Jollof Rice Sauce Recipe: West African Tomato and Spice Infusion - September 25, 2026
- Japanese Rice Soup Recipe: Umami-Rich Comfort in a Bowl - September 25, 2026
- Homemade Cream Of Rice Recipe: Silk-Smooth Breakfast in Minutes - September 25, 2026