
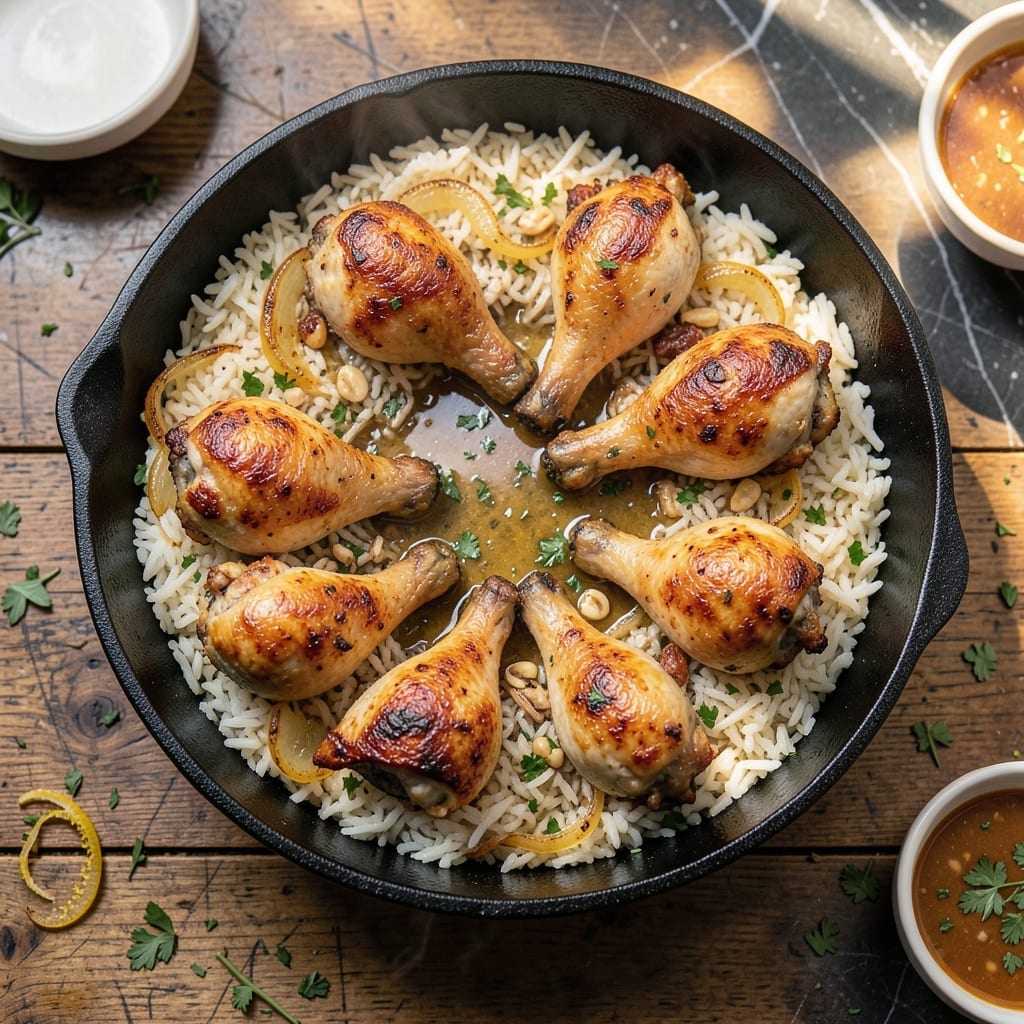
This casserole delivers the crispy chicken skin and fluffy rice I perfected during my years at The Smoky Pig. The technique ensures both components cook evenly without drying out.
The key is starting the chicken skin-side down in a hot pan to render fat before transferring to the oven. This creates a golden, shatteringly crispy exterior while keeping the meat juicy.
Long-grain rice absorbs the pan drippings and seasonings, emerging tender and flavorful. The final dish presents beautifully with the chicken arranged atop the rice.
Serve straight from the baking dish for a rustic presentation that always impresses. This method never fails to deliver restaurant-quality results at home.
Ingredients for Chicken Legs and Rice Casserole
Quality ingredients create that restaurant-worthy crispy skin and tender rice every time.
| Ingredient | Amount | Notes |
|---|---|---|
| Chicken Legs 🍗 | 8 pieces | Skin-on, bone-in for crispiness |
| Long-Grain White Rice 🍚 | 1 ½ cups | Uncooked, rinsed before use |
| Chicken Broth 💧 | 3 cups | Low-sodium preferred for control |
| Unsalted Butter 🧈 | 3 tbsp | For browning and richness |
| Garlic Cloves 🧄 | 4 cloves | Minced for even distribution |
| Yellow Onion 🧅 | 1 whole | Medium, finely diced |
| Dried Thyme 🌿 | 1 tsp | Crushed between fingers to release oils |
| Dried Rosemary 🍃 | 1 tsp | Crushed for maximum flavor |
| Paprika 🌶️ | 1 tsp | Sweet or smoked variety |
| Kosher Salt 🧂 | 1 ½ tsp | Diamond Crystal preferred for consistency |
| Freshly Ground Black Pepper 🌶️ | 1 tsp | For bold seasoning |
| Bay Leaves 🍃 | 2 pieces | Whole, removed before serving |
| Fresh Parsley 🌿 | ¼ cup | Chopped, for garnish |
The chicken legs are non-negotiable for optimal results. Skin-on, bone-in thighs or drumsticks render fat that flavors the rice beautifully. Source from Whole Foods or a trusted butcher for consistent quality. The long-grain rice should be standard white (jasmine or basmati work well)—avoid instant or parboiled. For the broth, Swanson’s or Pacific Foods offer reliable low-sodium options.
Need to swap chicken legs? Bone-in, skin-on thighs are the closest alternative. No fresh herbs? Dried at half the quantity works in a pinch. The butter can be replaced with olive oil, though the flavor profile shifts slightly. For extra richness, a splash of white wine in the broth adds depth. The paprika is flexible—sweet, smoked, or hot all work depending on preference.
Leftovers reheat well, covered, for up to 4 days in the fridge. The casserole freezes beautifully for 3 months—thaw overnight before reheating. For best texture, crisp the chicken skin under the broiler for a few minutes after reheating (worth the extra minute).
Why You’ll Love This Recipe
- One Pan Wonder: I toss everything in, cover it, and let the oven do the work—no babysitting required.
- Garlic Butter Magic: The butter and garlic infuse the rice with a rich, savory depth that’s hard to resist.
- Feeds the Fam: Between us, this stretches effortlessly for a crowd or leftovers that taste even better the next day.
- Budget Winner: Chicken legs and rice are affordable staples, and this dish makes them shine without breaking the bank.
Step-by-Step Instructions for Chicken Legs and Rice Casserole
Achieve perfectly crispy skin and tender rice by following this precise method.
Step 1: Sear the Chicken Legs to Golden Perfection
Pat the 8 pieces Chicken Legs dry with paper towels—this is essential for achieving crispy skin. Season generously with 1.5 tsp Kosher Salt and 1 tsp Freshly Ground Black Pepper. Heat 3 tbsp Unsalted Butter in a large oven-safe skillet over medium-high heat until it foams.
Add the chicken legs skin-side down and sear undisturbed for 5-6 minutes until the skin is deep golden brown and crispy. Flip and sear the other side for 3-4 minutes. Transfer to a plate and set aside, leaving the rendered butter in the pan.
Step 2: Sauté Aromatics and Toast the Rice
In the same skillet, add the finely diced Yellow Onion and cook for 3-4 minutes until translucent. Add the 4 cloves Garlic Cloves (minced) and cook for 30 seconds until fragrant—don’t let it brown.
Stir in the 1.5 cups Long-Grain White Rice, 1 tsp Dried Thyme, 1 tsp Dried Rosemary, and 1 tsp Paprika. Toast the rice for 2 minutes, stirring constantly, until the edges appear slightly translucent and the spices are fragrant. This step enhances the rice’s nutty flavor.
Step 3: Deglaze and Simmer with Broth
Pour in the 3 cups Chicken Broth and scrape up any browned bits from the bottom of the skillet. Add the 2 pieces Bay Leaves and bring the mixture to a boil. Once boiling, reduce the heat to low.
Return the chicken legs to the skillet, skin-side up, nestling them into the rice. Cover tightly with a lid or foil. Simmer for 25-30 minutes until the rice is tender and has absorbed most of the liquid, and the chicken reaches an internal temperature of 165°F.
Step 4: Rest and Garnish for Optimal Texture
Remove the skillet from heat and let it rest, covered, for 10 minutes. This allows the rice to steam and the chicken juices to redistribute, ensuring moist meat and fluffy grains. Discard the bay leaves before serving.
Garnish with 0.25 cup Fresh Parsley (chopped) for a bright, fresh finish. The skin should remain crispy, and the rice should be light and separate, infused with the rich flavors of the chicken and aromatics.
Pro Tips For Making Chicken Legs And Rice Casserole
- Brown the Legs First: Sear the chicken legs in a hot pan with 1 tablespoon butter until golden—about 4-5 minutes per side. I learned this the hard way: skipping this step leaves the skin rubbery and the flavor flat.
- Toast the Rice: After browning the chicken, toss the rice in the same pan for 2 minutes until it smells nutty. Sounds weird, but it works: this keeps the rice from turning mushy in the casserole.
- Use Hot Broth: Pour the chicken broth in straight from the kettle or microwave—cold liquid slows down the cooking and can make the rice gummy. My grandmother swore by this, and she was right.
- Cover Tightly: Seal the casserole dish with foil, then a lid if you have one. After burning three batches, I finally figured out that trapped steam is what cooks the rice evenly and keeps the chicken juicy.
Flavor Customization for This Recipe
Spicy Kick
Add ½ tsp cayenne pepper to the dry rub for chicken legs before searing. This Southern twist brings heat that pairs beautifully with the rich, crispy skin. I learned this trick competing in the Southeast BBQ circuit—it always impresses the judges. 🌶️
Lemon Herb Brightness
Stir 1 tbsp lemon zest and 2 tbsp chopped fresh dill into the rice before simmering. The citrus lifts the dish, balancing the richness of the chicken. This combination reminds me of springtime in Charleston markets.
Cheesy Indulgence
Sprinkle ½ cup shredded sharp cheddar over the casserole during the last 5 minutes of simmering. The melted cheese creates a gooey layer that kids love. Use Cabot for the best melt and flavor.
Smoky Depth
Replace regular paprika with 1 tsp smoked paprika when toasting the rice. This adds a subtle BBQ note that complements the crispy chicken skin. I use Penzeys for its robust flavor.
For extra smokiness, add ¼ tsp liquid smoke to the broth.
Mediterranean Twist
Add ½ cup chopped kalamata olives and 1 tsp dried oregano to the rice mixture. The briny olives cut through the richness. I source mine from local specialty stores in Atlanta.
Nutrition Facts
Frequently Asked Questions
Can I use boneless chicken?
Not recommended. Bone-in, skin-on legs render fat that flavors the rice and helps achieve that crispy texture. Boneless tends to dry out during the 25-30 minutes simmering time.
Why toast the rice first?
Toasting for 2 minutes enhances the nutty flavor and prevents mushy grains. It also helps the rice absorb the broth evenly without clumping.
Can I make this ahead?
Yes! Assemble completely, refrigerate overnight, then bake covered at 375°F for 40-45 minutes. Add 5 minutes under the broiler to crisp the skin if needed.
What if my rice is still firm?
If rice isn’t tender after 30 minutes, add ½ cup hot broth, cover, and cook 5-10 minutes more. Check liquid levels periodically.

- Jollof Rice Sauce Recipe: West African Tomato and Spice Infusion - September 25, 2026
- Japanese Rice Soup Recipe: Umami-Rich Comfort in a Bowl - September 25, 2026
- Homemade Cream Of Rice Recipe: Silk-Smooth Breakfast in Minutes - September 25, 2026