
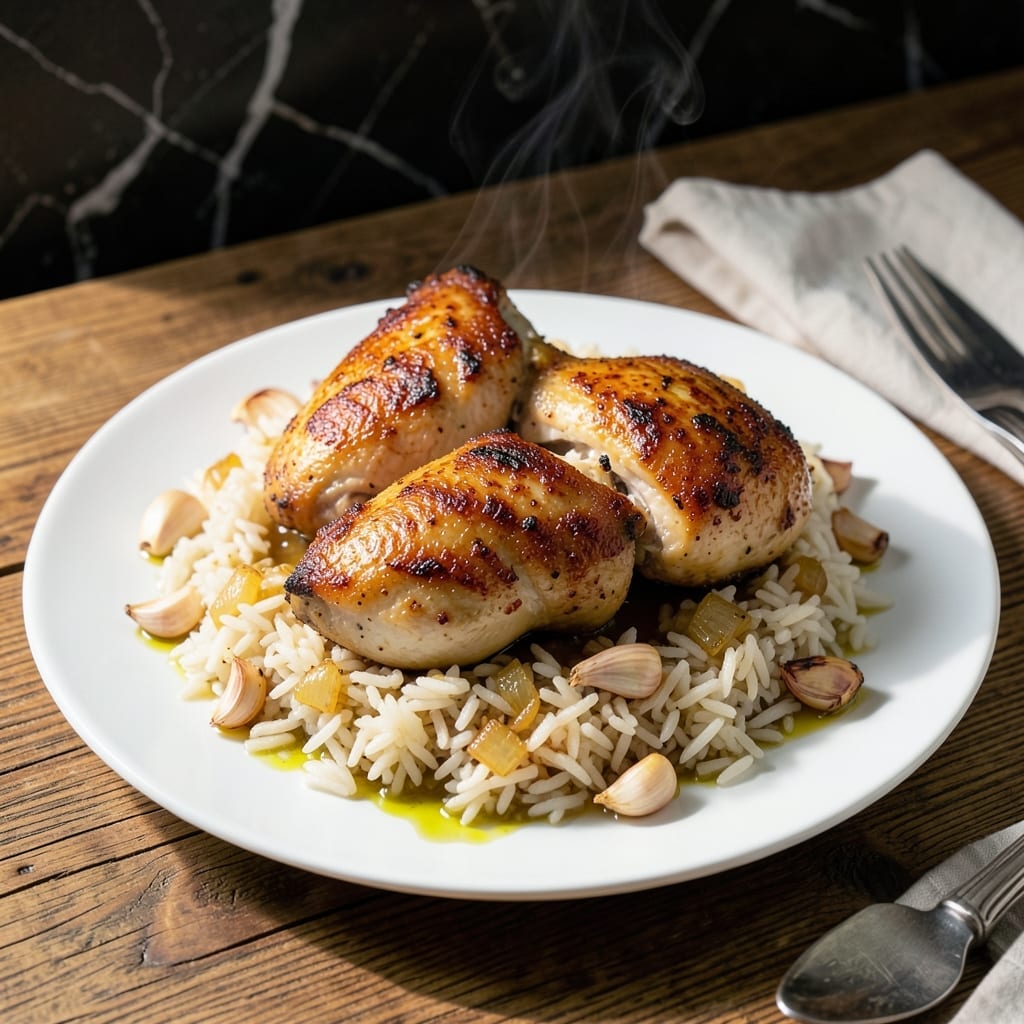
This one-pot creation brings comfort food to your table with minimal effort and maximum flavor. The chicken stays tender, the rice absorbs every savory note, and cleanup is a breeze.
I developed this method after years of testing ratios and techniques. The key is browning the chicken first, then cooking the rice in the same pot to capture all those flavorful bits.
What you get is a dish where every grain of rice carries the essence of the chicken and seasonings. The texture is perfect—not mushy, not dry, just right.
Ideal for busy weeknights or lazy weekends. This delivers on its promise of one-pot simplicity without sacrificing taste.
Ingredients for Chicken N Rice
Nothing exotic here—just good stuff for a hearty one-pot meal.
| Ingredient | Amount | Notes |
|---|---|---|
| Chicken Thighs 🍗 | 1 ½ lb | Boneless, skinless preferred |
| Long-Grain White Rice 🍚 | 1 ½ cups | Uncooked, rinsed before use |
| Chicken Broth 🥫 | 2 ½ cups | Low-sodium for better control |
| Yellow Onion 🧅 | 1 whole | Medium, finely diced |
| Garlic Cloves 🧄 | 4 cloves | Minced for depth of flavor |
| Olive Oil 🫒 | 2 tbsp | Divided for browning and sautéing |
| Dried Thyme 🌿 | 1 tsp | Or 1 tbsp fresh thyme |
| Dried Rosemary 🌿 | 1 tsp | Crushed to release flavor |
| Bay Leaf 🍃 | 1 whole | Removed before serving |
| Salt 🧂 | 1 tsp | Kosher or sea salt |
| Black Pepper 🌶️ | ½ tsp | Freshly ground preferred |
| Paprika 🌶️ | 1 tsp | Sweet or smoked variety |
| Frozen Peas 🌱 | 1 cup | Thawed, optional for color |
The chicken is the star here. Thighs stay tender where breasts might dry out—look for skinless, boneless at Costco or your regular supermarket. The rice? Any long-grain white works (jasmine or basmati add nice aroma). I always rinse mine first—removes excess starch so it doesn’t get gluey. For the broth, low-sodium is key; you can always add salt later.
No chicken thighs? Breasts work in a pinch but pull them at 160°F to avoid dryness. Swap the white rice for brown if you want more bite (add 10 extra minutes of cooking). Out of thyme? Poultry seasoning covers the same bases. Fresh herbs? Use triple the dried amount. The peas are optional but add a nice pop of color (frozen works—no need to thaw).
Leftovers keep 4-5 days in the fridge, reheat with a splash of water. Freezes beautifully for 3 months—portion first so you can grab just what you need. The flavors deepen overnight, making lunch the next day even better.
Why You’ll Love This Recipe
- One Pan Wonder: I toss everything in together and let it simmer—no extra pots to wash, just chicken thighs, rice, and broth doing their thing.
- Garlic Infused: The onion and garlic cook right into the rice, so every bite has that deep, savory flavor I crave.
- Leftovers King: Honestly, it tastes even better the next day, and it reheats in seconds for a solid lunch.
- Budget Stretcher: Chicken thighs and rice feed my family for days without breaking the bank.
Step-by-Step Instructions for Chicken N Rice
This one-pot method delivers rich, comforting flavors with minimal cleanup.
Step 1: Brown the Chicken Thighs
Heat 1 tbsp olive oil in a large pot or Dutch oven over medium-high heat. Pat the 1.5 lb chicken thighs dry with paper towels, then season both sides with 1 tsp salt, 0.5 tsp black pepper, and 1 tsp paprika.
Add the chicken to the pot and cook for 5-6 minutes per side until golden brown and crispy. The skin should release easily from the pan when it’s ready to flip. Remove the chicken and set aside—it’ll finish cooking later.
Step 2: Sauté the Aromatics
In the same pot, add the remaining 1 tbsp olive oil. Toss in the finely diced yellow onion and cook for 4-5 minutes until soft and translucent. The onions should start to smell sweet and caramelize slightly around the edges.
Add the minced garlic cloves, 1 tsp dried thyme, and 1 tsp dried rosemary. Stir constantly for 30 seconds until fragrant. Be careful not to let the garlic burn—it should stay pale and smell aromatic, not bitter.
Step 3: Toast the Rice and Deglaze
Pour in the 1.5 cups long-grain white rice and stir to coat in the oil and aromatics. Toast for 2 minutes until the rice turns slightly opaque and smells nutty. This step enhances the rice’s natural flavor and prevents it from becoming mushy.
Carefully pour in the 2.5 cups chicken broth and add the bay leaf. Stir to scrape up any browned bits from the bottom of the pot—this adds depth to the final dish. Bring the mixture to a gentle boil.
Step 4: Simmer and Finish
Return the chicken thighs to the pot, nestling them into the rice mixture. Reduce heat to low, cover, and simmer for 20-25 minutes until the rice is tender and the chicken reaches 165°F internally. Don’t stir during cooking to avoid breaking the rice grains.
Turn off the heat and let the pot sit covered for 5 minutes. Remove the bay leaf, then gently fold in the 1 cup frozen peas. The residual heat will warm them through perfectly. Fluff the rice with a fork and serve warm.
Pro Tips For Making Chicken N Rice
- Brown the Chicken First: Sear the chicken thighs skin-side down in the pot until golden brown—about 5-7 minutes. I learned this the hard way: skipping this step leaves the dish bland and the chicken rubbery.
- Rinse the Rice: Give the long-grain white rice a quick rinse under cold water to remove excess starch. Sounds weird, but it works: prevents gummy, clumpy rice in the final dish.
- Use Room-Temp Broth: Pull the chicken broth out of the fridge 20 minutes before cooking. Cold broth slows down the simmer, and I used to wonder why my rice took forever to cook.
- Let It Steam: Once the rice is tender, turn off the heat and let it sit covered for 10 minutes. My grandmother swore by this, and she was right: it guarantees fluffy, separate grains every time.
Storing and Reheating chicken n rice
Refrigerator Storage
Let your meal cool for no more than 2 hours before transferring to airtight containers. I use glass containers with snap-on lids. Store in the fridge at 40°F or below for up to 4-5 days. The flavors actually improve overnight. ❄️
Freezer Storage
This dish freezes beautifully for up to 3 months without quality loss. I recommend portioning into quart-size freezer bags—they stack efficiently and thaw faster. Leave 1 inch of headspace for expansion and squeeze out excess air.
Stovetop Reheating
Transfer a portion to a saucepan, add 2-3 tbsp water or chicken broth, and heat over medium-low heat for 8-10 minutes. Stir occasionally to prevent sticking. Taste and adjust seasonings if needed. 🔥
Microwave Reheating
Place a single serving in a microwave-safe dish, cover with a damp paper towel, and heat on 70% power for 2-3 minutes. Stir, then continue in 30-second intervals until reaching 165°F. Add a splash of water if it looks dry.
Nutrition Facts
Frequently Asked Questions
Can I use chicken breasts instead of thighs?
Yes, but reduce cooking time to prevent dryness. Pull breasts at 160°F and let carryover heat reach 165°F. Thighs are preferred for their juiciness.
Why toast the rice before adding liquid?
Toasting enhances nutty flavor and prevents mushiness. It also helps rice absorb liquid evenly, ensuring perfect texture every time.
How do I fix undercooked rice?
Add 1/4 cup broth, cover, and cook for 5 more minutes on low. Avoid stirring to keep grains intact.
Can I make this ahead?
Cook as directed, cool, then refrigerate up to 4 days or freeze for 3 months. Reheat with a splash of broth.

- Jollof Rice Sauce Recipe: West African Tomato and Spice Infusion - September 25, 2026
- Japanese Rice Soup Recipe: Umami-Rich Comfort in a Bowl - September 25, 2026
- Homemade Cream Of Rice Recipe: Silk-Smooth Breakfast in Minutes - September 25, 2026