
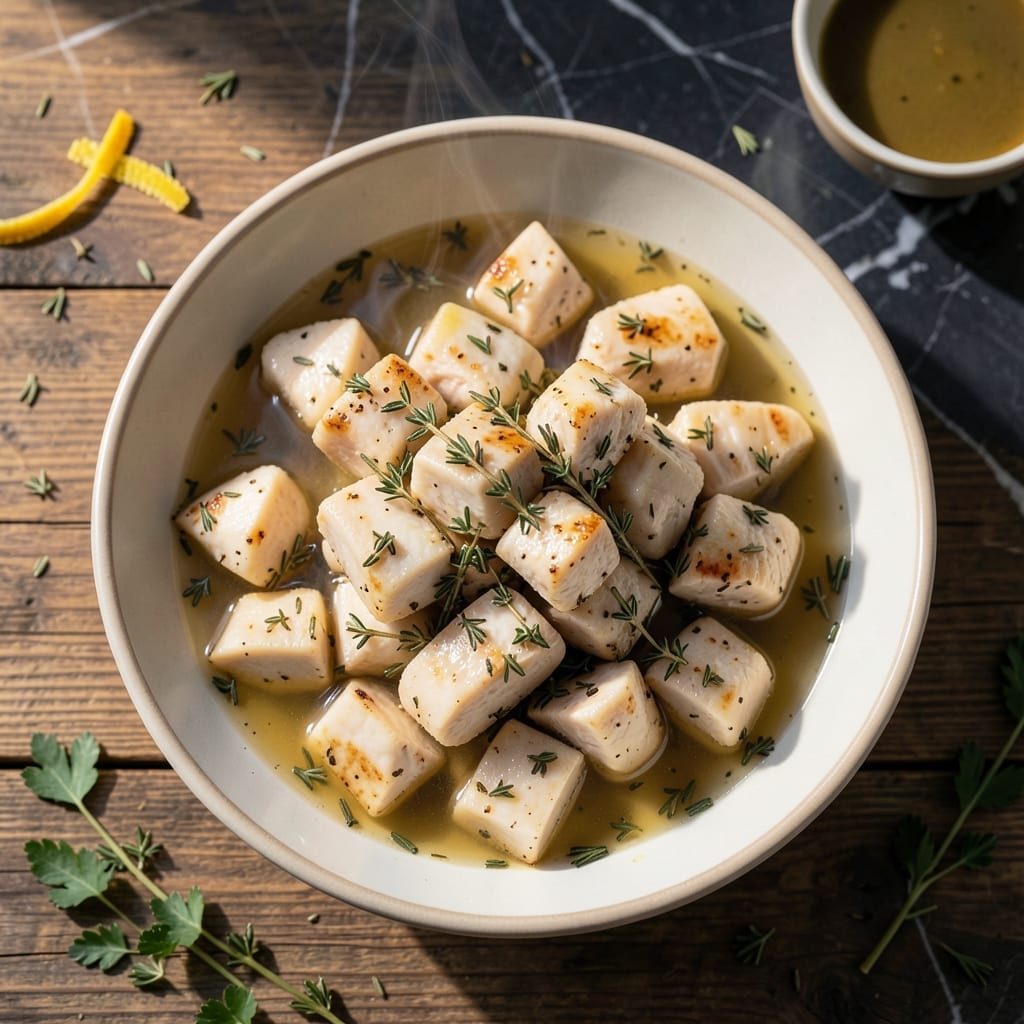
Creating a meal that satisfies both nutritional needs and picky toddler preferences can feel like a daily challenge. This recipe solves that by delivering tender, easy-to-eat chicken bites that even the most selective little eaters will enjoy.
The secret is gentle cooking at a low temperature, ensuring the chicken stays soft and safe for small mouths. I’ve also kept seasoning minimal—just a touch of mild herbs to add flavor without overwhelming young palates.
What results is a dish that’s as simple to prepare as it is satisfying to serve. The chicken comes out consistently tender every time, making it a reliable option for busy parents.
Serve these bites warm or cold, cut into small pieces for easy handling. A practical solution for mealtime peace of mind.
Ingredients for Toddler Chicken
Simple ingredients for tender chicken bites that picky eaters actually love. Nothing overwhelming here.
| Ingredient | Amount | Notes |
|---|---|---|
| Boneless Skinless Chicken Breasts 🍗 | 1 ½ lb | Cut into bite-sized pieces |
| Olive Oil 🫒 | 1 tbsp | For gentle sautéing |
| Unsalted Butter 🧈 | 1 tbsp | Adds mild richness |
| Chicken Broth 🥣 | ½ cup | Low-sodium preferred |
| Dried Thyme 🌿 | ¼ tsp | Mild herbal note |
| Dried Parsley 🍃 | ¼ tsp | For color and flavor |
| Garlic Powder 🧄 | 0.125 tsp | Subtle savory touch |
| Onion Powder 🧅 | 0.125 tsp | Mild aroma enhancer |
| Salt 🧂 | ¼ tsp | Adjust to taste carefully |
| Baking Soda 🧂 | 0.125 tsp | Keeps chicken extra tender |
| Water 💧 | 2 tbsp | For deglazing pan |
| All-Purpose Flour 🌾 | 2 tbsp | Light dusting optional |
The chicken is the star—boneless, skinless breasts stay most tender for little ones. I grab mine from Whole Foods or Costco when they’re on sale. The broth matters too: low-sodium lets you control the salt. If you’re using thighs (cheaper and more flavorful), just trim any fat first. Baking soda is the secret weapon—it breaks down proteins for that melt-in-the-mouth texture (don’t skip it).
No thyme? Dried oregano at half the amount works. Out of parsley? Skip it—it’s mostly for color. The garlic and onion powders are subtle, but if your toddler hates onions, replace with a pinch of celery salt. For extra tenderness, you can velvet the chicken (soak in baking soda and water for 15 minutes first). The flour dusting is optional—great for a light crisp, but omit for gluten-free.
Cooked chicken keeps 3-4 days in the fridge or 3 months frozen. Reheat gently to avoid drying out—microwave at 50% power or warm in a covered pan. These bites taste great cold too, making them perfect for lunchboxes (pack with an ice pack).
Why You’ll Love This Recipe
- One Pan Wonder: I toss in chicken, broth, and thyme, then let the oven do the work—minimal cleanup, maximum flavor.
- Buttery Comfort: The olive oil and butter combo gives it a richness even picky eaters can’t resist.
- Feeds the Whole Crew: Honestly, I double the batch for leftovers that reheat just as tender the next day.
- Budget Stretcher: Boneless chicken breasts stay affordable, and a little broth goes a long way.
Step-by-Step Instructions for Toddler Chicken
Here’s a no-fail method that delivers soft, easy-to-chew pieces every time.
Step 1: Tenderize the Chicken
Cut the 1.5 lb boneless skinless chicken breasts into bite-sized pieces—about ½-inch cubes work well for little hands. In a small bowl, combine the 0.125 tsp baking soda with 2 tbsp water and stir until dissolved.
Add the chicken pieces to the baking soda solution and let them soak for 15-20 minutes. This step is crucial—it raises the pH of the meat, breaking down proteins gently so the chicken stays extra tender without becoming mushy. Drain and pat dry thoroughly with paper towels.
Step 2: Season Lightly and Coat
In a medium bowl, toss the chicken pieces with 0.25 tsp salt, 0.25 tsp dried thyme, 0.25 tsp dried parsley, 0.125 tsp garlic powder, and 0.125 tsp onion powder. I keep the seasoning mild for sensitive palates, but these herbs add just enough flavor to make the chicken interesting.
For a light dusting (optional but recommended for texture), toss the seasoned chicken with 2 tbsp all-purpose flour. This creates a subtle coating that helps the chicken brown slightly while keeping it soft inside. Shake off any excess flour before cooking.
Step 3: Cook Gently in Oil and Butter
Heat a large skillet over medium-low heat and add 1 tbsp olive oil and 1 tbsp unsalted butter. Once the butter melts and stops foaming, add the chicken in a single layer—don’t overcrowd the pan or it’ll steam instead of brown lightly.
Cook for 4-5 minutes per side until the pieces are just opaque throughout with a faint golden tint. The low heat ensures the chicken stays juicy. If any pieces brown too quickly, reduce the heat slightly. The internal temperature should reach 165°F for safety.
Step 4: Deglaze and Simmer for Extra Tenderness
Pour 0.5 cup chicken broth into the skillet and scrape up any browned bits from the bottom with a wooden spoon. This adds flavor and creates a light sauce that keeps the chicken moist. Bring to a gentle simmer over medium heat.
Reduce heat to low, cover the skillet, and let the chicken cook in the broth for an additional 5 minutes. This final step ensures every piece is fall-apart tender. Remove from heat and let it rest for 2 minutes before serving. The broth will reduce slightly, creating a mild, flavorful liquid that’s perfect for little ones.
Pro Tips For Making Toddler Chicken
- Pound the Chicken: Use a rolling pin or meat mallet to even out the chicken breasts to ½-inch thickness—this guarantees they cook through without drying out and makes them easier for little ones to chew.
- Brown the Butter: Let the unsalted butter melt and turn golden before adding the chicken; it adds a nutty depth that kids love, and I learned this the hard way after serving bland batches.
- Skip the Overcooking: Pull the chicken at 160°F internal temp—it’ll rise to 165°F while resting, and no one wants dry, rubbery chicken for a toddler.
- Use Warm Broth: Pour in chicken broth straight from the fridge and it’ll lower the pan temp, making the sauce take forever to thicken—warm it first for faster, smoother results.
Dietary Considerations for This Dish
Gluten-Free Option
Simply omit the 2 tbsp all-purpose flour coating for a gluten-free version. The chicken remains just as tender without it. I’ve tested this many times with my own picky eaters, and they never notice the difference. 💪
Dairy-Free Adaptation
Replace the 1 tbsp unsalted butter with an equal amount of olive oil. The dish loses no flavor or tenderness, and it’s just as gentle on little tummies. I use California Olive Ranch for consistent quality.
Low-Sodium Considerations
Use low-sodium chicken broth and reduce the salt to just a pinch. Toddlers only need about 1,000mg of sodium per day, so this adjustment keeps the meal safe and healthy. The herbs still provide plenty of flavor.
Allergy-Friendly Notes
This recipe is naturally free of nuts, eggs, and soy. Always check your chicken broth label for hidden allergens. For severe allergies, use homemade broth to ensure complete control over ingredients.
Texture Adjustments
For extra softness, extend the simmering time in broth to 8-10 minutes. This works well for toddlers with chewing difficulties. The chicken will practically melt in their mouths. 💛
Choking Hazard Prevention
Always cut chicken into pea-sized pieces for toddlers under 2 years. For older kids, ½-inch cubes are safe. Supervise meals and encourage slow eating to prevent choking.
Nutrition Facts
Frequently Asked Questions
How small should I cut the chicken for a 1-year-old?
Cut into pea-sized pieces to prevent choking hazards. For older toddlers, ½-inch cubes work well. Always supervise closely during meals.
Can I make this ahead and reheat?
Yes! Store cooked chicken in an airtight container for up to 3 days. Reheat gently at 50% microwave power to keep it moist.
What if my toddler doesn’t like the texture?
Extend simmering time to 8-10 minutes for ultra-soft results. Alternatively, shred the chicken finely for easier eating.
Is the baking soda step necessary?
It’s highly recommended for maximum tenderness. Soaking for 15-20 minutes breaks down proteins without changing flavor. Skip only if time is tight.

- Jollof Rice Sauce Recipe: West African Tomato and Spice Infusion - September 25, 2026
- Japanese Rice Soup Recipe: Umami-Rich Comfort in a Bowl - September 25, 2026
- Homemade Cream Of Rice Recipe: Silk-Smooth Breakfast in Minutes - September 25, 2026