
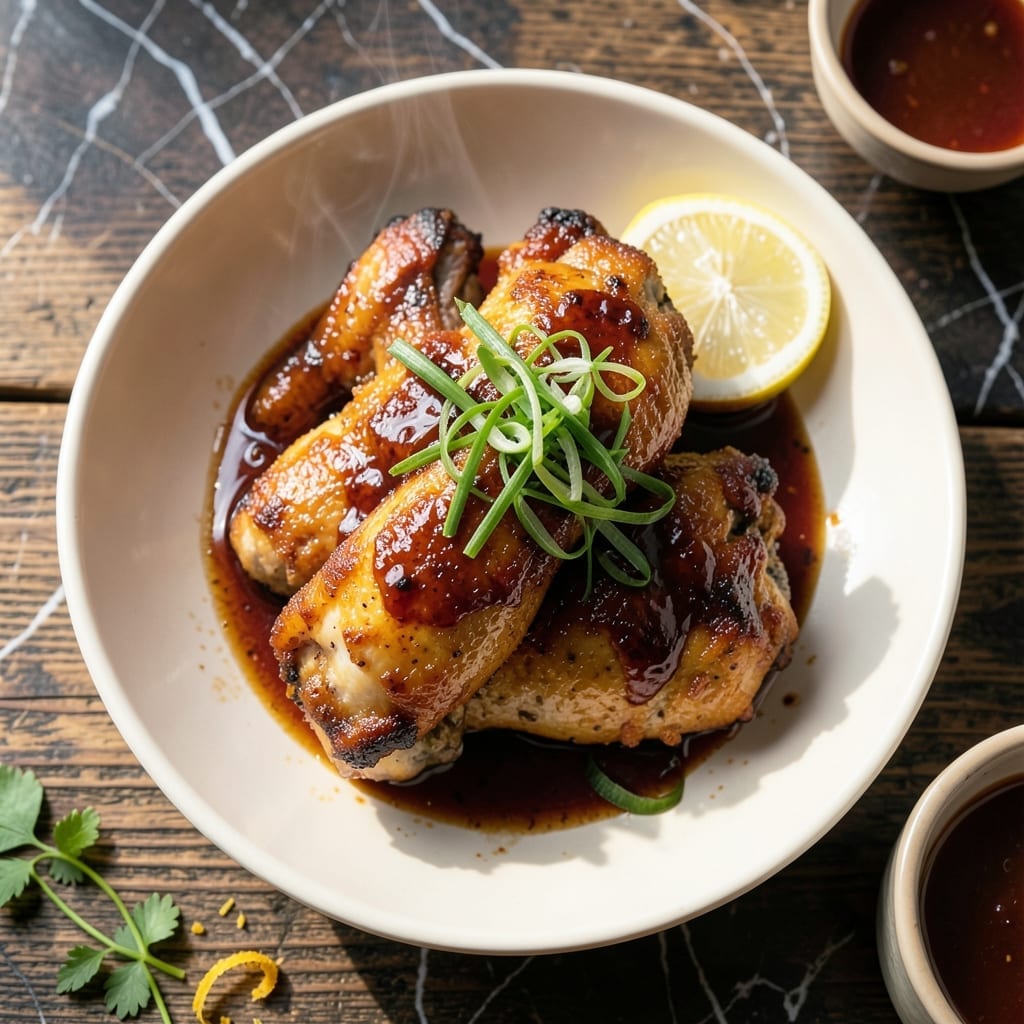
I’ve refined this Japanese fried chicken recipe to achieve the ideal balance of textures and flavors. The chicken is marinated, fried until golden, then coated in a tangy-sweet vinegar-based glaze.
The double-frying method ensures an ultra-crispy exterior while keeping the meat juicy inside. The glaze, made with vinegar, soy sauce, and sugar, delivers that signature bright, punchy finish.
This dish brings the authentic taste of southern Japan to your kitchen. The contrast between the crispy coating and the tangy glaze makes every bite unforgettable.
Serve it hot with steamed rice and pickled vegetables for a complete meal. The recipe stays true to tradition while being simple to execute.
Ingredients for Chicken Nanban
Authentic Japanese flavors start with these carefully selected ingredients for crispy, tangy perfection.
| Ingredient | Amount | Notes |
|---|---|---|
| Chicken Thighs 🍗 | 1 ½ lb | Boneless, skin-on, cut into bite-sized pieces |
| Soy Sauce 🥢 | ¼ cup | Japanese-style preferred |
| Rice Vinegar 🍚 | ¼ cup | For marinade and glaze |
| Sake 🍶 | 2 tbsp | Dry variety for marinating |
| Garlic Cloves 🧄 | 3 cloves | Minced finely |
| Fresh Ginger 🌿 | 1 tbsp | Grated or minced |
| All-Purpose Flour 🌾 | ½ cup | For light dredging |
| Potato Starch 🥔 | ½ cup | Essential for crispiness |
| Neutral Oil 🫒 | 4 cups | For deep frying, like vegetable or canola |
| Granulated Sugar 🍚 | 2 tbsp | For glaze balance |
| Mirin 🍶 | 1 tbsp | Sweet rice wine for glaze |
| Green Onions 🧅 | 2 whole | Thinly sliced for garnish |
| Lemon Wedges 🍋 | 4 pieces | For serving |
| Kosher Salt 🧂 | 1 tsp | For seasoning chicken |
| Black Pepper 🌶️ | ½ tsp | Freshly ground |
The chicken thighs are non-negotiable here—skin-on, bone-in delivers the juiciest results, though boneless works in a pinch. Japanese soy sauce like Kikkoman or Yamasa has the right balance of saltiness and umami. Sake and mirin are essential for authenticity; look for them in the international aisle of Whole Foods or H Mart. Fresh ginger and garlic should be fragrant—avoid the pre-minced jars if possible.
No sake on hand? Dry white wine plus a pinch of sugar can substitute. Mirin can be replaced with 1 tbsp sugar mixed with 1 tbsp water, though the depth won’t be identical. Cornstarch works in place of potato starch for dredging, but the texture won’t be quite as light. For a gluten-free version, swap all-purpose flour for rice flour.
Marinated chicken keeps 1-2 days in the fridge before cooking. The fried pieces are best served immediately but can be reheated in a 400°F oven for 10-12 minutes to revive crispiness. Leftovers? They’ll lose their crunch but still taste great over rice the next day.
Why You’ll Love This Recipe
- One Pan Magic: I just toss the chicken thighs in the soy-sake marinade and let the oven do the work.
- Tangy Garlic Punch: The rice vinegar and garlic give it that bright, addictive zing I crave all week.
- Meal Prep Hero: Between us, this tastes even better cold the next day in my lunchbox.
- Budget Friendly Feast: Chicken thighs stay cheap, and a little soy and sake stretch a long way.
Step-by-Step Instructions for Chicken Nanban
Master the technique for crispy Japanese fried chicken with its signature tangy-sweet glaze.
Step 1: Marinate the Chicken Thighs
In a bowl, combine the 0.25 cup soy sauce, 0.25 cup rice vinegar, 2 tbsp sake, 3 cloves minced garlic, and 1 tbsp grated fresh ginger. Add the 1.5 lb chicken thighs and ensure each piece is thoroughly coated.
Cover and refrigerate for at least 2 hours or overnight. The longer marinade time allows the flavors to penetrate deeply, tenderizing the meat while imparting the characteristic umami and tang. Stir the chicken once halfway through marinating to ensure even flavor distribution.
Step 2: Dredge and Double-Coat for Maximum Crispiness
Remove the chicken from the marinade (reserve the marinade for the glaze) and pat dry with paper towels. Season with 1 tsp kosher salt and 0.5 tsp black pepper. This step is crucial—excess moisture prevents proper crisping.
In a shallow dish, combine the 0.5 cup all-purpose flour and 0.5 cup potato starch. The potato starch is non-negotiable for that ultra-crisp texture. Dredge each piece of chicken in the flour mixture, pressing firmly to adhere. Shake off excess, then dip back into the reserved marinade, and dredge a second time in the flour mixture for an extra-thick, shatteringly crisp crust.
Step 3: Deep-Fry to Golden Perfection
Heat the 4 cups neutral oil in a deep, heavy-bottomed pot to 340°F. Use a thermometer for precision—oil temperature is key to even cooking without burning. Fry the chicken in batches to avoid overcrowding, which lowers the oil temperature.
Cook for 6-8 minutes until the exterior is deep golden brown and the internal temperature reaches 165°F. The double coating will create a craggy, crisp surface that stays crunchy even after glazing. Drain on a wire rack, not paper towels, to maintain crispness.
Step 4: Prepare the Tangy-Sweet Glaze
In a small saucepan, combine the reserved marinade, 2 tbsp granulated sugar, and 1 tbsp mirin. Simmer over medium heat for 5-7 minutes until the mixture reduces by half and thickens into a glossy glaze.
The glaze should coat the back of a spoon. This reduction concentrates the flavors and balances the acidity with sweetness. Keep an eye on it—sugar burns easily. Once thickened, remove from heat and let cool slightly before using.
Step 5: Glaze and Garnish
Toss the hot fried chicken in the warm glaze until each piece is evenly coated. The residual heat from the chicken will help the glaze adhere and caramelize slightly. Work quickly to prevent the chicken from losing its crispness.
Transfer to a serving platter and garnish with thinly sliced green onions and lemon wedges. The acidity from the lemon cuts through the richness, while the green onions add a fresh, sharp contrast. Serve immediately while the chicken is still hot and crispy.
Pro Tips For Making Chicken Nanban
- Marinate Longer: I learned this the hard way—give the chicken at least 2 hours in the soy, sake, and vinegar mix, or the flavors won’t penetrate. Overnight in the fridge is even better if you can swing it.
- Pat the Thighs Dry: Sounds weird, but it works: blot the marinated chicken with paper towels before frying. Wet meat steams instead of crisping, and nobody wants soggy nanban.
- Double Fry for Crisp: Fry once at 325°F for 4-5 minutes, rest, then hit it again at 350°F for 2 minutes. This guarantees a shatteringly crisp crust without drying out the meat.
- Use Fresh Garlic: Skip the pre-minced stuff—freshly crushed garlic cloves release way more aroma into the marinade. It’s the difference between flat flavor and that punchy, restaurant-style taste.
Pro Cooking Tips for This Dish
Double-Frying Secret
For extra crispiness, I use a double-fry method. First fry at 320°F for 4 minutes, rest for 2 minutes, then fry again at 340°F for 3-4 minutes. This creates a shatteringly crisp exterior while keeping the inside juicy. 🔥
Oil Temperature Control
Use a deep-fry thermometer to maintain precise oil temperature. If it drops below 320°F, the chicken absorbs oil and becomes greasy. I recommend a Taylor Precision thermometer for accuracy.
Glaze Consistency
Your glaze should reduce to a syrup-like consistency. If it’s too thin, simmer for 1-2 more minutes. If too thick, add 1 tsp water to loosen. The glaze should cling to the chicken without running off.
Marinade Tip
Don’t discard the marinade after coating the chicken. Boil it for 3-5 minutes to kill bacteria, then use as the base for your glaze. This maximizes flavor and prevents waste.
Crispiness Preservation
Drain fried chicken on a wire rack, not paper towels. This allows air circulation, preventing steam from making the coating soggy. I use a cooling rack over a baking sheet. ✨
Batch Frying
Fry in small batches to avoid oil temperature drops. Overcrowding causes uneven cooking and greasy results. I never fry more than 4-5 pieces at once in my 5-quart Dutch oven.
Nutrition Facts
Frequently Asked Questions
Can I use chicken breast instead of thighs?
Thighs work best due to their fat content and moisture. Breast can dry out during frying, but if you must, brine for 30 minutes first and reduce cooking time by 1-2 minutes.
Why does the recipe call for double frying?
The first fry cooks the meat through, while the second at higher heat creates an ultra-crispy crust. This two-step method ensures perfect texture inside and out.
How do I keep the coating crispy when glazing?
Work quickly and toss the chicken in the glaze immediately after frying. The residual heat helps the glaze adhere without making the coating soggy.
Can I make the glaze ahead of time?
Yes, prepare it up to 2 days ahead and store in the fridge. Gently reheat before using, but don’t boil or it may thicken too much.

- Jollof Rice Sauce Recipe: West African Tomato and Spice Infusion - September 25, 2026
- Japanese Rice Soup Recipe: Umami-Rich Comfort in a Bowl - September 25, 2026
- Homemade Cream Of Rice Recipe: Silk-Smooth Breakfast in Minutes - September 25, 2026