
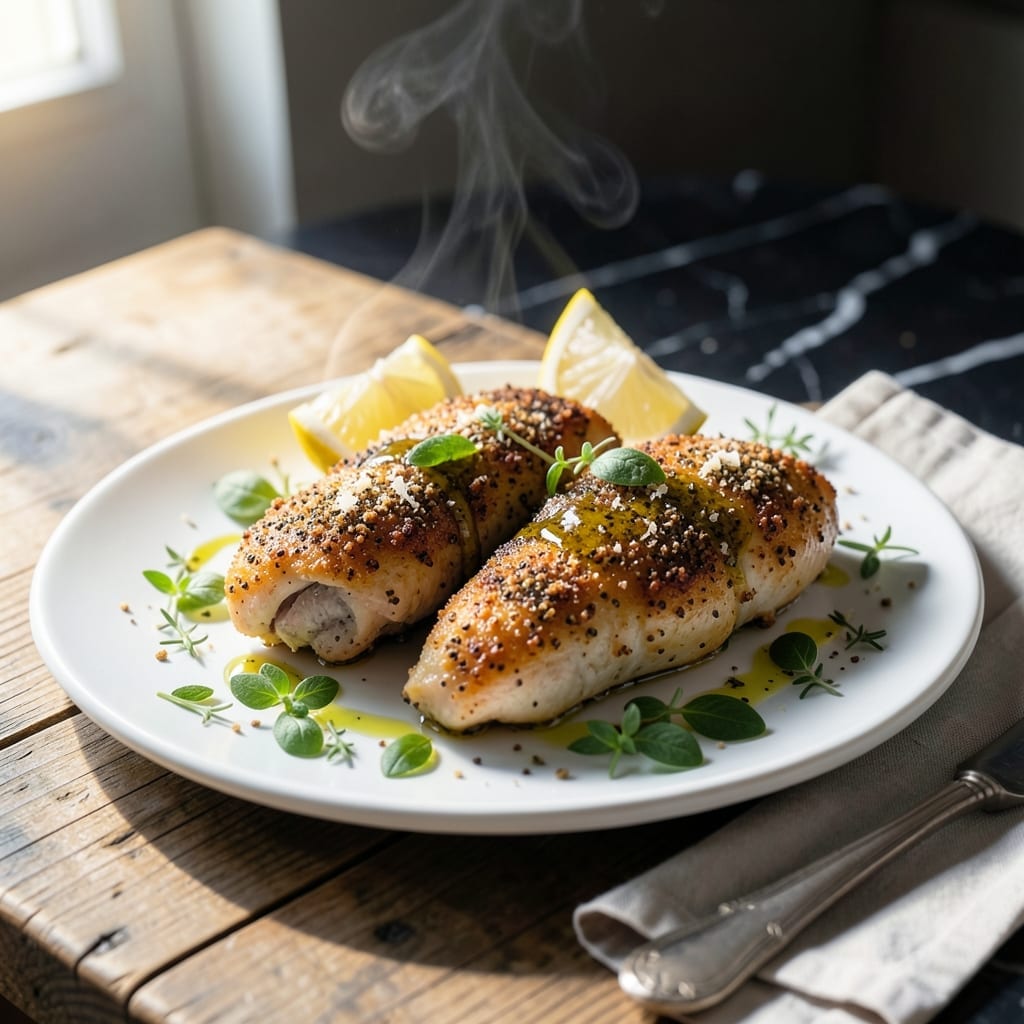
There’s a reason this Italian classic has stood the test of time—its crispy herb crust and juicy chicken create a perfect balance of textures and flavors. I’ve refined this method to ensure every bite delivers that signature oregano-forward taste with a golden, crunchy exterior.
This dish transforms simple chicken breasts into something extraordinary with a breadcrumb and herb coating that bakes to perfectly crispy perfection. The secret lies in the right ratio of oregano to breadcrumbs and a precise baking temperature to achieve that ideal crunch.
What emerges from the oven is tender chicken encased in a crispy, herb-scented crust that’s as satisfying as any restaurant version. The aroma alone will have everyone gathering around the table before it’s even ready to serve.
Serve with a side of lemon wedges to brighten the rich flavors. Here’s how to make this timeless dish at home.
Ingredients for Chicken Oreganata
Transform simple chicken breasts into an herb-crusted Italian masterpiece with these ingredients.
| Ingredient | Amount | Notes |
|---|---|---|
| Boneless Skinless Chicken Breasts 🍗 | 1 ½ lb | Pounded to even thickness |
| Dried Oregano 🌿 | 2 tbsp | Rubbed between fingers to release oils |
| Italian-Style Breadcrumbs 🍞 | 1 ½ cups | Panko for extra crunch optional |
| All-Purpose Flour 🌾 | ½ cup | For dredging chicken |
| Large Eggs 🥚 | 2 whole | Beaten for egg wash |
| Parmesan Cheese 🧀 | ½ cup | Freshly grated from wedge |
| Garlic Powder 🧄 | 1 tsp | Not garlic salt |
| Onion Powder 🧅 | 1 tsp | Enhances herb blend |
| Extra-Virgin Olive Oil 🫒 | ¼ cup | Divided for brushing and drizzling |
| Salt 🧂 | 1 tsp | Diamond Crystal kosher preferred |
| Freshly Ground Black Pepper 🌶️ | ½ tsp | Coarse grind ideal |
| Lemon 🍋 | 1 whole | Cut into wedges for serving |
| Dried Parsley 🍃 | 1 tbsp | For color and balance |
| Grated Pecorino Romano Cheese 🧀 | ¼ cup | Optional for sharper flavor |
| Unsalted Butter 🧈 | 2 tbsp | Melted for breadcrumb mixture |
The oregano is non-negotiable here—Penzeys or a well-stocked bulk section ensures maximum potency. For breadcrumbs, Progresso Italian-style delivers consistent texture, but panko from Kikkoman adds superior crunch. The Parmesan should be Parmigiano-Reggiano, freshly grated from a wedge (pre-shredded contains anti-caking agents that inhibit browning). Source chicken breasts with even thickness to ensure uniform cooking.
No dried oregano? Fresh at double the amount works, though the texture differs. Gluten-free breadcrumbs substitute seamlessly for dietary needs. Out of Parmesan? Pecorino Romano offers a sharper alternative. The egg wash can be replaced with buttermilk or olive oil for a dairy-free bind. Garlic and onion powders are interchangeable with fresh minced at one-third the quantity.
The breadcrumb mixture keeps in an airtight container for 1 week at room temperature. Prepared chicken can be refrigerated for 1 day before baking. Leftovers maintain their crispiness when reheated in a 375°F oven for 10-12 minutes. Always bring chicken to room temperature before baking for even cooking.
Why You’ll Love This Recipe
- I’ll be real: chicken breasts and pantry staples like flour and eggs make this a wallet-friendly dinner that still feels special.
- One Pan Magic: Honestly, I love that I can bread, bake, and serve this all on one sheet pan—no mountain of dishes afterward.
- Herb-Crusted Heaven: That crispy oregano breadcrumb coating with the juicy chicken inside? Ridiculously good, like a little taste of Italy at home.
- Weeknight Hero: Between us, this is my go-to for busy Tuesdays—ready in 25 minutes and my kids actually eat it without complaining.
Step-by-Step Instructions for Chicken Oreganata
Master the technique for achieving a perfectly crispy herb crust with juicy chicken underneath.
Step 1: Prepare and Season the Chicken Breasts
Begin by pounding the 1.5 lb boneless skinless chicken breasts to an even ½-inch thickness using a meat mallet. This ensures uniform cooking and prevents dry spots. Place each breast between plastic wrap to avoid tearing the meat.
Season both sides generously with the 1 tsp salt and ½ tsp freshly ground black pepper. I always press the seasoning into the meat lightly to ensure it adheres well. Set the prepared breasts aside while you create the breading station.
Step 2: Create the Breading Station with Herb-Infused Crust
In a shallow dish, combine the 1.5 cups Italian-style breadcrumbs, ½ cup Parmesan cheese, 2 tbsp dried oregano, 1 tsp garlic powder, 1 tsp onion powder, and 1 tbsp dried parsley. Rub the oregano between your fingers as you add it to release its aromatic oils.
Melt the 2 tbsp unsalted butter and mix it into the breadcrumb mixture. This adds richness and helps the crust adhere. In a separate dish, beat the 2 whole large eggs until uniform. Place the ½ cup all-purpose flour in a third dish. This three-step breading process is non-negotiable for maximum crispiness.
Step 3: Bread and Sear the Chicken to Golden Perfection
Dredge each chicken breast in the flour, shaking off the excess. Dip it into the beaten eggs, allowing any excess to drip off. Press the chicken firmly into the breadcrumb mixture, ensuring complete coverage on both sides. The crust should look substantial—this is what creates that signature crunch.
Heat ¼ cup extra-virgin olive oil in a large skillet over medium heat until shimmering. Add the breaded chicken and cook for 4-5 minutes per side until the crust is deep golden brown and the internal temperature reaches 165°F. Resist the urge to move the chicken—let it develop that crispy exterior undisturbed.
Step 4: Finish and Rest for Optimal Texture
Transfer the cooked chicken to a paper towel-lined plate to drain any excess oil. For an extra layer of flavor, I like to add the ¼ cup grated Pecorino Romano cheese to the remaining breadcrumb mixture and sprinkle it over the hot chicken immediately after cooking. The residual heat melts it slightly.
Let the chicken rest for 5 minutes before serving. This allows the juices to redistribute and the crust to set. Serve with the lemon cut into wedges for squeezing over the top—this bright acidity cuts through the richness perfectly. The result should be a crisp, herb-scented crust with tender, juicy meat beneath.
Pro Tips For Making Chicken Oreganata
- Pound the Chicken: Use a meat mallet or rolling pin to pound the breasts to an even ½-inch thickness—I learned this the hard way after too many dry, overcooked edges hiding under thick centers.
- Toast the Breadcrumbs: Toss the Italian-style breadcrumbs in a dry skillet over medium heat for 2-3 minutes until golden; it adds a nutty depth that plain crumbs just can’t match.
- Skip the Overcrowding: Fry in batches with space between each piece, or the breading steams instead of crisps—your future self will thank you when every bite stays crunchy.
- Use Fresh Oregano: Sounds weird, but it works: rub a pinch of fresh oregano between your palms to release the oils before mixing it into the breadcrumbs.
Essential Equipment for Perfect Results
Breading Station Essentials
Set up three shallow dishes: one for ½ cup all-purpose flour, one for 2 beaten eggs, and one for the herb-breadcrumb mixture. I use OXO Good Grips shallow dishes—their sloped sides make dredging easier. 💡
Skillet Selection
A heavy 12-inch skillet with a flat base is crucial for even browning. I swear by my Lodge cast iron for its heat retention and natural non-stick surface after seasoning. Avoid non-stick pans—they can’t reach the high heat needed for that perfect crust.
Meat Mallet
Use a flat-faced meat mallet to pound chicken to ½-inch thickness. My Norpro stainless steel version has both flat and tenderizing sides. This step ensures even cooking and prevents dry spots in thicker areas.
Thermometer Accuracy
An instant-read thermometer is non-negotiable for hitting 165°F internal temperature. I trust my ThermoWorks Thermapen for its 3-second accuracy and thin probe that doesn’t leave large holes in the meat.
Baking Sheet Option
For oven finishing, use a half-sheet pan with a wire rack. I prefer Nordic Ware for its durability. The rack elevates the chicken, allowing heat circulation for an all-around crispy crust without turning.
Paper Towel Trick
Keep paper towels handy for draining excess oil after cooking. I use Bounty for its strength when handling hot, crispy chicken. This prevents sogginess while maintaining that signature crunch. 🔥
Nutrition Facts
Frequently Asked Questions
Can I use fresh oregano instead of dried?
Yes, use 2x the amount of fresh oregano since it’s less concentrated. Finely chop it and mix into the breadcrumbs. The texture will be slightly different but the flavor will be vibrant.
Why do I need to pound the chicken?
Pounding to ½-inch thickness ensures even cooking and prevents dry spots. Thicker areas take longer to cook, risking dried-out meat. This step guarantees a juicy, tender result every time.
Can I bake instead of pan-frying?
Bake at 375°F for 20-25 minutes on a wire rack for all-around crispiness. Brush with olive oil first for extra browning. The texture will be slightly different but still delicious.
How do I keep the crust crispy when reheating?
Reheat in a 375°F oven for 10-12 minutes on a wire rack. Avoid microwaving, which will make the crust soggy. The oven restores the crunch while warming the chicken through.

- Jollof Rice Sauce Recipe: West African Tomato and Spice Infusion - September 25, 2026
- Japanese Rice Soup Recipe: Umami-Rich Comfort in a Bowl - September 25, 2026
- Homemade Cream Of Rice Recipe: Silk-Smooth Breakfast in Minutes - September 25, 2026