
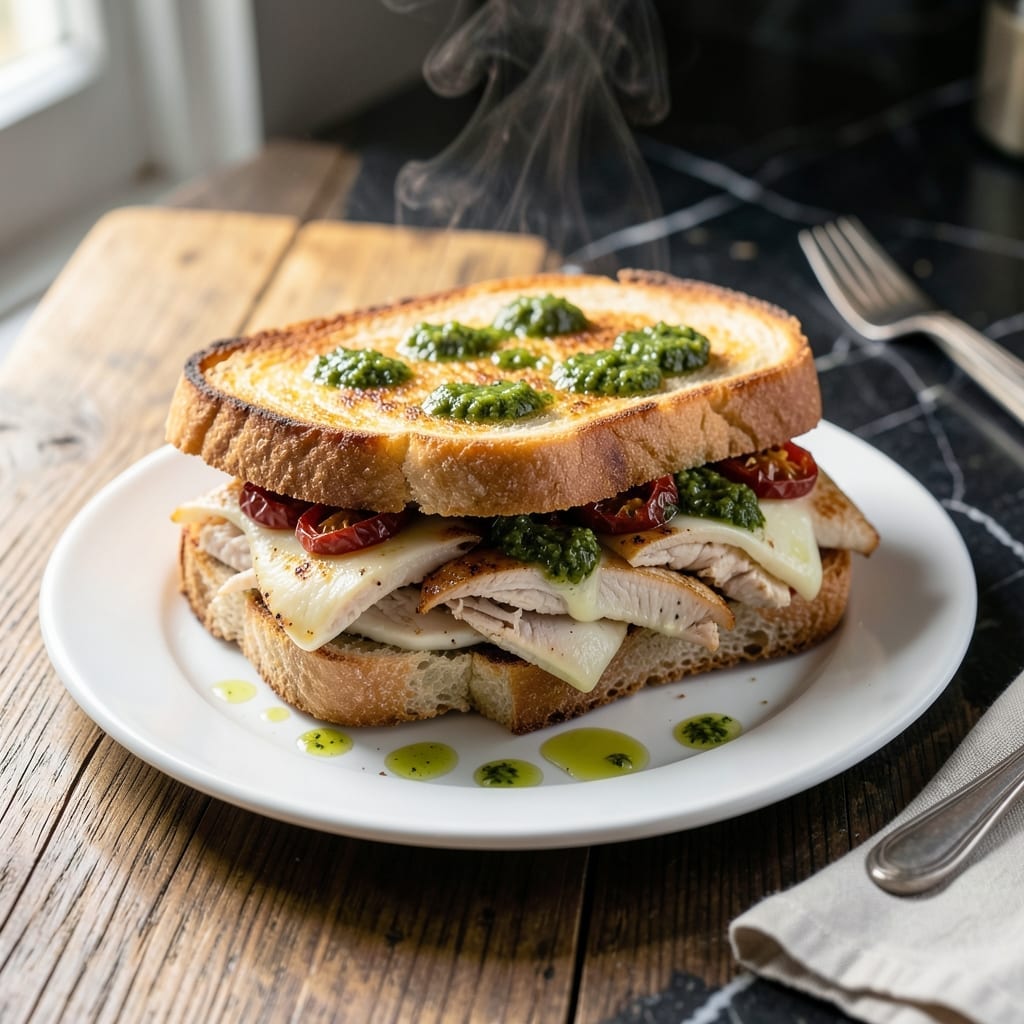
There’s a reason panini presses exist—this chicken panini achieves what no regular sandwich can: golden crisp bread with melty cheese, all while keeping the filling perfectly warm. No special equipment? No problem.
The key is layering ingredients strategically so every bite delivers tender chicken, gooey cheese, and crisp exterior. I’ve tested countless variations to land on this foolproof method.
What you’ll get is a sandwich with shatteringly crispy bread, juicy chicken, and just the right amount of melty cheese holding it all together. It’s restaurant-quality without the markup.
Ready in 15 minutes, this is lunch done right. Here’s how to make it.
Ingredients for Chicken Panini
Golden, crispy perfection starts with these carefully chosen ingredients for your sandwich.
| Ingredient | Amount | Notes |
|---|---|---|
| Ciabatta Bread 🍞 | 1 pieces | Freshly baked, sliced lengthwise |
| Chicken Breast 🍗 | 1 ½ lb | Boneless, skinless, cooked and sliced |
| Provolone Cheese 🧀 | 8 oz | Sliced thin for even melting |
| Mozzarella Cheese 🧀 | 4 oz | Freshly shredded for best texture |
| Pesto Sauce 🌿 | ½ cup | Basil-based, homemade or quality jarred |
| Sun-Dried Tomatoes 🍅 | ¼ cup | Oil-packed, chopped |
| Red Onion 🧅 | ½ whole | Thinly sliced for mild bite |
| Butter 🧈 | 2 tbsp | Unsalted, softened for spreading |
| Olive Oil 🫒 | 1 tbsp | Extra-virgin for brushing |
| Garlic Cloves 🧄 | 2 cloves | Minced for additional flavor |
| Salt 🧂 | ½ tsp | Kosher or sea salt preferred |
| Black Pepper 🌶️ | ¼ tsp | Freshly ground for best flavor |
The bread is non-negotiable here. Ciabatta from a proper bakery (not the grocery store shelf) gives you that shatteringly crisp exterior with airy interior. For the chicken, boneless, skinless breasts pounded to even thickness cook faster and more evenly. Boar’s Head makes excellent pre-sliced provolone, but any good deli counter will have quality options.
No ciabatta? Sourdough or focaccia work in a pinch (just press them well). Swap provolone for Gouda or Swiss if you prefer. Fresh mozzarella can replace shredded, but pat it dry first. The pesto can be store-bought—Buitoni or Barilla are solid choices. No sun-dried tomatoes? Fresh tomato slices with a pinch of oregano get you close.
Assemble right before pressing—no soggy bread. Leftovers keep 2-3 days wrapped tight in the fridge, but they’re best fresh. Reheat in the panini press or a skillet with a weight on top to revive the crisp. Freezing? Not recommended—the texture suffers.
Why You’ll Love This Recipe
- No-Fuss Assembly: I just layer the chicken, cheeses, and pesto between ciabatta slices—no complicated steps, just stack and press.
- That Pesto Zing: The basil pesto cuts through the rich provolone and mozzarella with this bright, herby punch that makes every bite sing.
- Lunchbox Hero: I pack these for picnics or office lunches, and they hold up beautifully—no soggy bread, just warm, melty perfection.
- Budget Stretcher: One chicken breast makes two generous sandwiches, and the cheese goes further than I expected. Honestly, it’s my wallet’s new best friend.
Step-by-Step Instructions for Chicken Panini
This method guarantees crisp, golden bread with perfectly melted cheese and juicy chicken every time.
Step 1: Prepare the Chicken and Vegetables
Season the 1.5 lb chicken breast with 0.5 tsp salt and 0.25 tsp black pepper, then cook it in a skillet with 1 tbsp olive oil over medium-high heat for 6-7 minutes per side until fully cooked through. Let it rest for 5 minutes before slicing thinly against the grain.
While the chicken cooks, thinly slice the 0.5 whole red onion and chop the 0.25 cup sun-dried tomatoes. Mince the 2 cloves garlic cloves if you want to add extra flavor to your panini. This prep work ensures all components are ready for quick assembly.
Step 2: Assemble the Panini Layers
Slice the 1 pieces ciabatta bread lengthwise and lightly spread 2 tbsp butter on the outer surfaces of both halves. On the bottom half, spread a thin layer of 0.5 cup pesto sauce, then layer the sliced chicken evenly across the surface.
Arrange the 8 oz provolone cheese slices over the chicken, followed by the 4 oz mozzarella cheese. Top with the sliced red onion and chopped sun-dried tomatoes, distributing them evenly. The combination of cheeses ensures a perfect melt and rich flavor.
Step 3: Press and Cook to Golden Perfection
Place the top half of the ciabatta bread on the sandwich and press down gently. Heat a panini press or large skillet over medium heat. If using a skillet, place the sandwich in the pan and weigh it down with a heavy pan or press to compress it evenly.
Cook for 3-4 minutes per side until the bread is golden brown and the cheese is fully melted. The weight ensures even contact and a crisp exterior. If the bread browns too quickly, reduce the heat slightly to allow the cheese to melt without burning.
Step 4: Rest and Serve Immediately
Remove the panini from the press or skillet and let it rest for 1-2 minutes. This brief rest allows the cheese to set slightly, making it easier to slice without the fillings spilling out.
Cut the panini diagonally into portions and serve immediately while hot. The contrast of crispy bread, melted cheese, and tender chicken with the tangy sun-dried tomatoes and pesto creates a perfect bite every time.
Pro Tips For Making Chicken Panini
- Press Hard: Use a heavy pan or proper panini press to really compress the sandwich—I learned this the hard way when my first few came out soggy instead of crisp.
- Slice Thin: Pound the chicken breast to 1/4-inch thickness before cooking so it cooks evenly and fits neatly in the ciabatta without bulging.
- Skip Cold Cheese: Take the provolone and mozzarella out of the fridge 15 minutes early—cold cheese doesn’t melt as smoothly and you’ll end up with uneven pockets.
- Butter the Outside: Sounds weird, but brushing the ciabatta with melted butter before grilling gives it that golden, crunchy crust everyone loves.
Storing and Reheating Leftovers
Short-Term Storage
Let your panini cool completely before wrapping in parchment paper then aluminum foil. Store in the fridge at 40°F or below for up to 3 days. The foil keeps it from drying out while the parchment prevents sogginess. ❄️
Freezing Guidance
Freezing isn’t ideal for panini, but if needed, wrap each sandwich in plastic wrap then freezer paper and freeze for up to 1 month. The texture will change slightly, but it’s better than wasting a good sandwich.
Oven Reheating
Preheat oven to 350°F. Wrap the panini in aluminum foil and heat for 10-12 minutes. For crispier bread, open the foil and broil for 1-2 minutes at the end. This method revives the melty cheese beautifully.
Panini Press Revival
Reheat directly in a preheated panini press for 2-3 minutes until warm and crispy. This is the best method if you have the equipment, as it restores that signature pressed texture.
Skillet Method
Heat a skillet over medium heat. Place the panini in the skillet, weigh it down with a heavy pan, and heat for 2-3 minutes per side. Add a pat of butter for extra crispiness.
Microwave Last Resort
If you’re in a hurry, microwave for 30-45 seconds on 50% power. Place a damp paper towel over it to prevent drying. Note this will soften the bread significantly, but it’s still tasty. 🔥
Nutrition Facts
Frequently Asked Questions
What bread works best if I don’t have ciabatta?
Sourdough or focaccia are great substitutes. Both hold up well to pressing and deliver that crisp exterior. Just press firmly to ensure good contact with the grill.
How do I prevent my panini from getting soggy?
Assemble right before cooking and use minimal wet ingredients. Pat dry any fresh tomatoes or vegetables first, and spread sauces sparingly.
Can I make this without a panini press?
Yes! Use a heavy skillet on medium heat and weigh down the sandwich with another pan. Cook for 3-4 minutes per side for crisp results.
What’s the best way to reheat leftovers?
Wrap in foil and warm in a 350°F oven for 10-12 minutes. For extra crisp, broil for 1-2 minutes after.

- Jollof Rice Sauce Recipe: West African Tomato and Spice Infusion - September 25, 2026
- Japanese Rice Soup Recipe: Umami-Rich Comfort in a Bowl - September 25, 2026
- Homemade Cream Of Rice Recipe: Silk-Smooth Breakfast in Minutes - September 25, 2026