
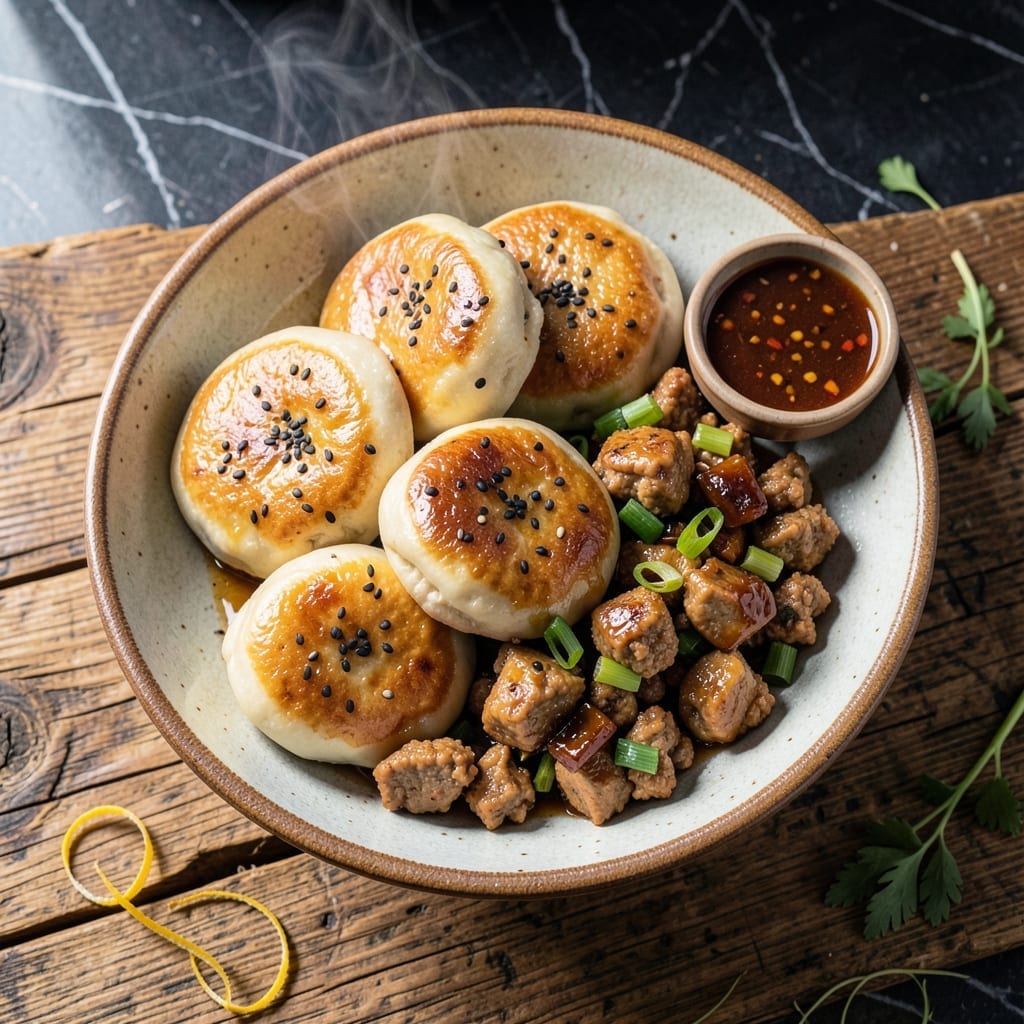
I’ve perfected this method for creating pillowy-soft steamed buns filled with a savory chicken mixture that melts in your mouth.
This recipe simplifies the traditional process without sacrificing texture or flavor. The dough rises to a light, airy consistency, while the filling remains juicy and aromatic.
Each bite delivers a balance of tender bun and rich, seasoned chicken. The steaming process locks in moisture, ensuring a delicate yet sturdy result.
Serve warm for the best experience, with the buns slightly sticky and the filling perfectly tender. This dish is worth the effort.
Ingredients for Chicken Pao
Pillowy buns start with simple dough and a flavorful chicken filling. Nothing overcomplicated here.
| Ingredient | Amount | Notes |
|---|---|---|
| All-Purpose Flour 🌾 | 4 cups | Plus extra for dusting |
| Active Dry Yeast 🍞 | 2 ¼ tsp | One packet, proofed in warm water |
| Granulated Sugar 🍚 | 2 tbsp | Divided for dough and proofing |
| Warm Water 💧 | 1 ¼ cups | About 110°F for yeast |
| Vegetable Oil 🫒 | 2 tbsp | Plus extra for greasing |
| Ground Chicken 🍗 | 1 lb | Boneless, skinless preferred |
| Soy Sauce 🥄 | 3 tbsp | Low-sodium if preferred |
| Sesame Oil 🫒 | 1 tbsp | Toasted for best flavor |
| Fresh Ginger 🌿 | 1 tbsp | Minced or grated |
| Garlic Cloves 🧄 | 3 cloves | Minced finely |
| Green Onions 🧅 | 3 whole | Thinly sliced, white and green parts |
| Light Brown Sugar 🍯 | 1 tbsp | For filling sweetness |
| Rice Vinegar 🍋 | 1 tbsp | For balancing filling flavors |
| Salt 🧂 | 1 tsp | Divided for dough and filling |
| White Pepper 🌶️ | ½ tsp | For subtle heat in filling |
The flour is the foundation here. King Arthur all-purpose is my go-to for consistent texture, but any reliable brand works. Yeast quality matters—check the expiration date and store it in the freezer if you won’t use it quickly. Warm water must be just right: too hot kills the yeast, too cold and it won’t activate. A thermometer is worth the $5 investment for perfect proofing every time.
No ground chicken? Turkey or pork work equally well—just keep the fat content similar. For a vegetarian twist, crumbled tofu or mushrooms absorb the flavors nicely. Soy sauce can be swapped for tamari (gluten-free) or coconut aminos. The sesame oil is non-negotiable though—it adds that signature depth. If you only have dark brown sugar, use it, but reduce by half a teaspoon to avoid overpowering sweetness.
Dough can rest in the fridge overnight if you need to stop mid-process. The filling keeps 3-4 days refrigerated, or freeze for 2 months. Steam buns from frozen—just add 5 extra minutes to the cooking time. Always let them cool slightly before serving to prevent sticking.
Why You’ll Love This Recipe
- No Fuss Dough: The yeast does all the work—just mix flour, sugar, warm water, and oil, then let it rise while you prep the filling.
- Pillowy Perfection: That first bite of soft, slightly sweet bread with the savory chicken inside? Ridiculously satisfying.
- Crowd Pleaser: Honestly, I’ve served these at potlucks and family dinners, and they disappear faster than I can make them.
- Budget Friendly: A bag of flour and a little yeast stretch further than you’d think, and the leftovers taste just as good the next day.
Step-by-Step Instructions for Chicken Pao
Master the dough and filling with these tested techniques for perfect results every time.
Step 1: Prepare and Proof the Dough
In a large bowl, whisk together the 4 cups All-Purpose Flour, 2.25 tsp Active Dry Yeast, 1 tbsp Granulated Sugar, and ½ tsp Salt. Create a well in the center and add the 1.25 cups Warm Water and 2 tbsp Vegetable Oil.
Mix with a wooden spoon until a shaggy dough forms. Turn onto a lightly floured surface and knead for 8-10 minutes until smooth and elastic. The dough should spring back when pressed lightly with your finger. Place it in an oiled bowl, cover with a damp towel, and let rise in a warm place for 1-1.5 hours or until doubled in size.
Step 2: Make the Savory Chicken Filling
Heat the 1 tbsp Sesame Oil in a skillet over medium heat. Add the 1 lb Ground Chicken and cook for 5-6 minutes, breaking it apart with a wooden spoon, until no longer pink and the edges are lightly browned.
Stir in the 1 tbsp Fresh Ginger, 3 cloves Garlic Cloves (minced), and white parts of the 3 whole Green Onions. Cook for 1 minute until fragrant. Add the 3 tbsp Soy Sauce, 1 tbsp Light Brown Sugar, 1 tbsp Rice Vinegar, and 0.5 tsp White Pepper. Simmer for 3-4 minutes until the mixture thickens slightly. Remove from heat and stir in the green parts of the Green Onions. Let cool completely.
Step 3: Shape the Buns
Punch down the risen dough and divide it into 12 equal portions (about 80g each). Roll each piece into a 3-inch circle on a lightly floured surface, keeping the rest covered with a towel to prevent drying.
Place 1-2 tbsp of the cooled chicken filling in the center of each dough circle. Pleat the edges upward, pinching to seal tightly at the top. Twirl the bun gently between your hands to create a smooth, rounded shape. Place each finished bun on a square of parchment paper to prevent sticking during steaming.
Step 4: Steam to Perfection
Arrange the buns in a steamer basket, leaving 1 inch of space between each for expansion. Bring 2 inches of water to a boil in the base of your steamer. Place the basket over the boiling water, cover tightly with a lid, and steam for 15 minutes.
Do not lift the lid during steaming, as the sudden temperature change can cause the buns to collapse. After 15 minutes, turn off the heat and let them sit covered for 2 minutes. The buns are done when they appear puffy and the dough springs back when gently pressed. Serve warm, with the remaining Green Onions sliced thinly on top if desired.
Pro Tips For Making Chicken Pao
- Activate Yeast First: Always bloom your yeast in warm water with a pinch of sugar for 5-10 minutes until frothy—skip this and your pao won’t rise properly.
- Knead Until Smooth: Work the dough for at least 8-10 minutes until it’s elastic and no longer sticky; under-kneading leads to dense, chewy pao.
- Resist Overfilling: I learned this the hard way—use no more than 2 tablespoons of filling per pao, or they’ll burst open while steaming.
- Steam on High Heat: Sounds obvious, but bring your water to a rolling boil before adding the pao, then keep the lid sealed for 15 minutes—this guarantees a fluffy texture.
Wine and Beer Pairings for These Flavors
Light Beer Choices
An Asian lager like Sapporo or Tsintgtao pairs beautifully with these buns. Their crisp, clean profile cuts through the richness without overpowering the ginger and garlic notes. The subtle sweetness complements the filling’s savory depth. 🍺
Wheat Beer Options
A German-style hefeweizen with its banana and clove esters creates an interesting contrast. I particularly enjoy Weihenstephaner—its effervescence refreshes your palate between bites. The wheat’s natural sweetness harmonizes with the brown sugar in the filling.
White Wine Pairings
For wine lovers, a chilled Riesling from Germany or Alsace works wonders. The wine’s bright acidity and touch of sweetness balance the umami flavors. Look for a Kabinett or Spätlese style with 8-10% ABV. 🍷
Red Wine Alternative
If you prefer red, try a lightly chilled Beaujolais. The Gamay grape‘s red fruit flavors and low tannins won’t clash with the dish’s delicate spices. Avoid heavy, oaky reds that would overwhelm the subtle flavors.
Non-Alcoholic Options
For a non-alcoholic pairing, jasmine tea is my top choice. Its floral aroma enhances the ginger and garlic in the filling. Serve it hot or iced depending on your preference. The slight bitterness cleanses your palate between buns.
Sparkling Pairing
A dry Prosecco or Cava offers a celebratory touch. The bubbles lift the dish’s richness while the crisp acidity prevents it from feeling too heavy. I find the citrus notes particularly complementary to the sesame oil in the filling.
Nutrition Facts
Frequently Asked Questions
Can I use a different type of meat?
Yes! Ground turkey or pork work well as substitutes. For a vegetarian version, try crumbled tofu or finely chopped mushrooms.
Why did my buns collapse after steaming?
This usually happens if the lid was lifted too soon. Keep the lid closed for the full 15 minutes and let them rest for 2 minutes after turning off the heat.
How do I store leftovers?
Cool completely, then refrigerate in an airtight container for up to 4 days. Reheat by steaming for 5-7 minutes until warm.

- Jollof Rice Sauce Recipe: West African Tomato and Spice Infusion - September 25, 2026
- Japanese Rice Soup Recipe: Umami-Rich Comfort in a Bowl - September 25, 2026
- Homemade Cream Of Rice Recipe: Silk-Smooth Breakfast in Minutes - September 25, 2026