
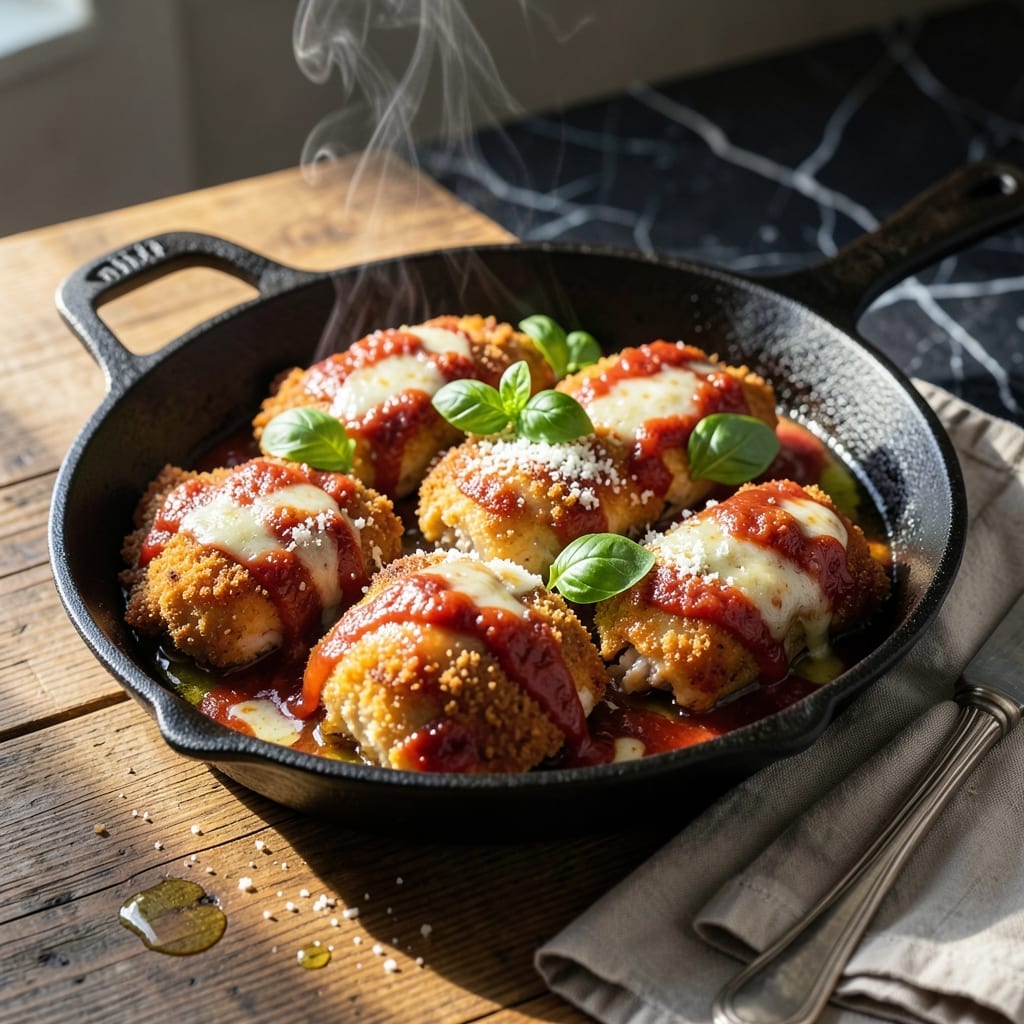
I’ve perfected the art of chicken parmesan in a single skillet, eliminating multiple pans and messy cleanup. This method delivers crispy breaded chicken smothered in rich marinara and melted cheese, all in one convenient vessel.
The key is searing the chicken until golden, then nesting it in sauce before blanketing with cheese. The skillet goes from stovetop to oven, creating a seamless cooking process that locks in flavor and moisture.
You’ll end up with tender chicken, bubbling sauce, and a perfectly melted cheese topping that stretches with every bite. The best part? Only one pan to wash when you’re finished.
Ready in 45 minutes, this dish brings restaurant-quality results to your home kitchen with minimal effort.
Ingredients for Chicken Parm Skillet
Everything you need for melty, crispy one-pan perfection right here.
| Ingredient | Amount | Notes |
|---|---|---|
| Chicken Breast 🍗 | 1 ½ lb | Boneless, skinless, pounded to 1/2-inch thickness |
| All-Purpose Flour 🌾 | ½ cup | For dredging chicken |
| Large Eggs 🥚 | 2 whole | Beaten for breading |
| Italian Breadcrumbs 🍞 | 1 ½ cups | Panko for extra crispiness |
| Parmesan Cheese 🧀 | ½ cup | Freshly grated from block |
| Marinara Sauce 🍅 | 2 cups | Quality jarred or homemade |
| Mozzarella Cheese 🧀 | 8 oz | Shredded or fresh slices |
| Garlic Cloves 🧄 | 3 cloves | Minced for sauce |
| Olive Oil 🫒 | ½ cup | Divided for cooking and sauce |
| Dried Oregano 🌿 | 1 tsp | For seasoning sauce |
| Dried Basil 🍃 | 1 tsp | For seasoning sauce |
| Kosher Salt 🧂 | 1 tsp | Plus more to taste |
| Black Pepper 🌶️ | ½ tsp | Freshly ground preferred |
| Red Pepper Flakes 🔥 | ¼ tsp | Optional for heat |
The chicken is the foundation, so look for even-sized breasts—they’ll cook uniformly. Pounding them to an even thickness (about 1/2-inch) means no dry spots. Costco’s Kirkland brand is great for bulk, but any supermarket will do. For the Parmesan, skip the pre-grated stuff—it’s coated in anti-caking agents and doesn’t melt as well. Grab a wedge and grate it yourself (worth the extra minute).
No Italian breadcrumbs? Panko with a pinch of Italian seasoning works in a pinch. Out of marinara? Crushed tomatoes with garlic and herbs can stand in—just simmer them down first. The mozzarella can be fresh (for that stretchy pull) or shredded block (more even melting). Whole milk mozzarella gives the best texture. Fresh basil in the sauce? Even better (add it at the end).
Leftovers keep 3-4 days in the fridge—reheat covered to keep the chicken from drying out. Freezes well for up to 3 months, too. I like to portion extras into meal-prep containers for easy lunches later.
Why You’ll Love This Recipe
- One Pan Dinner: I love that everything cooks together in a single skillet—no extra dishes, just golden chicken and melty cheese.
- Crispy, Cheesy Bite: That Italian breadcrumb and Parmesan crust on the chicken is what keeps me coming back for seconds.
- Weeknight Hero: Honestly, it’s my go-to when I need something hearty that still feels special on a busy Tuesday.
- Leftovers Win: The flavors actually get better the next day, so I always make extra for lunch the following afternoon.
Step-by-Step Instructions for Chicken Parm Skillet
Here’s how to layer flavors and textures in one pan for that perfect melty finish.
Step 1: Prep and Bread the Chicken
Pat the 1.5 lb Chicken Breast dry and season both sides with 1 tsp Kosher Salt and 0.5 tsp Black Pepper. I pound the pieces to an even ½-inch thickness first—this ensures they cook through at the same rate without drying out.
Set up a breading station with three shallow dishes. Place the 0.5 cup All-Purpose Flour in the first, beat the 2 whole Large Eggs in the second, and mix the 1.5 cups Italian Breadcrumbs with 0.5 cup Parmesan Cheese in the third. Dredge each piece in flour, then egg, then breadcrumbs, pressing gently so the coating adheres.
Step 2: Sear the Chicken Until Golden
Heat ¼ cup Olive Oil in a large oven-safe skillet over medium-high heat until it shimmers. Add the breaded chicken and cook for 4-5 minutes per side until golden brown and crispy. Watch for the edges to turn that perfect amber color—that’s your cue to flip.
Don’t crowd the pan; work in batches if needed. Transfer the seared chicken to a plate and set aside. The chicken won’t be fully cooked yet, but it’ll finish in the oven later. Pour off any excess oil but leave the browned bits—they’re packed with flavor.
Step 3: Build the Sauce Base
In the same skillet, heat 2 tablespoons Olive Oil over medium heat. Add the 3 cloves Garlic Cloves (minced) and sauté for 30 seconds until fragrant but not browned. Stir in the 2 cups Marinara Sauce, 1 tsp Dried Oregano, 1 tsp Dried Basil, and 0.25 tsp Red Pepper Flakes.
Let the sauce simmer for 5 minutes until it thickens slightly and the flavors meld. Taste and adjust seasoning if needed. This step infuses the sauce with aromatic depth that complements the crispy chicken.
Step 4: Assemble and Melt the Cheese
Preheat your oven to 375°F. Nestle the seared chicken into the simmering sauce in the skillet. Spoon some sauce over the top of each piece to coat lightly. Sprinkle the 8 oz Mozzarella Cheese evenly over the chicken and sauce, letting it melt into every nook.
Transfer the skillet to the oven and bake for 10-12 minutes until the cheese is bubbly and lightly golden in spots, and the chicken reaches an internal temperature of 165°F. Keep an eye on it—the cheese can go from melty to over-browned quickly.
Let the skillet rest for 5 minutes before serving. The cheese will set slightly, making it easier to slice into portions without everything sliding off. Garnish with extra Parmesan and fresh basil if you like, then dig in while it’s hot and gooey.
Pro Tips For Making Chicken Parm Skillet
- Pound the Chicken: Use a meat mallet or rolling pin to flatten the chicken breasts to an even 1/2-inch thickness. I learned this the hard way—uneven pieces cook unevenly, leaving you with dry edges and undercooked centers.
- Double-Dredge for Crisp: Dip the chicken in flour, then egg, then breadcrumbs mixed with Parmesan, and repeat the egg and breadcrumb step. Sounds tedious, but it creates that extra-crispy crust that doesn’t fall apart in the skillet.
- Skip the Overcrowding: Cook the chicken in batches if needed—about 2 pieces at a time in a 12-inch skillet. After burning my first batch, I realized cramming them in steams the breading instead of frying it.
- Rest Before Saucing: Let the fried chicken rest on a wire rack for 5 minutes before smothering it in sauce. My grandmother swore by this, and she was right: it keeps the coating crispy under the melted cheese.
Wine and Beer Pairings for This Dish
Italian Wine Pairings
For this dish, I love a bold Chianti Classico from Tuscany. Its bright acidity and cherry notes cut through the richness of the cheese and breading. The tannins also stand up to the tomato sauce beautifully. 🍷
Lighter White Option
A crisp Pinot Grigio from Friuli works surprisingly well too. The citrus and mineral notes refresh your palate between bites. I recommend Santa Margherita for a reliable choice at any grocery store.
Craft Beer Choices
An Italian-style pilsner like Birra Moretti offers a clean, crisp contrast to the dish’s richness. The light carbonation helps cleanse your palate. For craft lovers, a Belgian blonde ale provides similar benefits with more complexity. 🍺
American Beer Alternatives
If you prefer domestic brews, a light lager like Peroni or even Miller Lite works in a pinch. The key is choosing something with mild bitterness and high carbonation to balance the dish’s heaviness.
Non-Alcoholic Pairing
For non-drinkers, try a sparkling blood orange soda like San Pellegrino Aranciata Rossa. The effervescence and citrus notes complement the tomato sauce perfectly, while the sweetness balances the dish’s savory elements.
Nutrition Facts
Frequently Asked Questions
Can I use chicken thighs instead of breasts?
Yes! Boneless, skinless thighs stay juicier and are more forgiving. Reduce cooking time by 2-3 minutes per side since they’re thinner. They’ll still reach 165°F safely.
Why did my breading fall off?
This usually happens if the chicken isn’t dry before breading or if you skip pressing the crumbs firmly. Let breaded pieces rest for 5 minutes before frying to help the coating adhere better.
Can I make this without an oven-safe skillet?
Use a regular skillet for stovetop cooking, then transfer to a baking dish for the cheese-melting step. Cover with foil and bake at 375°F for 10-12 minutes.

- Jollof Rice Sauce Recipe: West African Tomato and Spice Infusion - September 25, 2026
- Japanese Rice Soup Recipe: Umami-Rich Comfort in a Bowl - September 25, 2026
- Homemade Cream Of Rice Recipe: Silk-Smooth Breakfast in Minutes - September 25, 2026