
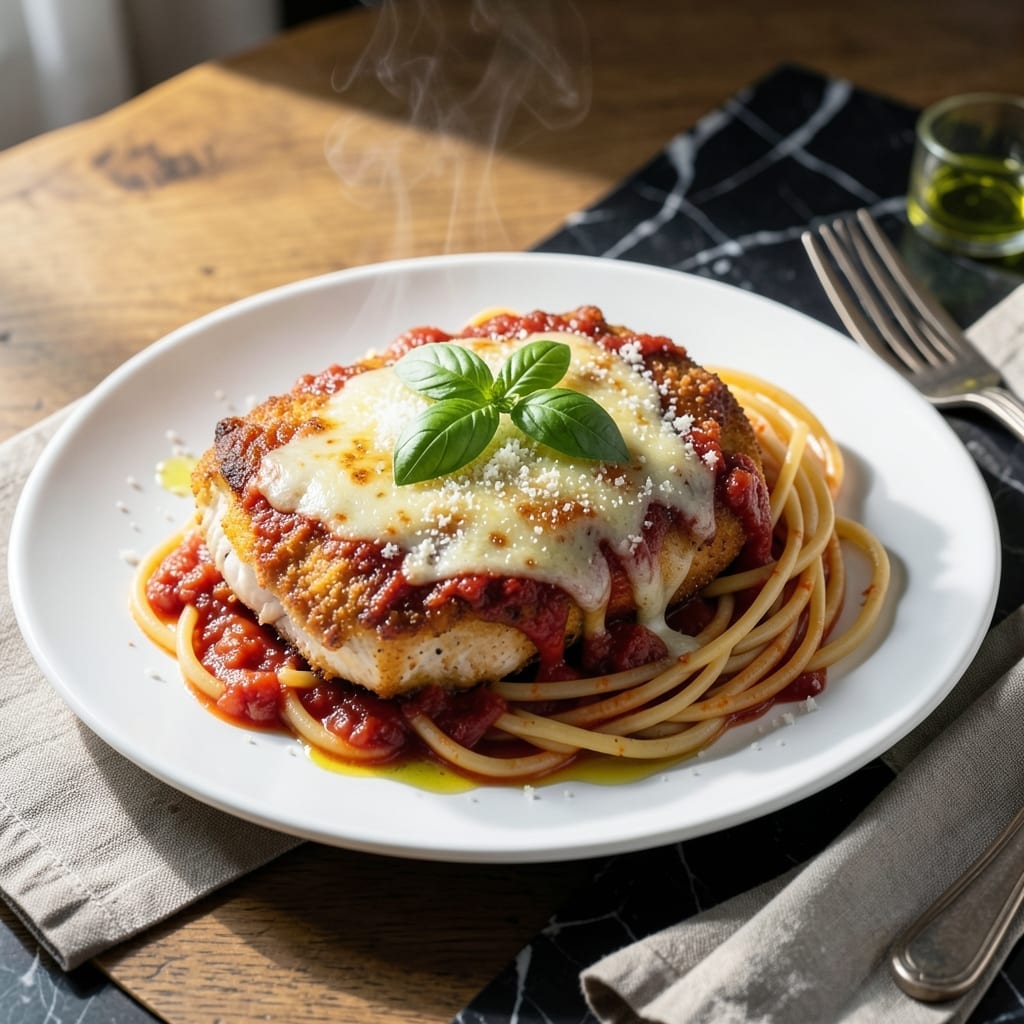
There’s a reason chicken parmesan remains a beloved classic—it delivers crispy, golden cutlets smothered in rich tomato sauce and melted mozzarella every time. This dish combines simple ingredients with precise technique for restaurant-quality results at home.
The secret lies in the breading process: a three-step method of flour, egg, and seasoned breadcrumbs ensures a crispy exterior that stays intact even under layers of sauce and cheese. Baking, not frying, keeps it lighter while maintaining that essential crunch.
What emerges is a dish with perfectly breaded chicken, tangy marinara, and gooey, bubbling cheese—comfort food at its finest. The contrast of textures and flavors makes each bite satisfying.
Serve with pasta or a fresh salad for a complete meal. Here’s how to make it right.
Ingredients for Chicken Parmesian
Pantry staples meet deli counter finds for restaurant-quality breaded chicken at home.
| Ingredient | Amount | Notes |
|---|---|---|
| Chicken Breast 🍗 | 1 ½ lb | Boneless, skinless, pounded to 1/2-inch thickness |
| All-Purpose Flour 🌾 | 1 cup | For dredging chicken cutlets |
| Large Eggs 🥚 | 2 whole | Beaten for egg wash |
| Italian Breadcrumbs 🍞 | 1 ½ cups | Panko for extra crispiness |
| Parmesan Cheese 🧀 | 1 cup | Freshly grated from wedge |
| Marinara Sauce 🍅 | 2 cups | Homemade or premium jarred |
| Mozzarella Cheese 🧀 | 8 oz | Low-moisture, shredded or sliced |
| Garlic Cloves 🧄 | 3 cloves | Minced for sauce |
| Olive Oil 🫒 | ½ cup | Divided for cooking and greasing |
| Dried Oregano 🌿 | 1 tsp | For seasoning breadcrumbs |
| Dried Basil 🍃 | 1 tsp | For seasoning breadcrumbs |
| Kosher Salt 🧂 | 1 ½ tsp | Divided for seasoning |
| Black Pepper 🌶️ | ½ tsp | Freshly ground preferred |
| Fresh Basil Leaves 🌿 | ¼ cup | Thinly sliced for garnish |
The chicken quality is paramount. Boneless, skinless breasts with even thickness ensure consistent cooking. Whole Foods and Costco offer reliable options, but any supermarket will suffice. For the breadcrumbs, Italian-style panko from Progresso delivers superior crunch. The Parmesan must be freshly grated—pre-shredded contains anti-caking agents that inhibit melting.
No Italian breadcrumbs? Crush plain panko with dried oregano and basil at a 2:1 ratio. Fresh mozzarella can replace low-moisture but requires patting dry to prevent sogginess. For the marinara, San Marzano tomatoes crushed by hand with garlic and olive oil make an excellent quick sauce. The olive oil can be avocado oil for higher smoke point if needed.
Assemble and bake immediately for best texture. Leftovers store well in airtight containers for 3-4 days refrigerated or 2 months frozen. Reheat in a 350°F oven to restore crispiness, avoiding the microwave which softens the breading.
Why You’ll Love This Recipe
- 30-Minute Meal: I can bread and bake the chicken while the pasta boils—dinner’s ready before the kids start asking for snacks.
- Crispy Cheesy Bite: That parmesan in the breadcrumbs gives it this golden, crunchy shell, and the melted cheese on top? Ridiculously good.
- Feeds a Hungry Table: I serve this for Sunday supper, but honestly, it’s just as easy to halve for a quick weeknight fix.
- Leftovers for Days: Between us, it tastes even better the next day—if there’s any left after the first round.
Step-by-Step Instructions for Chicken Parmesan
Master the technique for achieving golden-brown cutlets with perfectly melted cheese every time.
Step 1: Prepare and Bread the Chicken Cutlets
Begin by seasoning the 1.5 lb Chicken Breast with ½ tsp Kosher Salt and ½ tsp Black Pepper on both sides. Set up a breading station with three shallow dishes: the first with the 1 cup All-Purpose Flour, the second with the 2 whole Large Eggs beaten until uniform, and the third with a mixture of the 1.5 cups Italian Breadcrumbs, 1 cup Parmesan Cheese, 1 tsp Dried Oregano, 1 tsp Dried Basil, and remaining 1 tsp Kosher Salt.
Dredge each piece of chicken in the flour, shaking off excess, then dip in the egg wash, letting any extra drip off. Press firmly into the breadcrumb mixture, ensuring full coverage. I find pressing down with the palm of my hand creates better adhesion and a more even crust. Place the breaded cutlets on a plate and let them rest for 10 minutes to set the coating.
Step 2: Pan-Fry to Golden Perfection
Heat ¼ cup Olive Oil in a large skillet over medium-high heat until shimmering. Working in batches to avoid crowding, add the breaded cutlets and cook for 4-5 minutes per side until the coating is deep golden brown and crisp. The oil temperature is critical here—if it’s not hot enough, the breading will absorb oil and become greasy rather than crisp.
Transfer the fried cutlets to a paper towel-lined plate to drain excess oil. Wipe out the skillet between batches if any breadcrumbs begin to burn, and add more of the remaining ¼ cup Olive Oil as needed. You’ll know the oil is ready when a pinch of breadcrumbs sizzles immediately upon contact.
Step 3: Build and Bake the Dish
Preheat your oven to 375°F. Spread ½ cup Marinara Sauce on the bottom of a baking dish. Arrange the fried cutlets in a single layer, then top each with 2 tbsp Marinara Sauce, a portion of the 8 oz Mozzarella Cheese, and a sprinkle of any remaining Parmesan. The sauce acts as a barrier between the crispy breading and the cheese, preventing it from becoming soggy.
Bake for 15-20 minutes until the cheese is fully melted and bubbling at the edges, and the sauce is heated through. For the last 2 minutes, switch the oven to broil to achieve a beautiful golden browning on the cheese. Watch closely to prevent burning.
Step 4: Rest and Garnish for Serving
Remove the dish from the oven and let it rest for 5 minutes. This allows the cheese to set slightly, making it easier to serve intact cutlets rather than a cheesy mess. While resting, mince the 3 cloves Garlic Cloves and warm the remaining 1 cup Marinara Sauce in a small saucepan with the garlic over low heat for 3-4 minutes.
Garnish each serving with the warmed marinara and 0.25 cup Fresh Basil Leaves. The fresh basil adds a bright, aromatic contrast to the rich, savory flavors. Serve immediately while the breading is still crisp and the cheese is gooey.
Pro Tips For Making Chicken Parmesian
- Pound the Chicken: I learned this the hard way—pound the breasts to an even ½-inch thickness so they cook through without drying out or burning the breading.
- Double Dredge: Dip the chicken in flour, then egg, then breadcrumbs, but repeat the egg and breadcrumb step for a crust that actually stays put during frying and baking.
- Skip Cold Cheese: Pull your Parmesan out of the fridge 30 minutes before using—grated cold cheese clumps and doesn’t melt as smoothly over the chicken.
- Rest Before Baking: Let the breaded chicken rest for 10 minutes before baking to help the coating adhere, or you’ll end up with a plate of sad, naked chicken.
Storing and Reheating chicken parmesian
Refrigerator Storage
Let your dish cool completely before transferring to airtight containers. I use glass containers with locking lids to prevent leaks. Store in the fridge at 40°F or below for up to 4 days. The flavors actually deepen as the sauce and breading meld together. ❄️
Freezer Storage
For longer storage, wrap individual portions tightly in plastic wrap, then place in a gallon freezer bag. This double protection prevents freezer burn. Label with the date and freeze for up to 2 months without quality loss.
Oven Reheating
Preheat your oven to 375°F and place the portion on a baking sheet. Cover loosely with aluminum foil to retain moisture. Heat for 15-20 minutes until the internal temperature reaches 165°F. This method restores the breading’s crispness beautifully. 🔥
Microwave Method
For quick reheating, place a portion on a microwave-safe plate and cover with a damp paper towel. Heat on 70% power for 2-3 minutes, checking and rotating halfway. The damp towel adds steam to keep the chicken from drying out.
Pro Tips
Add a splash of marinara sauce or a sprinkle of Parmesan cheese before reheating to refresh the flavors. Avoid overcrowding when storing to maintain texture. I always reheat directly from frozen when using the oven method.
Nutrition Facts
Frequently Asked Questions
Can I use chicken thighs instead of breasts?
Yes! Boneless, skinless thighs work well and stay juicier. Pound them to ½-inch thickness for even cooking. They may need 1-2 extra minutes per side when frying.
Why did my breading fall off?
This usually happens if the chicken wasn’t dry before breading or didn’t rest after. Pat it completely dry and let breaded cutlets rest for 10 minutes before frying. Press firmly when coating.
Can I bake the cutlets instead of frying?
For a lighter option, bake breaded cutlets at 400°F for 20-25 minutes on a wire rack. Flip halfway for even browning. They won’t be as crispy but still delicious.
What’s the best way to prevent soggy breading?
Don’t overload with sauce or cheese. Use just enough marinara to coat and bake only until cheese melts. Letting it rest 5 minutes after baking helps too.

- Jollof Rice Sauce Recipe: West African Tomato and Spice Infusion - September 25, 2026
- Japanese Rice Soup Recipe: Umami-Rich Comfort in a Bowl - September 25, 2026
- Homemade Cream Of Rice Recipe: Silk-Smooth Breakfast in Minutes - September 25, 2026