
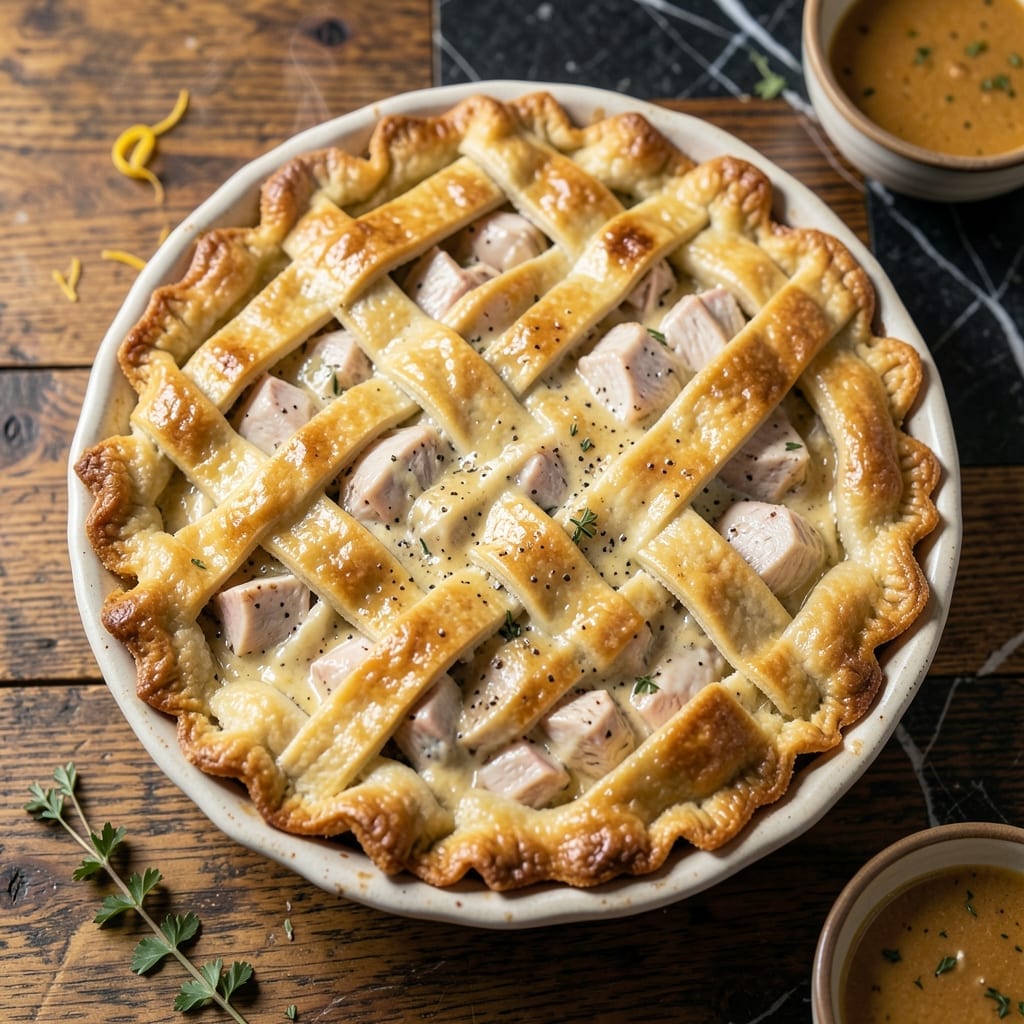
There’s an art to crafting the perfect chicken pie crust—one that balances flakiness with just the right sturdiness to hold savory fillings. This recipe delivers a golden, buttery foundation that elevates every bite.
I’ve refined this method to ensure a tender yet crisp crust, using simple ingredients and precise techniques. The key lies in cold butter and minimal handling, which creates those coveted layers without toughness.
What results is a pie with a crust that shatters gently under pressure, encasing a rich, hearty chicken filling. The contrast between the flaky pastry and creamy interior is what makes this dish unforgettable.
Serve warm, straight from the oven, for a meal that feels both comforting and impressive. This is how to master the perfect chicken pie.
Ingredients for Chicken Pie Crust
Buttery, flaky layers built from simple ingredients and precise technique for the perfect savory pie.
| Ingredient | Amount | Notes |
|---|---|---|
| All-Purpose Flour 🌾 | 2 ½ cups | Plus extra for dusting |
| Unsalted Butter 🧈 | 1 cup | Cold, cubed into 1/2-inch pieces |
| Ice Water 💧 | ½ cup | Plus 1 tbsp as needed |
| Salt 🧂 | 1 tsp | Fine sea salt preferred |
| Granulated Sugar 🍚 | 1 tsp | Balances savory flavors |
| Large Egg 🥚 | 1 whole | For egg wash finish |
| White Vinegar 🍶 | 1 tsp | Helps tenderize crust |
| Chicken Breast 🍗 | 1 ½ lb | Boneless, skinless, diced |
| Heavy Cream 🥛 | ½ cup | For creamy filling |
| Chicken Stock 🍲 | 1 cup | Low-sodium preferred |
| Yellow Onion 🧅 | 1 whole | Medium, finely diced |
| Carrots 🥕 | 2 whole | Medium, peeled and diced |
| Celery Stalks 🌿 | 2 whole | Diced for flavor base |
| Fresh Thyme 🍃 | 1 tbsp | Chopped, or 1 tsp dried |
| Black Pepper 🌶️ | ½ tsp | Freshly ground preferred |
The butter is non-negotiable here. Use European-style for higher fat content—it creates superior layers. Most supermarkets carry Plugrá or Kerrygold in the dairy case. Keep it ice-cold until the second it hits the flour, and don’t overwork the dough. The vinegar might seem odd, but it tenderizes the gluten just enough to prevent toughness without affecting flavor (trust me on this one).
No unsalted butter? Salted works in a pinch—just omit the added salt. Out of all-purpose flour? Pastry flour at a 1:1 ratio yields an even more delicate crust. For the filling, rotisserie chicken saves time, or use thighs for richer flavor. The thyme can be swapped for rosemary if that’s your preference, but reduce by half—it’s potent stuff.
The dough can rest in the fridge for up to 2 days, or freeze for 3 months. Once baked, the pie keeps well for 3-4 days—though the crust is best day-of. Reheat covered in foil at 350°F for 15 minutes to revive that just-baked flakiness.
Why You’ll Love This Recipe
- Five Ingredients Only: I love that this crust comes together with just flour, butter, ice water, salt, and a touch of sugar—no fancy pantry hunting required.
- Buttery, Flaky Layers: The cold butter and ice water create that perfect shatter-with-every-bite texture that makes chicken pie feel like a hug on a plate.
- Freezer Friendly: I always make a double batch—one for now, one to freeze for those last-minute dinner saves.
- Budget Stretcher: A pound of flour and a stick of butter turns into multiple pies, feeding my family for days without breaking the bank.
Step-by-Step Instructions for Chicken Pot Pie
Here’s the method. Straightforward, tested, works every time.
Step 1: Prepare the Flaky Pie Crust
In a large bowl, whisk together the 2.5 cups All-Purpose Flour, 1 tsp Salt, and 1 tsp Granulated Sugar. This creates the dry base for your crust. The sugar balances the savory filling, while salt enhances all the flavors.
Cut in the 1 cup Unsalted Butter (cold and cubed) using a pastry cutter or your fingers until the mixture resembles coarse crumbs with pea-sized butter pieces. This creates the flaky layers. Then add the 1 tsp White Vinegar to the 0.5 cup Ice Water and drizzle over the flour mixture.
Mix gently with a fork until the dough just comes together. Divide into two equal portions, shape into discs, wrap in plastic, and refrigerate for 1 hour. This resting time allows the gluten to relax and the butter to firm up.
Step 2: Create the Savory Chicken Filling
In a large skillet, cook the diced 1.5 lb Chicken Breast over medium-high heat until no longer pink, about 6-8 minutes. Remove and set aside. In the same pan, sauté the finely diced 1 whole Yellow Onion, 2 whole Carrots, and 2 whole Celery Stalks until softened, about 5 minutes.
Stir in the 1 tbsp Fresh Thyme and 0.5 tsp Black Pepper, then sprinkle with 2 tbsp of the All-Purpose Flour to create a roux. Gradually whisk in the 1 cup Chicken Stock and 0.5 cup Heavy Cream, bringing to a simmer until the mixture thickens.
Return the chicken to the pan and stir to combine. Cook for an additional 2-3 minutes until the filling is thick and bubbly. Remove from heat and let cool slightly while you roll out the crust.
Step 3: Assemble and Bake the Pie
On a lightly floured surface, roll out one disc of dough to fit a 9-inch pie dish. Transfer the dough to the dish, pressing it gently into the bottom and sides. Trim the edges, leaving a ½-inch overhang.
Pour the chicken filling into the crust. Roll out the second disc of dough and place it over the filling. Crimp the edges to seal, then cut several slits in the top crust to allow steam to escape. Brush the top with a beaten 1 whole Large Egg for a golden finish.
Bake at 375°F for 40-45 minutes until the crust is golden brown and the filling is bubbling. Let the pie rest for 10 minutes before serving to allow the filling to set.
Pro Tips For Making Chicken Pie Crust
- Chill the Butter: Cut your unsalted butter into small cubes and pop it in the freezer for 10 minutes before mixing—this keeps it cold enough to create flaky layers in your crust.
- Use Ice Water: Measure out your ice water and keep it in the fridge until ready to use; cold water prevents the butter from melting prematurely, which ruins the texture.
- Skip Overworking: Mix the dough just until it comes together—overworking it develops gluten, making your crust tough instead of tender.
- Rest the Dough: After shaping, let the dough rest in the fridge for at least 30 minutes; this relaxes the gluten and makes it easier to roll out without cracking.
Storing and Reheating This Dish
Refrigerator Storage
Let your pie cool completely at room temperature for about 2 hours before refrigerating. This prevents the crust from becoming soggy. Store in an airtight container or wrap tightly with aluminum foil. It keeps well for 3-4 days in the fridge. ❄️
Freezer Storage
For longer storage, freeze the entire pie before baking. Wrap it in plastic wrap and then heavy-duty foil to prevent freezer burn. It can be stored for up to 3 months without losing quality. Bake directly from frozen, adding 10-15 minutes to the baking time.
Reheating in Oven
Preheat your oven to 350°F. Place the pie on a baking sheet and cover loosely with foil. Heat for 15-20 minutes until warmed through. Remove the foil for the last 5 minutes to crisp the crust. This method preserves the flakiness beautifully. 🔥
Microwave Option
For a quick single serving, microwave a slice on 50% power for 1-2 minutes. Place a damp paper towel over it to retain moisture. The crust won’t be as crisp, but the filling stays creamy. Avoid high power to prevent toughening.
Reviving the Crust
If your crust loses its crispness, place the pie under the broiler for 2-3 minutes at the end of reheating. Watch closely to prevent burning. This trick works wonders for leftovers, bringing back that fresh-baked texture.
Nutrition Facts
Frequently Asked Questions
Can I use store-bought crust instead?
Yes, but homemade tastes far better. Store-bought works in a pinch—just thaw if frozen and follow assembly instructions. The texture won’t be as flaky.
Why did my bottom crust get soggy?
This happens when the filling is too wet. Pre-cook your filling until thick, and brush the bottom crust with beaten egg white before adding filling to create a barrier.
How do I prevent the edges from burning?
Cover the edges with foil or a pie shield during the first 30 minutes of baking. Remove for the last 10-15 minutes to let them brown.

- Jollof Rice Sauce Recipe: West African Tomato and Spice Infusion - September 25, 2026
- Japanese Rice Soup Recipe: Umami-Rich Comfort in a Bowl - September 25, 2026
- Homemade Cream Of Rice Recipe: Silk-Smooth Breakfast in Minutes - September 25, 2026