
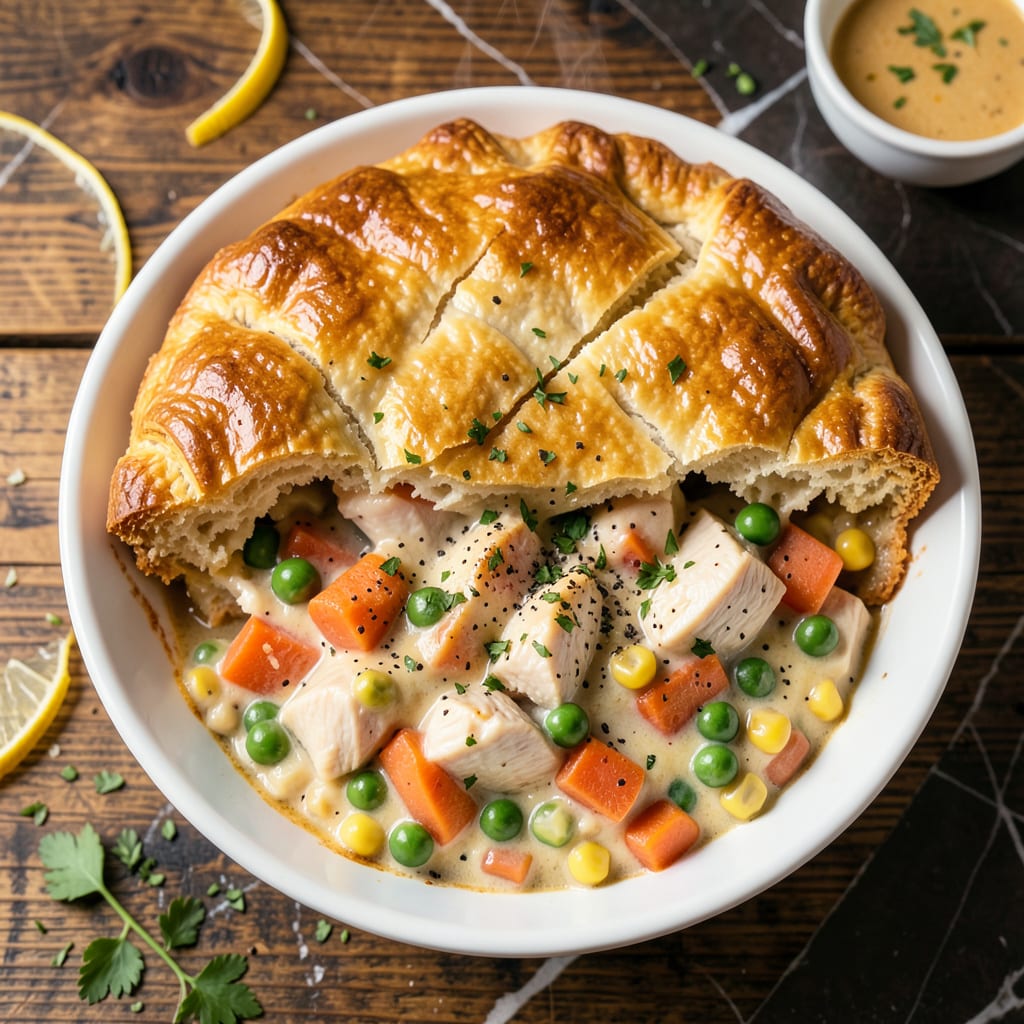
This Bisquick crust transforms chicken pot pie into a flaky, golden masterpiece with minimal effort. The mix creates perfect layers that bake up crisp and tender every time.
Ready in minutes, this method delivers quick results without sacrificing quality. The crust complements the rich filling beautifully, making it the ideal shortcut for a comforting, homemade meal.
Ingredients for Chicken Pot Pie Crust Recipe with Bisquick
Bisquick baking mix and cold butter create those promised flaky golden layers in minutes.
| Ingredient | Amount | Notes |
|---|---|---|
| Bisquick Baking Mix 🌾 | 2 cups | Original variety preferred |
| Cold Unsalted Butter 🧈 | ½ cup | Cut into small cubes |
| Whole Milk 🥛 | 0.6666667 cup | Ice cold for flakiness |
| All-Purpose Flour 🌾 | ¼ cup | For dusting work surface |
| Cooked Chicken Breast 🍗 | 2 cups | Shredded or diced |
| Frozen Mixed Vegetables 🥕 | 2 cups | Peas, carrots, corn blend |
| Cream of Chicken Soup 🥫 | 1 can | 10.5 oz can size |
| Chicken Broth 💧 | 1 ⅓ cups | Low-sodium if preferred |
| Yellow Onion 🧅 | 1 whole | Medium size, finely diced |
| Garlic Cloves 🧄 | 2 cloves | Minced for depth of flavor |
| Dried Thyme 🌿 | ½ tsp | Or 1.5 tsp fresh |
| Salt 🧂 | ½ tsp | Kosher or sea salt |
| Black Pepper 🌶️ | ¼ tsp | Freshly ground preferred |
| Large Egg 🥚 | 1 whole | Beaten for egg wash |
[recipeingredientscaler]
The Bisquick is non-negotiable for that signature texture. General Mills original formula works best—avoid the ‘Heart Smart’ version as it lacks the fat content needed for flakiness. Cold butter is essential (straight from the fridge, not ‘room temperature’), and Land O’Lakes or Kerrygold give the best layer separation. Whole milk adds richness, but 2% works in a pinch (just don’t use skim).
No Bisquick? Homemade baking mix (2 cups flour, 1 tbsp baking powder, 1 tsp salt, 1/3 cup shortening) is your backup. Short on time? Use store-bought pie crust—just know the texture won’t match. The cream of chicken soup can be swapped for cream of mushroom for a vegetarian twist. Fresh thyme at one-third the amount if you’ve got it, but dried is perfectly acceptable.
The crust dough keeps in the fridge for 2 days or can be frozen for 1 month. Baked pot pie stays fresh for 3-4 days in the fridge. Reheat in the oven (not microwave) to maintain that crisp, golden finish.
Why You’ll Love This Recipe
- One Bowl Wonder: I love that I just dump Bisquick, butter, and milk together—no fancy pastry skills needed, and it still turns out flaky every time.
- Melt-in-Your-Mouth Crust: That cold butter in the Bisquick mix creates layers so tender, it’s the star of the dish.
- Weeknight Rescue: Between us, I’ve served this for Sunday dinner and a Tuesday night emergency with equal success.
- Leftovers? No Problem: Honestly, it reheats beautifully—crust stays crisp and the filling doesn’t dry out, so I always make extra.
Step-by-Step Instructions for Chicken Pot Pie Crust With Bisquick
This method delivers a flaky, golden topping with minimal effort and maximum flavor.
Step 1: Prepare the Bisquick Mixture
In a large bowl, combine the 2 cups Bisquick Baking Mix with the 0.5 cup Cold Unsalted Butter cut into small cubes. Use a pastry cutter or fork to work the butter into the Bisquick until the mixture resembles coarse crumbs with pea-sized butter pieces visible.
This texture is critical—the butter creates steam during baking, which forms those coveted flaky layers. Avoid overworking the mixture, as this can lead to a dense, tough crust instead of one that’s light and airy.
Step 2: Incorporate the Liquid Ingredients
Make a well in the center of the Bisquick-butter mixture. Pour in the 0.6666667 cup Whole Milk and the 1 whole Large Egg. Using a fork, gently stir the ingredients together until just combined. The dough will be shaggy and slightly sticky, but resist the urge to overmix.
Overmixing develops gluten, which can make the crust tough. The key here is to stop stirring as soon as the dry ingredients are moistened. This ensures a tender, flaky result when baked.
Step 3: Shape and Assemble the Crust
Dust your work surface lightly with the 0.25 cup All-Purpose Flour to prevent sticking. Turn the dough out onto the floured surface and pat it into a rough rectangle about 1-inch thick. Fold the dough in half, then gently press it down to create layers.
This folding technique enhances the flakiness of the crust. For the pot pie, you can either roll the dough into a circle to cover the entire dish or drop spoonfuls of the mixture on top for a rustic, biscuit-style crust. Both methods yield excellent results.
Step 4: Bake to Golden Perfection
Place the assembled pot pie in a preheated 375°F oven. Bake for 25-30 minutes until the crust is golden brown and the filling is bubbling at the edges. The golden color indicates that the crust is fully cooked and flaky.
If the crust begins to brown too quickly, tent the pie with aluminum foil to prevent over-browning while the filling finishes cooking. The internal temperature of the filling should reach 165°F to ensure everything is heated through.
Let the pot pie rest for 5-10 minutes after removing it from the oven. This allows the filling to set slightly, making it easier to serve without the crust breaking apart.
Pro Tips For Making Chicken Pot Pie Crust Recipe With Bisquick
- Chill the Butter: Keep your butter ice cold—cut it into the Bisquick mix with a pastry cutter or fork, and work fast. I learned this the hard way after ending up with a dense, flat crust instead of a flaky one.
- Don’t Overmix: Stir the dough just until it comes together—about 10-12 turns with a wooden spoon. Overworking it makes the crust tough, and nobody wants a chewy pot pie topping.
- Use Whole Milk: Skip the low-fat stuff here. Whole milk adds the richness that makes the Bisquick crust tender and golden. I tried skim once and regretted it immediately.
- Preheat the Oven: Always preheat to 425°F before baking. A hot oven from the start gives the crust that perfect rise and crisp edge—my grandmother swore by this, and she was right.
Flavor Customization for These Flavors
Herb Infused Crust
Add 1 tsp dried rosemary or 1 tbsp fresh chives to the Bisquick mixture for an aromatic twist. The herbs pair beautifully with the chicken and vegetables, adding depth to each bite. I love how this elevates the dish with minimal extra effort. 🌿
Cheesy Biscuit Topping
Mix in ½ cup shredded cheddar or Parmesan cheese before adding the milk. This creates a rich, savory crust that complements the creamy filling. The cheese melts into golden pockets that everyone will love.
Spicy Kick
Stir ½ tsp cayenne pepper or 1 tsp smoked paprika into the dry mix for a subtle heat. This adds warmth without overpowering the classic flavors. Perfect for those who enjoy a little extra zing in their comfort food.
Garlic and Onion Boost
Blend in 1 tsp garlic powder and 1 tsp onion powder for a savory crust that enhances the filling’s flavors. This small addition makes the crust taste like it was made from scratch, with layers of taste in every bite.
Sweet and Savory
For a unique twist, add 1 tbsp honey or maple syrup to the milk before mixing. This subtly sweetens the crust, creating a delightful contrast with the savory chicken and vegetable filling. 💫
Crunchy Topping
Sprinkle 2 tbsp coarse cornmeal or breadcrumbs on top of the crust before baking. This adds a delightful textural contrast to the flaky layers, giving each bite an extra satisfying crunch.
Nutrition Facts
Frequently Asked Questions
Can I use a different baking mix?
Stick with original Bisquick for the best texture. Generic brands may work but often lack the right fat content. For a homemade option, mix 2 cups flour, 1 tbsp baking powder, 1 tsp salt, and ⅓ cup shortening.
Why is my crust dense instead of flaky?
Overworking the dough or using warm butter are common culprits. Keep butter cold and mix just until combined. Also, avoid pressing too hard when shaping the crust.
How do I prevent a soggy bottom?
Bake on a preheated baking sheet at 375°F for 25-30 minutes. For extra crispiness, brush the bottom crust with a thin layer of beaten egg before adding the filling.
Can I make this ahead of time?
Prepare the crust dough up to 2 days in advance and refrigerate. Or freeze uncooked dough for up to 1 month. Bake from frozen, adding 5-10 minutes to the time.

- Jollof Rice Sauce Recipe: West African Tomato and Spice Infusion - September 25, 2026
- Japanese Rice Soup Recipe: Umami-Rich Comfort in a Bowl - September 25, 2026
- Homemade Cream Of Rice Recipe: Silk-Smooth Breakfast in Minutes - September 25, 2026