
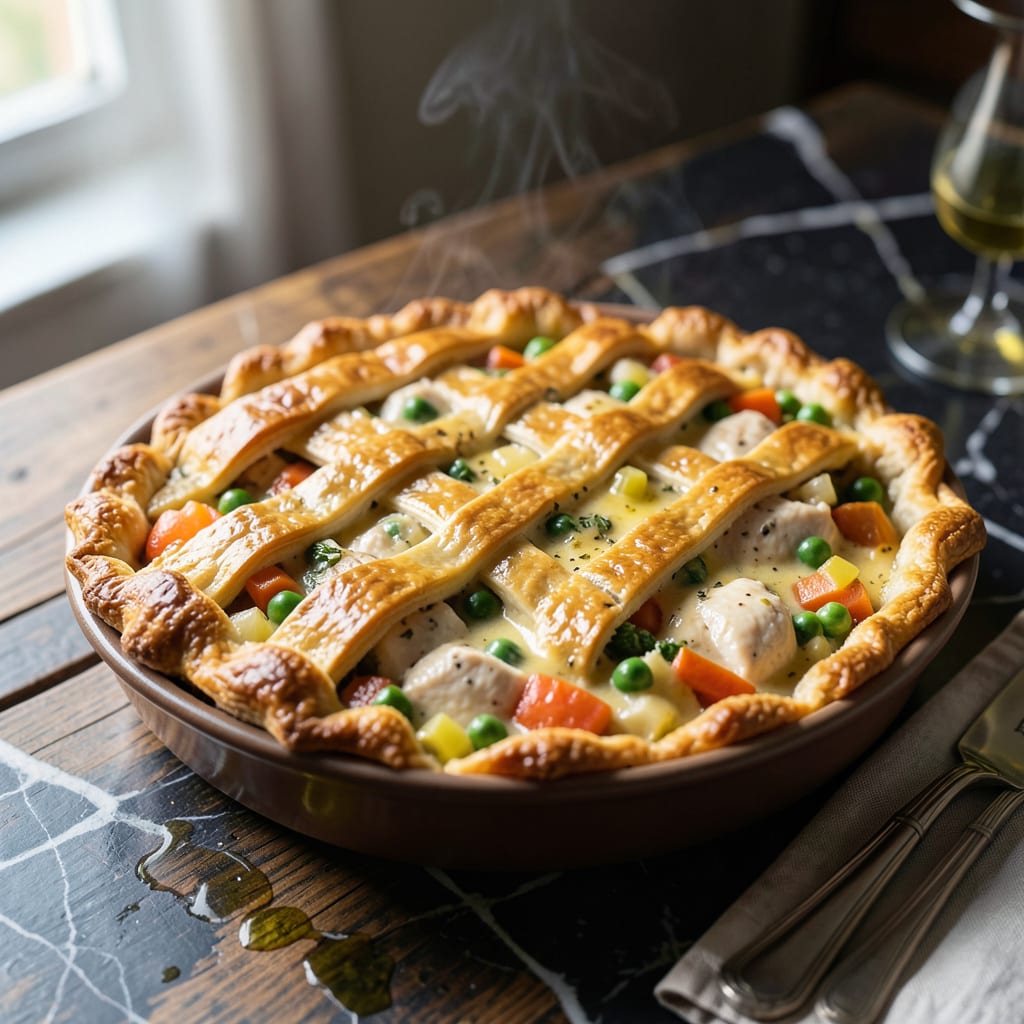
This copycat delivers the flaky crust and hearty filling you love from Costco. I’ve reverse-engineered every detail to match the original’s rich, creamy texture.
Using simple techniques, this version captures the exact taste and texture. You’ll get layers of buttery pastry wrapped around tender chicken and vegetables in a velvety sauce.
Ingredients for Costco Chicken Pot Pie Copycat
Layers of buttery pastry and creamy filling start with these quality ingredients.
| Ingredient | Amount | Notes |
|---|---|---|
| Chicken Breast 🍗 | 1 ½ lb | Boneless, skinless, diced |
| Frozen Mixed Vegetables 🥕 | 2 cups | Peas, carrots, corn, green beans |
| Yellow Onion 🧅 | 1 whole | Medium, finely diced |
| Celery Stalks 🌿 | 2 pieces | Finely diced |
| Garlic Cloves 🧄 | 3 cloves | Minced |
| Unsalted Butter 🧈 | ½ cup | For roux and crust |
| All-Purpose Flour 🌾 | ½ cup | For roux |
| Chicken Broth 💧 | 2 cups | Low-sodium preferred |
| Heavy Cream 🥛 | 1 cup | Full-fat for creaminess |
| Salt 🧂 | 1 tsp | Kosher or sea salt |
| Black Pepper 🌶️ | ½ tsp | Freshly ground |
| Dried Thyme 🍃 | 1 tsp | Or 1 tbsp fresh |
| Puff Pastry Sheets 🥧 | 2 sheets | Thawed, for crust |
| Egg 🥚 | 1 whole | For egg wash |
| Dijon Mustard 🟡 | 1 tbsp | For depth of flavor |
[recipeingredientscaler]
The puff pastry is non-negotiable for that Costco-level flake. Pepperidge Farm is the closest to what they use, and it’s sold frozen near the pie crusts at most supermarkets. The chicken should be boneless, skinless—thighs work too if you prefer darker meat. I grab mine from Costco (of course) in bulk, but any grocery store’s fresh chicken will do. Look for vibrant color and no strong odor.
No puff pastry? Pie crust or homemade rough puff gets you close, but it won’t be as light. Short on veggies? Fresh carrots, peas, and potatoes work—just dice them small so they cook fast. Heavy cream is key for the sauce, but half-and-half in a pinch works too. If you’re avoiding dairy, full-fat coconut milk plus a cornstarch slurry mimics the creaminess surprisingly well.
Assemble the pie just before baking to keep the crust crisp. Leftovers? Wrap slices tightly in foil and reheat at 350°F for 15-20 minutes. The filling thickens as it cools, so it’s even better the next day. Keeps 3-4 days in the fridge or 3 months frozen (slice before freezing for easy portions).
Why You’ll Love This Recipe
- One Pan Meal: I love that everything—chicken, veggies, even the creamy filling—comes together in a single dish. No extra pots to scrub.
- That Classic Taste: The garlic and celery give it that familiar Costco flavor, and the flaky crust seals the deal. Honestly, it’s just as good as the original.
- Feeds the Crowd: Between us, this is my go-to for family dinners or potlucks. One pie serves six, and it’s always a hit.
- Budget Stretcher: Frozen veggies and chicken breast keep it affordable, and leftovers taste even better the next day. I’ll be real: it’s a win for the wallet and the taste buds.
Step-by-Step Instructions for Chicken Pot Pie
This method delivers that signature flaky crust and creamy filling you know and love.
Step 1: Cook the Chicken and Vegetables
In a large skillet, melt ½ cup unsalted butter over medium heat. Add the diced 1.5 lb chicken breast and cook for 6-8 minutes until no longer pink. Remove the chicken and set aside.
In the same skillet, add the diced 1 whole yellow onion, 2 pieces celery stalks, and 2 cups frozen mixed vegetables. Cook for 5 minutes until the vegetables soften. Stir in the minced 3 cloves garlic cloves and cook for 1 minute until fragrant.
Step 2: Make the Creamy Filling
Sprinkle ½ cup all-purpose flour over the vegetable mixture and stir to coat. Gradually pour in 2 cups chicken broth, whisking constantly to avoid lumps. Bring to a simmer and cook for 3-4 minutes until the mixture thickens.
Stir in 1 cup heavy cream, 1 tsp salt, ½ tsp black pepper, 1 tsp dried thyme, and 1 tbsp Dijon mustard. Add the cooked chicken back to the skillet and stir to combine. Cook for an additional 2 minutes until everything is heated through.
Step 3: Assemble the Pot Pie
Preheat your oven to 375°F. Roll out the 2 sheets puff pastry sheets slightly to fit your pie dish. Place one sheet in the bottom of a 9-inch pie dish and press it gently into the edges. Spoon the chicken and vegetable filling into the crust.
Top with the second puff pastry sheet, crimping the edges to seal. Cut a few slits in the top to allow steam to escape. Whisk the 1 whole egg with a splash of water and brush it over the top crust for a golden finish.
Step 4: Bake to Golden Perfection
Bake for 30-35 minutes until the crust is golden brown and the filling is bubbling. If the edges start to brown too quickly, cover them with foil.
Remove from the oven and let it rest for 10 minutes before slicing. This resting time allows the filling to set slightly, making it easier to serve neat portions with that perfect flaky crust on top.
Pro Tips For Making Costco Chicken Pot Pie Copycat
- Precook the Chicken: Poach or bake the chicken breast first and shred it—this guarantees tender meat that won’t dry out during the long bake, and saves you from chewy, overcooked chunks.
- Sweat the Veggies: Cook the onion, celery, and garlic in butter until soft before adding flour; raw veggies make the filling taste flat and the sauce thin.
- Thaw the Vegetables: Drain the frozen mixed veggies and pat them dry; adding them frozen releases too much water and turns the filling into soup.
- Chill Before Baking: Let the assembled pie rest in the fridge for 20–30 minutes before baking—this keeps the crust from getting soggy and helps the filling set properly.
Make-Ahead Tips for This Recipe
Prep the Filling Ahead
Cook the chicken and vegetable mixture completely, then let it cool before storing. I transfer it to an airtight container and refrigerate for up to 2 days. The flavors deepen as it rests, making the filling even more delicious.
Assemble Unbaked Pies
Roll out your puff pastry and line your pie dish with the bottom crust. Add the chilled filling, then top with the second sheet. Don’t bake yet—cover tightly with plastic wrap and refrigerate for up to 24 hours. This saves time on busy days.
Freeze for Later
For longer storage, assemble the unbaked pie as above, then wrap the entire dish in heavy-duty aluminum foil and freeze for up to 3 months. When ready, bake directly from frozen, adding 10-15 minutes to the cooking time. 💡
Bake from Cold
If refrigerating assembled pies, let them sit at room temperature for 20-30 minutes before baking. This ensures even cooking and prevents a soggy bottom crust. Brush with egg wash just before putting it in the oven.
Reheat Individual Slices
Bake the entire pie as directed, then cool and slice. Wrap individual slices in foil and reheat at 350°F for 15-20 minutes for a quick meal. The crust stays crisp, and the filling warms perfectly.
Pro Tip for Crust
To avoid a soggy bottom, blind-bake the bottom crust for 10 minutes before adding the filling. This extra step ensures that flaky texture, even when making ahead. I always do this for the best results. ✨
Nutrition Facts
Frequently Asked Questions
Can I use rotisserie chicken instead?
Shred 2 cups of cooked rotisserie chicken to save time. It adds extra flavor to the filling. Just skip the initial cooking step and add it directly to the creamy sauce.
What if my crust browns too fast?
Cover the edges with foil during the last 15 minutes of baking. This prevents over-browning while the filling finishes cooking. Keep an eye on it for that perfect golden color.
Can I make this in individual portions?
Yes! Use ramekins or small oven-safe bowls. Cut puff pastry to fit each dish, fill, and bake at 375°F for 20-25 minutes. Great for meal prep or serving guests.
Why is my filling runny?
This usually happens if the filling wasn’t thickened enough before baking. Simmer the sauce for an extra 2-3 minutes until it coats the back of a spoon. Resting after baking also helps it set.

- Jollof Rice Sauce Recipe: West African Tomato and Spice Infusion - September 25, 2026
- Japanese Rice Soup Recipe: Umami-Rich Comfort in a Bowl - September 25, 2026
- Homemade Cream Of Rice Recipe: Silk-Smooth Breakfast in Minutes - September 25, 2026