
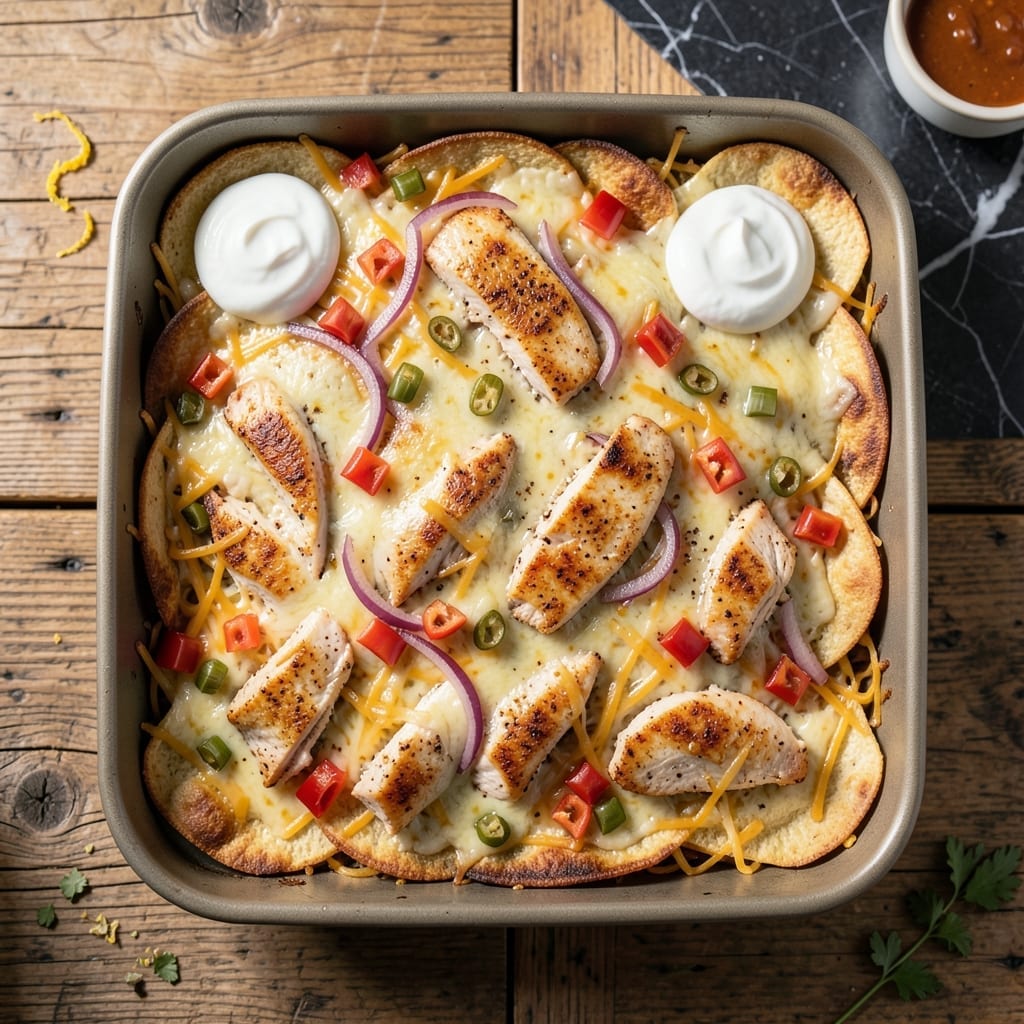
This baked quesadilla casserole transforms a weeknight staple into a crowd-pleasing dish with minimal effort. Layered tortillas, seasoned chicken, and melted cheese come together in a single pan for easy assembly and cleanup.
The beauty of this method lies in its simplicity and scalability. Use rotisserie chicken for convenience or season your own for extra flavor. Each layer builds upon the last, creating a perfectly balanced texture with crisp edges and gooey centers.
After 20 minutes in the oven, you’ll have a golden, bubbling bake that’s ready to slice and serve. The result is a dish that’s hearty, satisfying, and ideal for feeding a family or a hungry group.
Serve with salsa, sour cream, or guacamole for a complete meal. Here’s how to make it.
Ingredients for Chicken Quesadilla Bake
Layered tortillas, spiced chicken, and melty cheese make this dish effortlessly satisfying.
| Ingredient | Amount | Notes |
|---|---|---|
| Flour Tortillas 🌮 | 8 pieces | Large, burrito-sized preferred |
| Cooked Chicken Breast 🍗 | 2 cups | Shredded, rotisserie works great |
| Shredded Cheddar Cheese 🧀 | 3 cups | Sharp variety for best flavor |
| Shredded Monterey Jack Cheese 🧀 | 2 cups | Melts beautifully for gooey texture |
| Taco Seasoning 🌶️ | 2 tbsp | Homemade or store-bought packet |
| Sour Cream 🥛 | ½ cup | Full-fat for creaminess |
| Diced Green Chiles 🌶️ | 1 can | 4 oz size, drained |
| Red Bell Pepper 🌶️ | 1 whole | Diced for color and crunch |
| Red Onion 🧅 | ½ whole | Thinly sliced for sharpness |
| Olive Oil 🫒 | 2 tbsp | For greasing the pan |
| Fresh Cilantro 🌿 | ¼ cup | Chopped, for garnish |
| Lime 🍈 | 1 whole | Cut into wedges for serving |
| Black Beans 🫘 | 1 can | 15 oz size, drained and rinsed |
| Corn Kernels 🌽 | 1 cup | Fresh, frozen, or canned |
The tortillas are key here. Burrito-sized flour tortillas hold up best to the layering without tearing. I grab mine from Trader Joe’s—they’re sturdy and come in big packs. For the chicken, rotisserie from Costco is my go-to (cheap and already seasoned). If you’re shredding your own, use thighs for juicier results. The cheeses? Sharp cheddar and Monterey Jack melt into that perfect gooey stretch.
No taco seasoning? Chili powder plus cumin (1:1 ratio) works in a pinch. Swap the bell pepper for poblano peppers if you want a little heat. The green chiles can be fresh roasted if you’ve got time (worth it). Black beans can be pinto beans—whatever you’ve got in the pantry. For extra creaminess, stir a little cream cheese into the sour cream layer.
Assemble up to 24 hours ahead and refrigerate (add 5 minutes to bake time). Leftovers keep 3-4 days in the fridge or freeze for 2 months. Reheats perfectly in the microwave—just cover with a damp paper towel to keep it from drying out.
Why You’ll Love This Recipe
- One Pan Magic: I just layer tortillas, seasoned chicken, and that cheddar-Monterey Jack blend, then bake—no flipping, no fuss.
- Cheesy Perfection: The melted cheeses create this stretchy, gooey blanket over the taco-spiced chicken that’s honestly impossible to resist.
- Feeds My Crew: I make it for movie nights, potlucks, or just when I need to feed the kids and their friends without breaking a sweat.
- Leftovers Win: Between us, it tastes even better the next day—if there’s any left, that is. I’ve been known to sneak a slice cold straight from the fridge.
Step-by-Step Instructions for Chicken Quesadilla Bake
This layered bake comes together quickly with bold flavors and minimal effort required.
Step 1: Prepare the Filling Mixture
In a large bowl, combine the 2 cups Cooked Chicken Breast, 1 can Black Beans (drained and rinsed), 1 cup Corn Kernels, 1 can Diced Green Chiles (drained), 1 whole Red Bell Pepper (diced), and 0.5 whole Red Onion (thinly sliced).
Sprinkle the 2 tbsp Taco Seasoning over the mixture and toss to coat evenly. I like to use my hands for this—it ensures every piece gets well seasoned. The taco seasoning should create a vibrant, aromatic coating that promises bold flavor in every bite.
Step 2: Layer the Base with Tortillas and Cheese
Preheat your oven to 375°F. Lightly grease a 9×13-inch baking dish with 1 tbsp Olive Oil. Place 4 pieces Flour Tortillas in the bottom of the dish, overlapping slightly if needed to cover the surface completely.
Sprinkle 1.5 cups Shredded Cheddar Cheese and 1 cup Shredded Monterey Jack Cheese evenly over the tortillas. The cheese should create a thick, even layer that will melt into a gooey, golden blanket. This first layer of cheese ensures the tortillas don’t get soggy from the filling.
Step 3: Add Filling and Repeat Layers
Spread the chicken and vegetable mixture evenly over the cheese layer. Press down gently to create an even surface. Top with the remaining 1.5 cups Shredded Cheddar Cheese and 1 cup Shredded Monterey Jack Cheese, distributing it so every bite will have that perfect cheesy pull.
Arrange the remaining 4 pieces Flour Tortillas on top, pressing down lightly. Brush the top tortillas with the remaining 1 tbsp Olive Oil to help them crisp up beautifully in the oven. You’ll notice the layers start to compress slightly—that’s good; it means everything is packed tightly for even cooking.
Step 4: Bake Until Golden and Bubbly
Bake for 25-30 minutes until the top is golden brown and the cheese is fully melted and bubbling around the edges. The edges of the tortillas should be crisp, and the center should be set with no jiggle when you gently shake the dish.
Halfway through baking, I like to rotate the dish to ensure even browning. The aroma when you open the oven door will be irresistible—warm, cheesy, and slightly spicy from the taco seasoning and green chiles. That’s when you know it’s working perfectly.
Step 5: Rest, Garnish, and Serve
Remove from the oven and let it rest for 5-10 minutes. This allows the layers to set so you can cut clean portions. Sprinkle the 0.25 cup Fresh Cilantro (chopped) over the top for a fresh, bright contrast to the rich, melty cheese.
Serve with the 0.5 cup Sour Cream and 1 whole Lime (cut into wedges) on the side. The sour cream adds a creamy tang, while a squeeze of lime brightens up all the flavors. Cut into squares and serve immediately while the cheese is still stretchy and the tortillas are crisp at the edges.
Pro Tips For Making Chicken Quesadilla Bake
- Preheat the Pan: I learned this the hard way—tossing tortillas into a cold pan makes them soggy. Get that oven or skillet screaming hot first for a crispy, golden finish.
- Shred Your Chicken: Sounds tedious, but shredded chicken distributes way better than chunks and gives you that perfect bite in every forkful.
- Skip Wet Fillings: After burning a few batches, I finally figured out that wet chicken or extra sauce makes the tortillas gummy. Pat the chicken dry and go easy on the liquids.
- Mix Your Cheeses: My grandmother swore by this, and she was right: combining cheddar and Monterey Jack gives you the best melt and flavor without overpowering the dish.
Make-Ahead Tips for Leftovers
Overnight Assembly
You can assemble this dish up to 24 hours ahead and refrigerate it. I recommend covering it tightly with plastic wrap or aluminum foil to prevent the tortillas from drying out. Just add 5-10 minutes to the baking time when you pull it straight from the fridge. 💡
Freezer-Friendly Prep
For longer storage, assemble and freeze before baking. Wrap the dish tightly with plastic wrap and aluminum foil, then freeze for up to 2 months. Thaw overnight in the fridge before baking as usual.
Baking from Frozen
If baking from frozen, add 15-20 minutes to the baking time. Cover with foil for the first 30 minutes, then uncover to let the top crisp up. The cheese may take a bit longer to melt evenly.
Make-Ahead Filling
Prepare the chicken and vegetable filling up to 2 days ahead and store it in an airtight container in the fridge. This saves time on busy nights. Just assemble the layers and bake when ready.
Cheese Prep Tip
Shred your own cheese if possible—it melts better than pre-shredded. If using pre-shredded, toss it with 1 tsp cornstarch to prevent clumping. I find this makes a noticeable difference in texture. ✨
Reheating Leftovers
Store leftovers in the fridge for up to 4 days. Reheat individual portions in the microwave covered with a damp paper towel for 1-2 minutes. The tortillas will soften but still hold their shape.
Nutrition Facts
Frequently Asked Questions
Can I use corn tortillas instead of flour?
Flour tortillas work best for this bake because they stay soft and hold up to the layers. Corn tortillas may become too brittle or crumble when baked at 375°F. Stick with flour for the best texture.
How do I keep the tortillas from getting soggy?
Spread a thin layer of cheese directly on each tortilla before adding the filling. This creates a barrier that prevents moisture from the chicken and veggies from soaking in. Also, bake immediately after assembling.
Can I substitute the cheeses?
Yes! Use any melty cheese like pepper jack, Colby, or a Mexican blend. For extra creaminess, add 1/2 cup cream cheese to the filling. Just avoid pre-shredded cheese, as it doesn’t melt as smoothly.
What if my bake isn’t crispy on top?
For extra crispiness, broil for 1-2 minutes after baking, watching closely to avoid burning. Brushing the top tortillas with oil before baking also helps achieve a golden, crisp finish.

- Jollof Rice Sauce Recipe: West African Tomato and Spice Infusion - September 25, 2026
- Japanese Rice Soup Recipe: Umami-Rich Comfort in a Bowl - September 25, 2026
- Homemade Cream Of Rice Recipe: Silk-Smooth Breakfast in Minutes - September 25, 2026